When I first discovered the magical combination of cinnamon rolls and cheesecake, my world changed forever. This extraordinary dessert brings together the warm, spiced comfort of freshly baked cinnamon rolls with the rich, creamy indulgence of New York-style cheesecake. After perfecting this recipe through countless trials in my kitchen, I’m thrilled to share with you what I consider to be the ultimate cinnamon roll cheesecake.
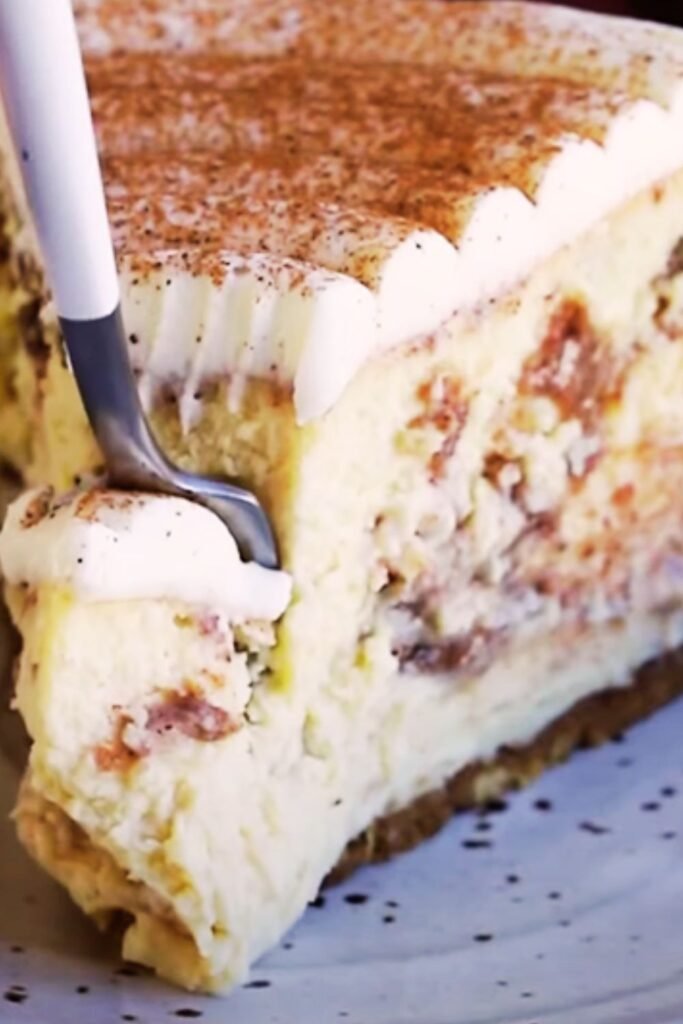
This isn’t just another dessert recipe – it’s a showstopper that will have your guests asking for the recipe before they’ve even finished their first bite. The beauty lies in how the cinnamon swirl weaves through the velvety cheesecake filling, creating beautiful marbled patterns that taste even better than they look.
What Makes This Cinnamon Roll Cheesecake Special
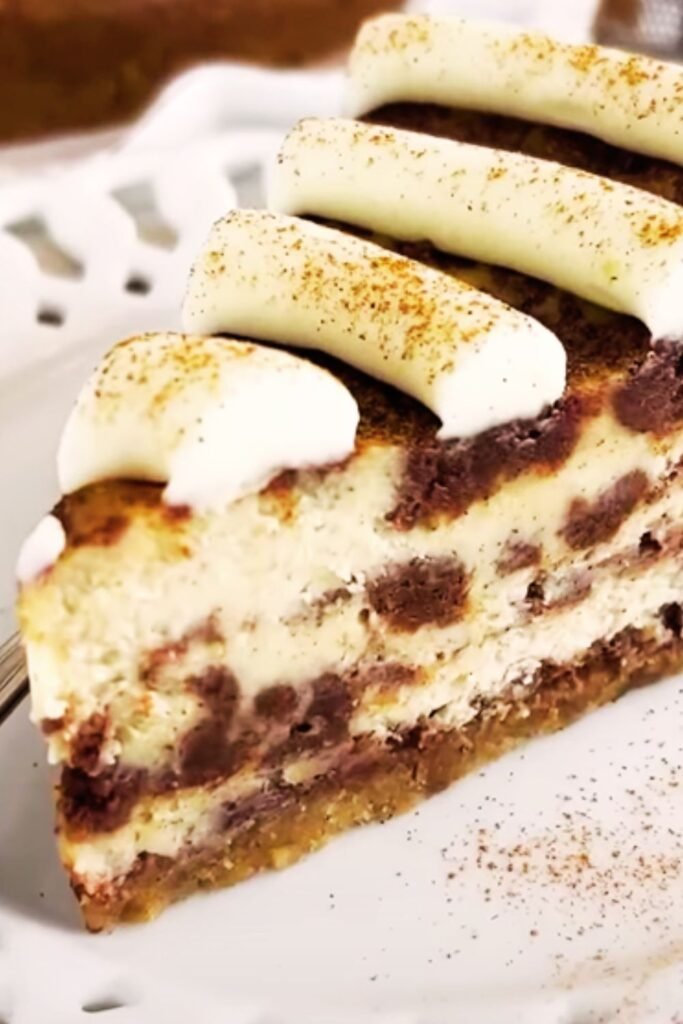
My version combines traditional cheesecake techniques with the beloved flavors of cinnamon rolls, resulting in a dessert that’s both familiar and wonderfully surprising. The secret lies in creating distinct layers: a buttery cinnamon graham cracker crust, a rich vanilla cheesecake base, and ribbons of cinnamon sugar swirl that mirror the filling found in classic cinnamon rolls.
What sets this recipe apart from others I’ve tried is the addition of cream cheese frosting drizzle on top, which truly captures the essence of a bakery-fresh cinnamon roll. The texture contrast between the smooth cheesecake and the slightly caramelized cinnamon swirl creates an experience that’s nothing short of extraordinary.
Essential Ingredients and Their Roles
For the Cinnamon Graham Cracker Crust:
- Graham Crackers (1½ cups crushed): Forms the foundation with its honey-sweet flavor
- Ground Cinnamon (1 teaspoon): Adds warmth and complements the filling
- Unsalted Butter (6 tablespoons, melted): Binds the crust and adds richness
- Granulated Sugar (3 tablespoons): Enhances sweetness and helps with browning
For the Cheesecake Filling:
- Cream Cheese (32 oz, room temperature): The heart of any great cheesecake
- Granulated Sugar (1 cup): Sweetens without overpowering
- Large Eggs (4, room temperature): Provides structure and richness
- Sour Cream (½ cup): Adds tanginess and prevents cracking
- Vanilla Extract (2 teaspoons): Enhances all other flavors
- All-Purpose Flour (3 tablespoons): Stabilizes the filling
For the Cinnamon Swirl:
- Unsalted Butter (4 tablespoons, melted): Creates the swirl base
- Brown Sugar (⅓ cup, packed): Provides deep, caramel-like sweetness
- Ground Cinnamon (2 tablespoons): The star of the show
- All-Purpose Flour (2 tablespoons): Prevents the swirl from sinking
For the Cream Cheese Frosting Drizzle:
- Cream Cheese (4 oz, softened): Matches the cheesecake theme
- Powdered Sugar (1 cup): Creates smooth sweetness
- Heavy Cream (3-4 tablespoons): Achieves drizzling consistency
- Vanilla Extract (½ teaspoon): Rounds out the flavor

Detailed Ingredient Analysis Table
| Ingredient | Quantity | Purpose | Substitution Options | Storage Tips |
|---|---|---|---|---|
| Cream Cheese | 32 oz | Main structure and flavor | Full-fat only, no substitutes | Room temp 2-3 hours before use |
| Graham Crackers | 1½ cups crushed | Crust foundation | Vanilla wafers, digestive biscuits | Store in airtight container |
| Brown Sugar | ⅓ cup packed | Cinnamon swirl sweetness | Coconut sugar, muscovado | Keep sealed to prevent hardening |
| Ground Cinnamon | 2 tbsp + 1 tsp | Signature flavor | Ceylon or cassia varieties | Replace every 2-3 years for potency |
| Eggs | 4 large | Binding and structure | Must be large size, room temperature | Test freshness in water |
| Sour Cream | ½ cup | Prevents cracking, adds tang | Full-fat Greek yogurt | Use within expiration date |
Step-by-Step Preparation Guide
Preparing Your Kitchen and Equipment
Before I start any cheesecake, I ensure my kitchen is properly set up. Preheat your oven to 325°F (163°C) and position the rack in the center. I always use a 9-inch springform pan because it makes removal so much easier. Wrap the bottom and sides of your pan in heavy-duty aluminum foil – this prevents water from seeping in during our water bath.
Creating the Perfect Cinnamon Crust
I begin by crushing my graham crackers in a food processor until they form fine crumbs. The key is achieving uniform texture without any large pieces that might create weak spots in the crust. In a mixing bowl, I combine the graham cracker crumbs with cinnamon and sugar, then slowly drizzle in the melted butter while stirring with a fork.
The mixture should hold together when pressed but not be overly wet. Press this mixture firmly into the bottom of your prepared springform pan, using the bottom of a measuring cup to create an even layer. I like to bring the crust slightly up the sides – about half an inch – which creates a beautiful presentation and helps contain the filling.
Bake the crust for 10 minutes, then remove and let it cool while you prepare the filling. This pre-baking step ensures a crisp bottom that won’t become soggy.
Mastering the Cheesecake Filling
Temperature control is absolutely crucial for cheesecake success. All your dairy ingredients must be at room temperature – I cannot stress this enough. Cold ingredients lead to lumps that are nearly impossible to eliminate, and lumpy cheesecake filling results in a dense, uneven texture.
In a large mixing bowl, I beat the cream cheese with an electric mixer on medium speed until it’s completely smooth and fluffy – this usually takes 3-4 minutes. Scrape down the sides frequently to ensure even mixing. Gradually add the sugar, beating until well combined.
Add eggs one at a time, beating just until incorporated after each addition. Overbeating at this stage can incorporate too much air, leading to cracks during baking. Mix in the sour cream, vanilla, and flour until just combined.
Creating the Signature Cinnamon Swirl
The cinnamon swirl is what transforms ordinary cheesecake into something extraordinary. In a small bowl, I whisk together the melted butter, brown sugar, cinnamon, and flour until smooth. The consistency should be thick enough to hold its shape but fluid enough to swirl easily.
Assembly and Baking Techniques
Layering for Success
Pour half of the cheesecake filling over the cooled crust, spreading it evenly with an offset spatula. Drop spoonfuls of the cinnamon mixture over this layer, then use a knife to create swirl patterns by drawing it through the mixture in figure-eight motions.
Add the remaining cheesecake filling, then repeat the swirling process with the remaining cinnamon mixture. The key is not to over-swirl – you want distinct ribbons of cinnamon throughout, not a completely mixed filling.
The Water Bath Method
I always use a water bath (bain-marie) for my cheesecakes because it provides gentle, even heat that prevents cracking. Place your wrapped springform pan in a large roasting pan, then carefully pour hot water halfway up the sides of the springform pan.
This method might seem intimidating at first, but it’s actually quite simple and makes an enormous difference in the final texture. The steam created by the water bath keeps the surface of the cheesecake moist while it bakes.
Baking Timeline and Temperature Control
| Baking Stage | Temperature | Time | What to Look For |
|---|---|---|---|
| Initial Bake | 325°F | 55-65 minutes | Center slightly jiggly |
| Cooling in Oven | Oven off, door cracked | 1 hour | Gradual temperature reduction |
| Room Temperature | Remove from oven | 2-3 hours | Completely cool |
| Refrigeration | 40°F | Minimum 6 hours | Fully set |
Bake for 55-65 minutes, until the center is almost set but still slightly jiggly when gently shaken. The edges should be set and slightly puffed. Turn off the oven and crack the door open, allowing the cheesecake to cool gradually in the oven for one hour.
This gradual cooling process is crucial for preventing cracks. Rapid temperature changes are the enemy of smooth cheesecake surfaces.
Perfecting the Cream Cheese Frosting Drizzle
While your cheesecake chills, prepare the signature drizzle that makes this dessert truly special. Beat the softened cream cheese until smooth, then gradually add powdered sugar, beating until well combined. Add heavy cream one tablespoon at a time until you reach a drizzling consistency.
The frosting should flow smoothly off a spoon but not be so thin that it runs off the cheesecake immediately. Add vanilla extract and mix until incorporated.
Troubleshooting Common Issues
Preventing and Fixing Cracks
Cracks in cheesecake are usually caused by overbaking, rapid temperature changes, or overbeating the filling. If your cheesecake does crack, don’t panic – the cream cheese drizzle does an excellent job of hiding minor imperfections.
Prevention strategies I’ve learned:
- Always use room temperature ingredients
- Don’t overbeat once eggs are added
- Use a water bath consistently
- Cool gradually in the oven
- Avoid opening the oven door during baking
Texture Troubleshooting
Dense or heavy texture: Usually caused by overbeating or using cold ingredients. Next time, ensure all ingredients are at room temperature and mix just until combined.
Grainy texture: This occurs when the cream cheese wasn’t properly softened or when ingredients were added too quickly. Take time to properly soften cream cheese and add ingredients gradually.
Soggy crust: Often results from not pre-baking the crust or from moisture seeping through foil in the water bath. Always pre-bake and ensure your foil wrapping is secure.
Serving and Presentation Ideas
Professional Slicing Techniques
For clean slices that showcase the beautiful cinnamon swirls, I use a sharp knife dipped in warm water between each cut. Wipe the blade clean after each slice to prevent dragging the filling.
I like to remove the cheesecake from the refrigerator about 15 minutes before serving – this slight softening makes it easier to cut and enhances the flavors.
Creative Serving Suggestions
This cheesecake is stunning on its own, but I love offering complementary accompaniments:
- Fresh berries provide a bright, acidic contrast
- Caramel sauce enhances the cinnamon roll theme
- Chopped toasted pecans add textural interest
- A light dusting of cinnamon over each slice
- Whipped cream rosettes for special occasions
Portion Control and Presentation
| Serving Size | Occasion | Presentation Style | Accompaniments |
|---|---|---|---|
| Standard (1/12 of cake) | Casual dinner | Simple slice on dessert plate | Fresh strawberries |
| Large (1/10 of cake) | Special celebration | Garnished with drizzle design | Caramel sauce |
| Small (1/16 of cake) | Buffet or party | Mini portions on small plates | Mixed berry compote |
| Individual | Elegant dinner party | Plated with artistic drizzle | Candied pecans |
Storage and Make-Ahead Tips
Refrigeration Guidelines
This cheesecake actually improves with time – the flavors meld beautifully overnight. Store covered in the refrigerator for up to five days. I prefer to add the cream cheese drizzle just before serving to maintain the best appearance.
Freezing Instructions
For longer storage, this cheesecake freezes beautifully for up to three months. Wrap individual slices in plastic wrap, then place in freezer bags, or freeze the whole cheesecake wrapped in plastic wrap and aluminum foil.
To thaw, transfer to the refrigerator overnight. Never thaw at room temperature, as this can create condensation that affects the texture.
Make-Ahead Strategy
I often make this cheesecake 2-3 days before I need it. The flavors actually improve with time, and having it ready in advance reduces stress when entertaining. Prepare everything except the drizzle, which I add just before serving for the freshest appearance.
Nutritional Information and Dietary Considerations
Nutritional Breakdown per Serving (1/12 of cake)
| Nutrient | Amount | % Daily Value |
|---|---|---|
| Calories | 485 | 24% |
| Total Fat | 34g | 44% |
| Saturated Fat | 21g | 105% |
| Cholesterol | 145mg | 48% |
| Sodium | 385mg | 17% |
| Carbohydrates | 38g | 14% |
| Protein | 8g | 16% |
| Calcium | 145mg | 11% |
Dietary Modifications
While this is undeniably an indulgent dessert, I’ve experimented with several modifications:
Reduced Sugar Version: I’ve successfully reduced the sugar by ¼ cup in the filling without significantly affecting texture, though the sweetness is noticeably less intense.
Gluten-Free Option: Substitute the graham crackers with gluten-free versions and ensure your flour is gluten-free certified.
Lower Fat Considerations: I don’t recommend using reduced-fat cream cheese, as it significantly affects both texture and flavor. However, you can use light sour cream without major changes.
Frequently Asked Questions
Q: Can I make this cheesecake without a springform pan? I strongly recommend using a springform pan for best results, but you can use a regular 9-inch cake pan lined with parchment paper with long overhangs for easier removal. The presentation won’t be quite as clean, but the taste will be identical.
Q: Why is my cheesecake cracking even when I follow the recipe exactly? Cracking is usually caused by overbaking or temperature shock. Make sure your oven temperature is accurate (use an oven thermometer), don’t open the oven door during baking, and ensure you’re cooling gradually. Also, check that your cream cheese was properly softened.
Q: Can I substitute the sour cream with something else? You can use full-fat Greek yogurt as a substitute, but the flavor will be slightly different. Avoid using low-fat alternatives as they can affect the texture. Some bakers use heavy cream, but I prefer the tang that sour cream provides.
Q: How do I know when my cheesecake is properly baked? The center should be almost set but still have a slight jiggle when you gently shake the pan. The edges should be set and slightly puffed. Don’t rely solely on time – ovens vary significantly.
Q: Can I double this recipe for a larger crowd? Yes, but you’ll need to use a larger pan or make two separate cheesecakes. If using a larger pan, increase the baking time by 15-20 minutes, but watch carefully for doneness.
Q: What’s the best way to achieve clean slices? Use a sharp, thin-bladed knife dipped in warm water between each cut. Wipe the blade clean after each slice. Let the cheesecake soften slightly at room temperature for easier cutting.
Q: Can I make mini versions of this cheesecake? Absolutely! Use a muffin tin lined with paper cups or small springform pans. Reduce the baking time to 18-22 minutes for mini versions.
Q: How far in advance can I make the cream cheese drizzle? The drizzle can be made up to 3 days ahead and stored in the refrigerator. You may need to thin it with a little more cream before using if it thickens too much.
Q: My cinnamon swirl sank to the bottom – what went wrong? This usually happens when the swirl mixture is too thin or when it’s added to filling that’s too liquid. Make sure your swirl mixture includes flour and has a thick consistency, and don’t over-swirl.
Q: Can I use a different type of crust? Certainly! Vanilla wafer crusts work beautifully, as do crushed cinnamon cookies. Oreo crusts create an interesting flavor contrast, though they’re less traditional for this style of cheesecake.
This cinnamon roll cheesecake represents the perfect marriage of two beloved desserts. The time and care invested in its preparation are rewarded with a dessert that’s both visually stunning and absolutely delicious. Whether you’re celebrating a special occasion or simply want to treat yourself and your loved ones to something extraordinary, this recipe delivers every single time.
The key to success lies in patience – from properly softening ingredients to allowing adequate cooling time. But I promise you, the results are worth every minute spent. There’s something magical about watching people’s faces light up when they take that first bite and realize they’re experiencing something truly special.
I hope this recipe brings as much joy to your kitchen as it has to mine. Happy baking!