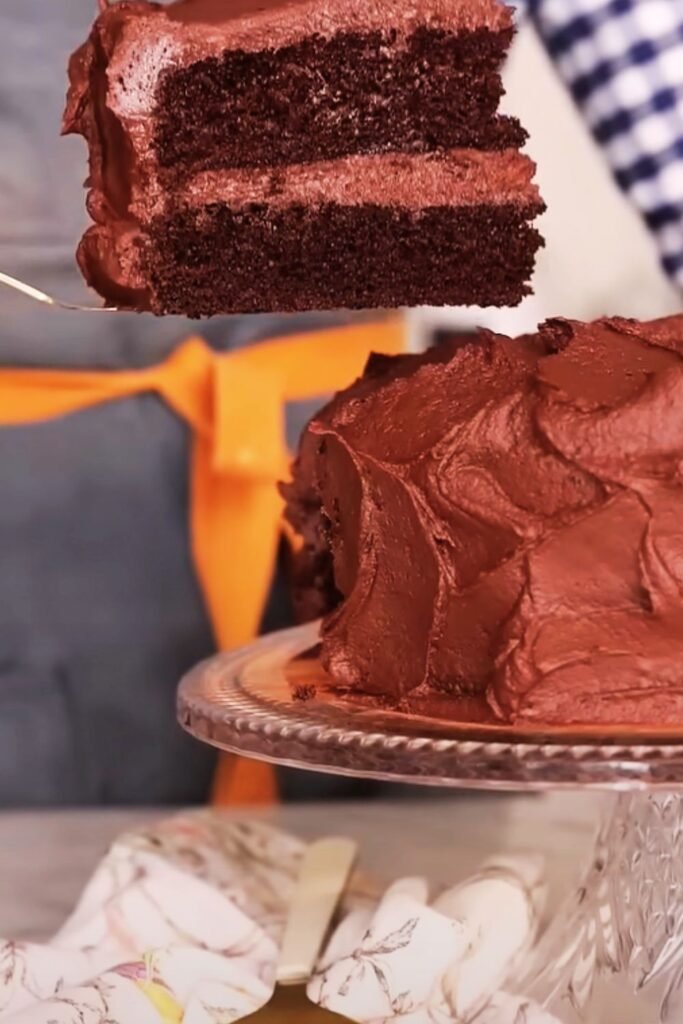
After years of testing countless chocolate cake recipes in my kitchen, I can confidently say I’ve discovered the holy grail of chocolate cakes. This isn’t just another chocolate cake recipe – it’s the one that will make your friends beg for the secret and have your family declaring you the official dessert maker for every celebration.
I remember the first time I made this cake. It was for my daughter’s birthday, and I was determined to create something extraordinary. After three failed attempts with different recipes that promised “the moistest cake ever,” I was frustrated and covered in flour. That’s when I decided to combine the best elements from each recipe and add my own secret touches. The result? Pure chocolate perfection.
What makes this cake so special isn’t just one thing – it’s the combination of carefully chosen ingredients, precise techniques, and a few surprising additions that most recipes overlook. I use hot coffee to intensify the chocolate flavor, sour cream for incredible moisture, and a special mixing method that creates the most tender crumb you’ve ever experienced.
Why This Recipe Works Better Than Others
Most chocolate cake recipes fail because they focus on just one aspect – either flavor or texture – but rarely achieve both. I’ve spent countless hours understanding the science behind what makes a cake truly moist and flavorful. Here’s what sets my recipe apart:
Coffee Enhancement: The hot coffee doesn’t make the cake taste like coffee at all. Instead, it acts as a flavor amplifier, making the chocolate taste more intense and rich. I discovered this trick after reading about how coffee enhances chocolate in professional bakeries.
Dual Fat System: I use both oil and butter in this recipe. The butter provides flavor while the oil ensures lasting moisture. Many recipes use only one or the other, but combining them creates the perfect balance.
Acid-Base Reaction: The combination of baking soda and baking powder with acidic ingredients like sour cream and cocoa creates a perfect rise and incredibly tender texture. This chemical reaction is what gives the cake its light yet moist crumb.
Temperature Control: Every ingredient temperature matters. I’ve tested this recipe with cold ingredients, room temperature ingredients, and various combinations. The specific temperatures I recommend create the ideal emulsion for maximum moisture retention.
Essential Ingredients Breakdown
Understanding your ingredients is crucial for success. Let me walk you through each component and why it’s essential:
Dutch-Processed Cocoa Powder : This type of cocoa has been treated with alkali to neutralize its acidity. It creates a deeper, more mellow chocolate flavor and darker color. Regular cocoa powder will work, but Dutch-processed gives superior results.
Cake Flour vs. All-Purpose Flour : I use a combination of both. Cake flour has less protein, creating a more tender crumb, while all-purpose flour provides enough structure to support the moist ingredients.
Sour Cream : This is my secret weapon for moisture. The acidity tenderizes the gluten while the fat content keeps the cake moist for days. Don’t substitute with yogurt – sour cream has a higher fat content that’s crucial for this recipe.
Brown Sugar and White Sugar : The combination provides complexity. Brown sugar adds moisture and a subtle molasses flavor that complements chocolate, while white sugar ensures proper structure and sweetness balance.
Vegetable Oil : I specifically use neutral vegetable oil, not olive oil or coconut oil. The neutral flavor won’t compete with the chocolate, and oil stays liquid at room temperature, keeping the cake moist longer than butter-only recipes.
The Complete Recipe
Ingredients
| Ingredient | Amount | Notes |
|---|---|---|
| All-purpose flour | 1¾ cups (220g) | Spoon and level for accuracy |
| Cake flour | ¼ cup (30g) | Sifted for best results |
| Dutch-processed cocoa powder | ¾ cup (75g) | Sifted to remove lumps |
| Granulated sugar | 1½ cups (300g) | Room temperature preferred |
| Light brown sugar | ½ cup (100g) | Packed measurement |
| Baking powder | 2 teaspoons | Fresh, not expired |
| Baking soda | 1 teaspoon | Fresh, not expired |
| Salt | 1 teaspoon | Fine sea salt or table salt |
| Large eggs | 2 | Room temperature, about 70°F |
| Whole milk | 1 cup (240ml) | Room temperature |
| Vegetable oil | ½ cup (120ml) | Neutral flavor |
| Sour cream | ½ cup (120g) | Full-fat, room temperature |
| Unsalted butter | 4 tablespoons (56g) | Melted and slightly cooled |
| Pure vanilla extract | 2 teaspoons | Real vanilla, not imitation |
| Hot brewed coffee | 1 cup (240ml) | Strong brew, can substitute hot water |
For the Chocolate Buttercream Frosting
| Ingredient | Amount | Purpose |
|---|---|---|
| Unsalted butter | 1 cup (226g) | Room temperature, soft |
| Powdered sugar | 3½ cups (420g) | Sifted for smoothness |
| Dutch-processed cocoa powder | ¾ cup (75g) | For rich chocolate flavor |
| Heavy cream | ⅓ cup (80ml) | For creamy consistency |
| Vanilla extract | 1 teaspoon | Flavor enhancement |
| Salt | ¼ teaspoon | Balances sweetness |
Step-by-Step Instructions
Preparing Your Kitchen
Before I start any baking project, I always prepare my workspace completely. This recipe moves quickly once you start, so having everything ready is crucial for success.
Preheat your oven to 350°F (175°C). I’ve tested this recipe at various temperatures, and 350°F gives the perfect balance of cooking the interior while creating a tender crust. Position your oven rack in the center – this ensures even heat distribution.
Prepare two 9-inch round cake pans by greasing them thoroughly with butter, then dusting with cocoa powder instead of flour. The cocoa powder prevents white residue on your dark cake and adds an extra hint of chocolate flavor to the crust.
The Mixing Process
Step 1: Dry Ingredient Foundation In a large mixing bowl, whisk together both flours, cocoa powder, both sugars, baking powder, baking soda, and salt. I whisk for a full minute to ensure everything is evenly distributed. This prevents pockets of leavening agents that can create uneven rising.
Step 2: Wet Ingredient Harmony In a separate bowl, whisk the eggs until they’re slightly frothy – about 30 seconds. Add the milk, oil, sour cream, melted butter, and vanilla. Whisk until the mixture is smooth and homogeneous. The key here is ensuring the melted butter doesn’t solidify by adding it to room temperature ingredients.
Step 3: The Critical Combination Pour the wet ingredients into the dry ingredients. Using a wooden spoon or rubber spatula, gently fold the mixture together until just combined. Don’t overmix – a few small lumps are better than a tough cake. Overmixing develops gluten, which creates a dense, chewy texture instead of the tender crumb we want.
Step 4: The Coffee Magic Here’s where the magic happens. Slowly pour in the hot coffee while gently stirring. The batter will become quite thin – this is exactly what we want. The thin batter allows for even baking and creates that incredibly moist texture. Don’t worry if it looks too liquid; trust the process.
Baking to Perfection
Divide the batter evenly between your prepared pans. I use a kitchen scale for this, but if you don’t have one, eyeball it as evenly as possible. Give each pan a gentle tap on the counter to release air bubbles.
Bake for 28-32 minutes. I start checking at 28 minutes with a toothpick inserted in the center. It should come out with just a few moist crumbs clinging to it. If it comes out completely clean, the cake is overbaked. If it comes out with wet batter, give it another 2-3 minutes.
The cakes are done when they spring back lightly when touched in the center and just start to pull away from the sides of the pan. Remove from the oven and let them cool in the pans for 10 minutes before turning out onto wire racks.
The Perfect Chocolate Buttercream
While the cakes cool completely, I make the frosting. This buttercream is rich, creamy, and has the perfect chocolate intensity to complement the cake without overwhelming it.
Creating the Base Beat the room temperature butter with an electric mixer until it’s light and fluffy – about 3-4 minutes on medium-high speed. The butter should be pale and increased in volume. This step is crucial for achieving the light, creamy texture we want.
Adding the Chocolate Gradually add the sifted powdered sugar and cocoa powder, alternating between the two. Start with the mixer on low speed to prevent a powdered sugar cloud in your kitchen. Once incorporated, increase to medium speed.
Achieving Perfect Consistency Add the heavy cream, vanilla, and salt. Beat on high speed for 2-3 minutes until the frosting is light, fluffy, and spreadable. If it’s too thick, add cream one tablespoon at a time. If it’s too thin, add more powdered sugar.
Assembly and Decoration Tips
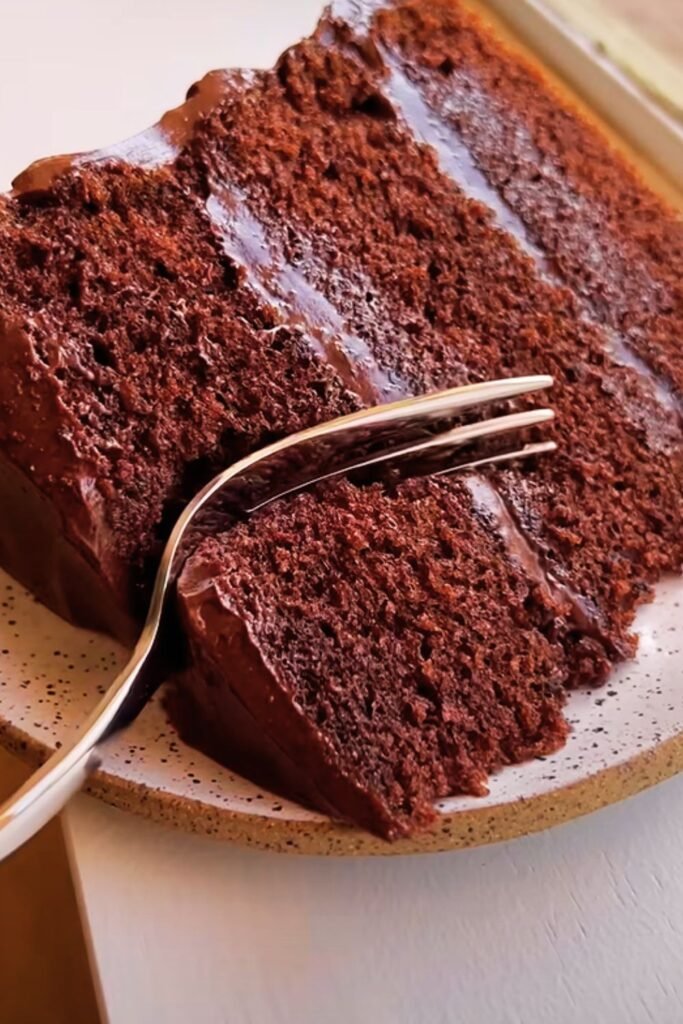
Leveling the Layers Once completely cool, I level each cake layer with a long serrated knife or cake leveler. This ensures stable stacking and professional-looking results. Save the cake scraps – they make excellent snacks or can be crumbled over ice cream.
The Crumb Coat Technique Place the first layer on your serving plate. Spread about ¾ cup of frosting evenly across the top. Place the second layer on top, pressing gently to adhere. Apply a thin layer of frosting all over the cake – this is called a crumb coat. Refrigerate for 30 minutes to set.
Final Frosting After the crumb coat is set, apply the remaining frosting in smooth, even strokes. I like to create swirls on top for a homestyle look, but you can make it as smooth or decorative as you prefer.
Troubleshooting Common Issues
Dense or Heavy Cake This usually results from overmixing the batter or using expired leavening agents. Make sure your baking powder and soda are fresh – they lose potency after six months. Mix the batter just until ingredients are combined.
Dry Cake Overbaking is the most common cause. Even a few extra minutes can dry out a cake. Also, ensure you’re measuring flour correctly – too much flour creates a dry texture. I always recommend weighing ingredients for best results.
Sunken Center This happens when the oven temperature is too high, causing the outside to set before the inside is done. It can also result from opening the oven door too early in the baking process. Don’t check the cake until at least 25 minutes into baking.
Frosting Too Soft Make sure your butter wasn’t too warm when you started. If the frosting is too soft, refrigerate it for 15-20 minutes, then re-whip. Sometimes adding a bit more powdered sugar helps stabilize it.
Storage and Make-Ahead Tips
This cake actually improves after a day, as the flavors meld and the crumb becomes even more tender. Here’s how to store it properly:
Short-Term Storage (1-3 days) Cover the cake with a cake dome or loose plastic wrap at room temperature. The moisture in the cake and frosting will stay perfectly balanced.
Longer Storage (up to 1 week) Refrigerate the cake, covered. Bring it to room temperature for 30 minutes before serving for the best flavor and texture.
Freezing Options You can freeze the unfrosted cake layers for up to 3 months. Wrap each layer tightly in plastic wrap, then aluminum foil. Thaw at room temperature and frost as directed. The assembled cake can also be frozen for up to 1 month.
Nutritional Information and Serving Suggestions
| Nutritional Content | Per Slice (12 servings) |
|---|---|
| Calories | 485 |
| Total Fat | 18g |
| Saturated Fat | 9g |
| Cholesterol | 65mg |
| Sodium | 380mg |
| Total Carbohydrates | 78g |
| Dietary Fiber | 4g |
| Sugars | 65g |
| Protein | 6g |
Perfect Pairings This cake pairs beautifully with fresh berries, especially raspberries or strawberries. The tartness cuts through the rich chocolate perfectly. A dollop of whipped cream on the side adds a lovely contrast in both flavor and texture.
For special occasions, I love serving this with a scoop of vanilla ice cream and a drizzle of chocolate sauce. The temperature contrast between the room temperature cake and cold ice cream is delightful.
Beverage Suggestions Coffee is the classic pairing – the flavors complement each other beautifully. For non-coffee drinkers, try it with cold milk or a rich hot chocolate. Herbal teas like peppermint or chamomile also work wonderfully.
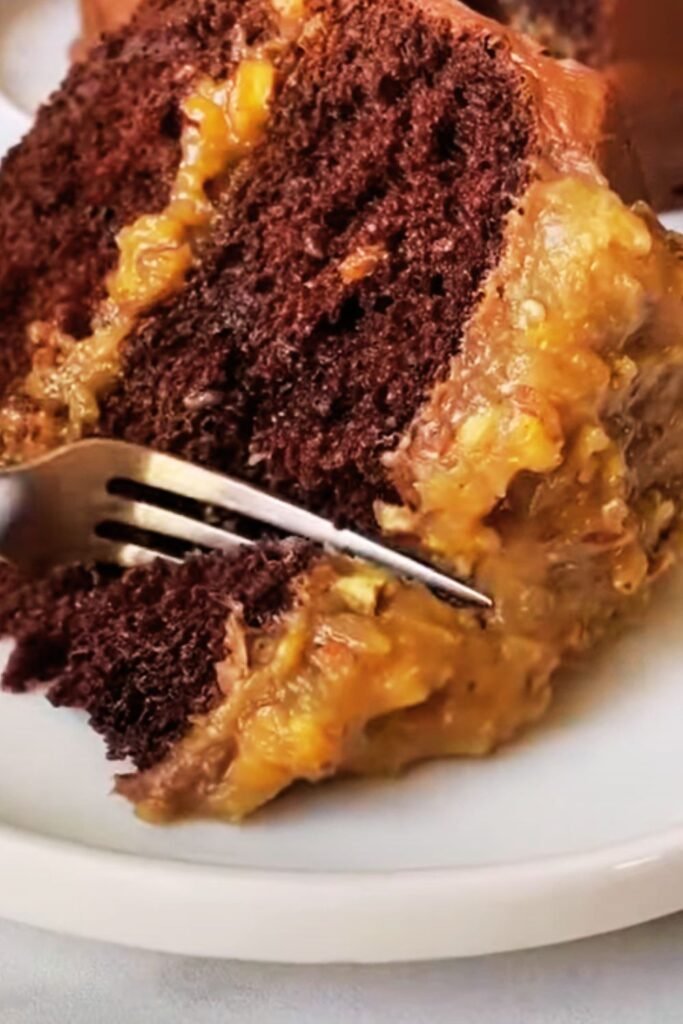
Variations and Customizations
Chocolate Chip Addition Fold 1 cup of mini chocolate chips into the batter just before adding the coffee. They’ll distribute evenly and add delightful pockets of extra chocolate.
Espresso Enhancement Replace the vanilla extract with espresso extract for a more intense coffee-chocolate flavor. Start with 1 teaspoon and adjust to taste.
Coconut Variation Add ½ cup of shredded coconut to the batter and use coconut extract instead of vanilla. Top with coconut flakes for a tropical twist.
Orange Chocolate Add the zest of one large orange to the batter and 1 teaspoon of orange extract. The citrus brightens the rich chocolate flavor beautifully.
Peanut Butter Twist Swirl 3 tablespoons of creamy peanut butter into the batter before baking. Don’t overmix – you want ribbons of peanut butter throughout.
The Science Behind the Moisture
Understanding why this cake stays so moist helps you achieve consistent results every time. The combination of fats (oil and butter) creates moisture that lasts for days. Oil has a higher fat content than butter and remains liquid at room temperature, while butter provides flavor.
The sour cream adds both fat and acid. The acid tenderizes the proteins in flour, creating a more delicate crumb structure that holds moisture better. The coffee not only enhances flavor but also adds liquid that gets absorbed into the cake structure.
The proper balance of leavening agents creates just enough lift without drying out the cake. Too much leavening causes rapid rising followed by collapse, which creates a dry, dense texture.
Professional Baker’s Secrets
After years of perfecting this recipe, I’ve learned several professional tricks that make all the difference:
Room Temperature Ingredients This cannot be overstated. Cold ingredients don’t emulsify properly, leading to a dense cake. Take eggs and dairy out of the refrigerator 2-3 hours before baking.
Proper Measuring I always weigh my flour rather than using cup measurements. Different brands and humidity levels can cause significant variations in volume measurements. If you don’t have a scale, spoon flour into your measuring cup and level it off – never scoop directly from the bag.
Don’t Rush the Cooling I know it’s tempting to frost a warm cake, but patience pays off. A warm cake will melt your frosting and create a mess. Wait until the layers are completely cool to the touch.
Quality Ingredients Matter Use the best cocoa powder and vanilla extract you can afford. These flavors are prominent in the finished cake, so quality makes a noticeable difference.
Questions and Answers
Q: Can I make this cake without coffee? Absolutely! Replace the coffee with an equal amount of hot water. You’ll still get a delicious cake, though the chocolate flavor won’t be quite as intense. Some bakers use hot milk instead of water for extra richness.
Q: Why does my cake crack on top? Cracking usually indicates the oven temperature is too high or the cake is placed too close to the top heating element. Make sure your oven is properly calibrated and use the center rack position.
Q: Can I use this recipe for cupcakes? Yes! This batter makes excellent cupcakes. Fill cupcake liners about ⅔ full and bake at 350°F for 18-22 minutes. You’ll get approximately 24 standard cupcakes.
Q: How do I know when the cake is done? A toothpick inserted in the center should come out with a few moist crumbs clinging to it. The cake should also spring back lightly when touched and just start pulling away from the pan sides.
Q: Can I make this dairy-free? You can substitute the milk with non-dairy alternatives like almond or oat milk, and replace the sour cream with dairy-free versions. The butter in the cake can be replaced with additional oil, though you’ll lose some flavor complexity.
Q: What’s the best way to get smooth frosting? Make sure your butter is properly softened – it should give slightly when pressed but not be melty. Sift your powdered sugar and cocoa to remove lumps, and beat the frosting long enough to achieve the right consistency.
Q: Can I add nuts to this recipe? Certainly! Fold in 1 cup of chopped walnuts, pecans, or hazelnuts just before adding the coffee. Toast the nuts lightly first for better flavor.
Q: How far in advance can I make this? The cake layers can be made 2 days ahead and stored covered at room temperature. The frosting can be made 3 days ahead and refrigerated – just bring it to room temperature and re-whip before using.
Q: Why is my frosting grainy? Graininess usually comes from powdered sugar that wasn’t sifted or butter that was too cold. Always sift dry ingredients and ensure your butter is properly softened before starting.
Q: Can I double this recipe? Yes, this recipe doubles beautifully. You can make a four-layer cake or two separate cakes. Just make sure you have enough pan space in your oven and may need to extend baking time slightly.
This chocolate cake recipe has become my signature dessert, and I’m confident it will become yours too. The combination of deep chocolate flavor, incredible moisture, and foolproof technique makes it perfect for both novice and experienced bakers. Every time I serve this cake, I’m reminded why I fell in love with baking in the first place – the joy of creating something that brings people together and creates lasting memories.
The beauty of this recipe lies not just in its delicious results, but in its reliability. Whether you’re baking for a birthday, anniversary, or just because you need some chocolate therapy, this cake delivers every single time. I’ve made it in humid summer kitchens and dry winter ones, at sea level and high altitude (with minor adjustments), and it’s never let me down.
Remember, baking is both science and art. Follow the measurements and techniques I’ve outlined, but don’t be afraid to make it your own with the variations I’ve suggested. Some of my favorite family memories have been created while making this cake together, teaching my children the same techniques I’ve shared with you.
Take your time, enjoy the process, and most importantly, don’t forget to lick the bowl – that’s the baker’s privilege!