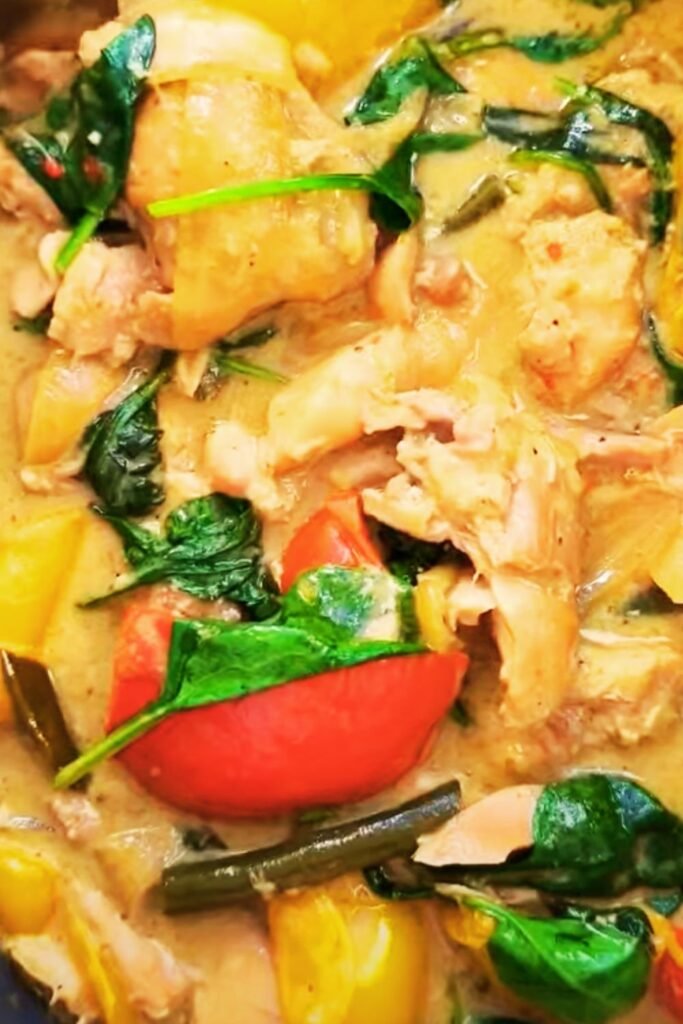
There’s something magical about walking into your home after a long day and being greeted by the aromatic scent of Thai yellow curry simmering away in the crockpot. This recipe has been my go-to comfort food for years, and I’m thrilled to share it with you today. The combination of tender chicken, vibrant vegetables, and a rich, complex curry sauce ladled over fragrant garlic rice creates a meal that’s both satisfying and impressively flavorful.
What I love most about this dish is how the slow cooking process allows the curry flavors to deepen and the chicken to become fall-apart tender. Plus, the hands-off nature of crockpot cooking means you can set it up in the morning and come home to a restaurant-quality meal with minimal effort. If you’ve been hesitant to try making Thai curry at home, this approachable recipe is the perfect place to start.
The Magic of Thai Yellow Curry
Before we dive into the recipe, let’s talk about what makes Thai yellow curry special. Yellow curry (karee gaeng in Thai) is generally milder than its red and green counterparts, making it a fantastic introduction to Thai curries if you’re sensitive to heat. The beautiful golden color comes from turmeric, while the complex flavor profile includes:
- Turmeric: Earthy and warm with a distinctive golden hue
- Coriander: Bright, citrusy notes that lighten the curry
- Cumin: Adds a smoky, earthy depth
- Lemongrass: Provides a subtle citrus tang
- Galangal: Similar to ginger but with a more peppery, citrusy flavor
- Garlic and Shallots: Create a savory foundation
- Coconut milk: Adds creaminess and tempers the spices
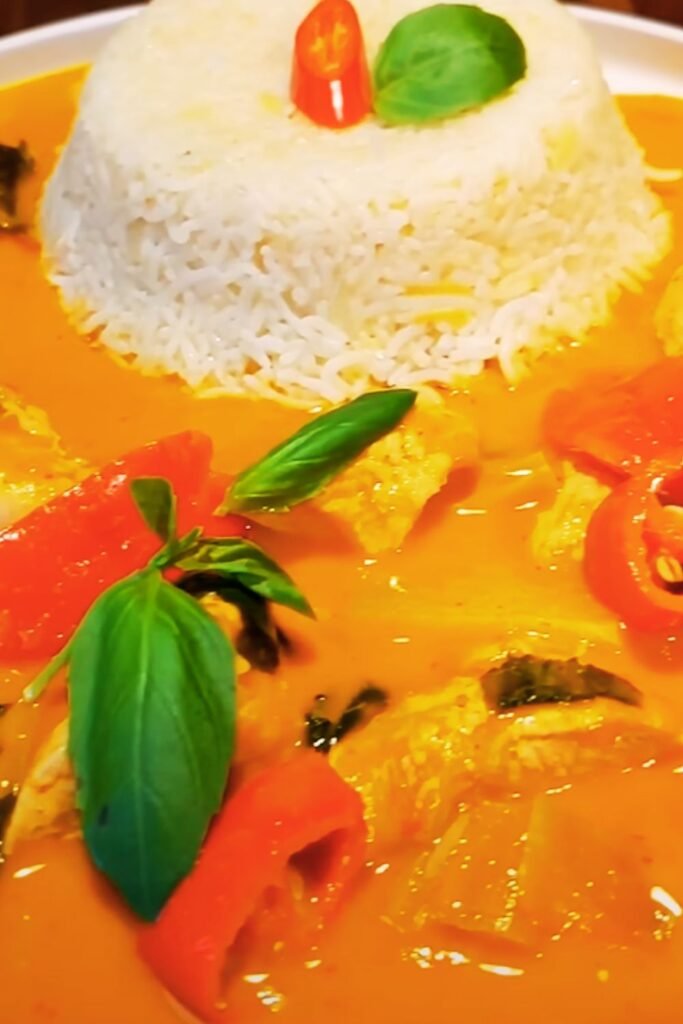
Yellow curry is traditionally served with rice to soak up the flavorful sauce. For this recipe, I’ve paired it with garlic rice, which complements the curry beautifully and elevates the entire dish.
Ingredients You’ll Need
For the Yellow Curry Chicken:
- 2 pounds boneless, skinless chicken thighs, cut into 1.5-inch pieces
- 2 tablespoons vegetable oil
- 4 tablespoons yellow curry paste (store-bought or homemade)
- 2 cans (13.5 oz each) full-fat coconut milk
- 1 large yellow onion, sliced
- 3 carrots, peeled and cut into 1/2-inch diagonal slices
- 2 red bell peppers, seeded and cut into 1-inch pieces
- 2 russet potatoes, peeled and cubed into 1-inch pieces
- 1 tablespoon brown sugar
- 2 tablespoons fish sauce
- 1 tablespoon lime juice
- 1 stalk lemongrass, bruised and cut into 3-inch pieces
- 4 kaffir lime leaves (optional but recommended)
- 1/2 cup frozen peas
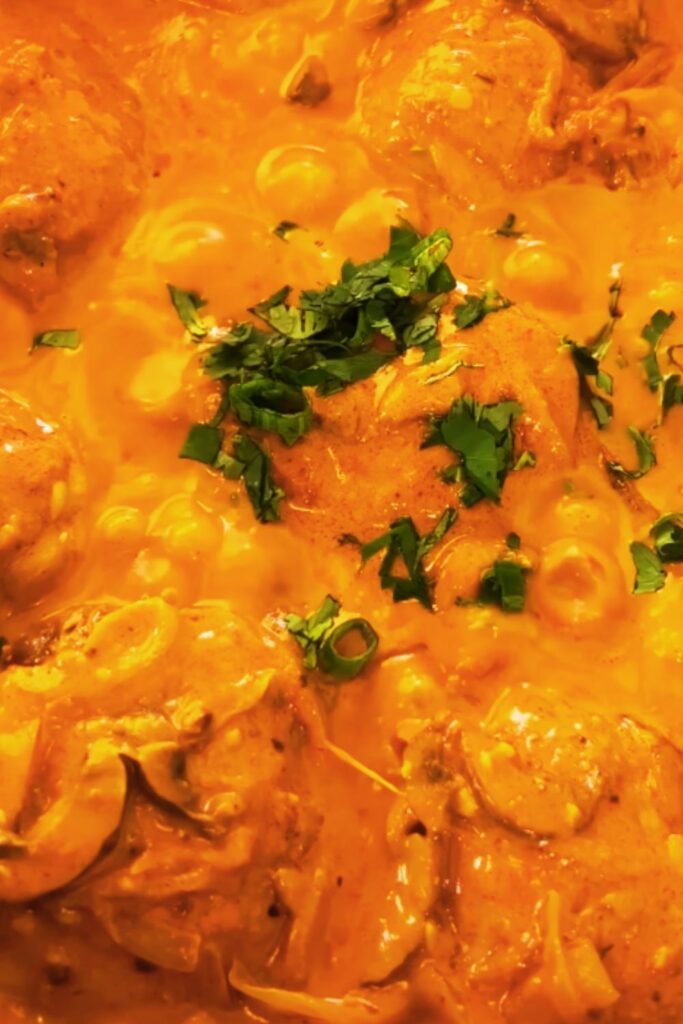
- Fresh cilantro, for garnish
- Thai basil leaves, for garnish
- Lime wedges, for serving
For the Garlic Rice:
- 2 cups jasmine rice
- 3 cups chicken broth
- 4 cloves garlic, minced
- 1 tablespoon butter
- 1/2 teaspoon salt
- 2 tablespoons fresh cilantro, chopped
Equipment Needed
Before we start cooking, make sure you have these essential tools on hand:
- 6-quart crockpot/slow cooker
- Large skillet
- Sharp knife and cutting board
- Rice cooker or medium saucepan with lid
- Measuring cups and spoons
- Wooden spoon
- Garlic press (optional)
Step-by-Step Instructions
Preparing the Curry:
- Brown the chicken: Heat vegetable oil in a large skillet over medium-high heat. Working in batches, brown the chicken pieces on all sides (about 2-3 minutes per batch). This step is optional but adds tremendous flavor. Transfer the browned chicken to your crockpot.
- Create the curry base: In the same skillet, reduce heat to medium and add 2 tablespoons of curry paste. Stir constantly for 30 seconds until fragrant. Add 1/2 can of coconut milk and whisk until the curry paste is fully incorporated and the mixture is smooth.
- Assemble in the crockpot: Pour the curry base over the chicken in the crockpot. Add the sliced onion, carrots, bell peppers, and potatoes. Pour in the remaining coconut milk.
- Add aromatics and seasonings: Stir in the remaining 2 tablespoons of curry paste, brown sugar, and fish sauce. Add the lemongrass and kaffir lime leaves, pushing them down into the liquid.
- Set it and forget it: Cover and cook on LOW for 6-7 hours or HIGH for 3-4 hours. The chicken should be tender, and the vegetables should be cooked through but not mushy.
- Finish the curry: During the last 15 minutes of cooking, stir in the frozen peas and lime juice. Remove the lemongrass pieces and kaffir lime leaves before serving.
For the Garlic Rice:
- Rinse the rice: Place the jasmine rice in a fine-mesh strainer and rinse under cold water until the water runs clear. This removes excess starch and prevents the rice from becoming too sticky.
- Sauté the garlic: In a medium saucepan or rice cooker, melt butter over medium heat. Add minced garlic and cook until fragrant, about 30 seconds to 1 minute. Be careful not to burn the garlic.
- Cook the rice: Add the rinsed rice to the garlic and stir to coat the grains. Add chicken broth and salt, then bring to a boil. Once boiling, reduce heat to low, cover, and simmer for 15-18 minutes until all liquid is absorbed.
- Steam and fluff: Remove from heat and let the rice sit, covered, for 5 minutes. This allows the rice to steam and finish cooking. Fluff with a fork and stir in chopped cilantro before serving.
Tips for Perfect Curry Every Time
Creating a spectacular Thai yellow curry isn’t complicated, but these tips will help you achieve restaurant-quality results:
- Use chicken thighs: They’re more flavorful and stay juicier during the long cooking process than chicken breasts.
- Don’t skip the browning step: While tempting to throw everything in the crockpot, taking 10 minutes to brown the chicken creates a depth of flavor that’s worth the effort.
- Layering vegetables: Place harder vegetables like potatoes and carrots at the bottom of the crockpot, closer to the heat source.
- Curry paste matters: The quality of your curry paste greatly impacts the final dish. Mae Ploy and Maesri are excellent store-bought options, or you can make your own for even better results.
- Full-fat coconut milk: Don’t substitute light coconut milk—the fat content is crucial for a rich, luxurious curry sauce.
- Add delicate ingredients later: Stir in quick-cooking vegetables like peas and acidic ingredients like lime juice toward the end of cooking.
- Let it rest: If you have time, make the curry a day ahead. Like many stews and curries, the flavors deepen and meld overnight in the refrigerator.
Nutritional Information
For those keeping track of nutritional content, here’s a breakdown per serving (assuming 6 servings):
| Nutrient | Amount per Serving |
|---|---|
| Calories | 620 |
| Protein | 35g |
| Carbohydrates | 58g |
| Dietary Fiber | 6g |
| Sugars | 6g |
| Fat | 28g |
| Saturated Fat | 18g |
| Cholesterol | 115mg |
| Sodium | 950mg |
| Potassium | 820mg |
| Vitamin A | 180% DV |
| Vitamin C | 85% DV |
| Calcium | 6% DV |
| Iron | 20% DV |
Serving Suggestions
The beauty of this Thai yellow curry is its versatility when it comes to serving. Here are my favorite ways to present this dish:
- Traditional Style: Serve the curry in a bowl alongside a mound of garlic rice. Allow each person to spoon the curry over their rice according to preference.
- Family Style: Place the curry in a large serving bowl in the center of the table with the rice in a separate dish. Provide small bowls of garnishes like chopped cilantro, Thai basil, lime wedges, and thinly sliced red chilis for everyone to customize their meal.
- Lunch Prep: Portion the curry and rice into meal prep containers for easy grab-and-go lunches throughout the week. The flavors actually improve after a day or two in the refrigerator.
- Appetizer Portions: For a dinner party, serve small portions in elegant cups as a starter course.
- Complementary Sides: Enhance your meal with side dishes like:
- Crisp cucumber salad with rice vinegar dressing
- Fresh spring rolls with peanut dipping sauce
- Thai-style coleslaw
- Steamed vegetables drizzled with sesame oil
- Non-alcoholic Pairings: Try these refreshing drinks with your curry:
- Thai iced tea
- Mango lassi
- Lemongrass-ginger iced tea
- Coconut water
Variations to Try
While this recipe is delicious as written, don’t be afraid to make it your own. Here are some variations that work beautifully:
Protein Swaps:
- Shrimp: Add peeled, deveined shrimp during the last 30 minutes of cooking
- Tofu: Use extra-firm tofu, pressed and cubed, for a vegetarian option
- Beef: Substitute chuck roast cut into 1-inch cubes and increase cooking time by 1-2 hours
- Mixed Seafood: A combination of shrimp, scallops, and firm white fish added in the last 30 minutes creates a spectacular seafood curry
Vegetable Variations:
- Sweet Potatoes: Swap regular potatoes for sweet potatoes for added nutrition and a subtle sweetness
- Butternut Squash: Adds a beautiful color and velvety texture
- Green Beans: Add them in the last hour of cooking for vibrant color and texture
- Bamboo Shoots: For authentic Thai flavor and crunchy texture
- Eggplant: Japanese or Thai eggplant holds up well in the slow cooker
- Spinach: Stir in fresh spinach just before serving for a boost of greens
Rice Alternatives:
- Coconut Rice: Replace some of the water with coconut milk when cooking the rice
- Brown Jasmine Rice: For added fiber and nutty flavor
- Cauliflower Rice: A low-carb option that still soaks up the curry sauce beautifully
- Rice Noodles: For a Thai curry noodle bowl experience
Make-Ahead and Storage Tips
One of the greatest things about this curry is how well it stores and reheats. Here’s how to make the most of leftovers:
Make-Ahead Options:
- Prep Ingredients: Chop all vegetables and chicken up to 2 days in advance. Store them separately in airtight containers in the refrigerator.
- Curry Base: Prepare the curry base (curry paste and coconut milk mixture) the night before and refrigerate.
- Complete Curry: The entire curry can be made 1-2 days ahead and refrigerated. The flavors will actually intensify and improve overnight.
- Freezer Meal: Combine all raw ingredients except the coconut milk and vegetables in a freezer bag. Freeze for up to 3 months. Thaw overnight in the refrigerator before cooking, then add coconut milk and vegetables when ready to cook.
Storage Guidelines:
| Storage Method | Duration | Notes |
|---|---|---|
| Refrigerator | 3-4 days | Store curry and rice separately in airtight containers |
| Freezer | 2-3 months | Freeze curry without rice; thaw overnight in refrigerator |
Reheating Instructions:
- Stovetop: Warm curry over medium-low heat, stirring occasionally to prevent sticking.
- Microwave: Heat in 1-minute intervals, stirring between each interval.
- Rice Refresher: Sprinkle a few drops of water over rice before reheating to restore moisture.
Frequently Asked Questions
Q: Can I use chicken breasts instead of thighs? A: Yes, you can substitute chicken breasts, but reduce the cooking time by about 30-60 minutes to prevent them from becoming dry. Chicken thighs are more forgiving and stay juicier in the slow cooker.
Q: I can’t find kaffir lime leaves. Is there a substitute? A: While the flavor is unique, you can substitute with 1 teaspoon of lime zest plus 1/4 teaspoon of bay leaf. Alternatively, you can omit them and add a bit more lime juice at the end.
Q: How spicy is this curry? A: As written, this curry is mild to medium spicy. Yellow curry is typically the mildest of Thai curries. You can adjust the heat level by varying the amount of curry paste or adding fresh chilies.
Q: Can I make this in an Instant Pot instead? A: Absolutely! Use the sauté function to brown the chicken, then add remaining ingredients. Cook on high pressure for 12 minutes with natural release for 10 minutes. Add peas after pressure cooking.
Q: My curry seems too thin. How can I thicken it? A: For a thicker sauce, remove 1 cup of the liquid during the last 30 minutes of cooking. Mix 1 tablespoon of cornstarch with 2 tablespoons of cold water, then stir this slurry into the removed liquid. Return the mixture to the crockpot and cook for the remaining time.
Q: Is this recipe gluten-free? A: Most curry pastes and fish sauce are gluten-free, but always check labels to be sure. Everything else in the recipe is naturally gluten-free.
Q: Can I make this vegan? A: Yes! Substitute the chicken with firm tofu, chickpeas, or additional vegetables. Use vegetable broth instead of chicken broth for the rice. Check your curry paste ingredients, as some contain shrimp paste.
The Heart Behind the Recipe
This crockpot Thai yellow curry chicken has become more than just a recipe in my kitchen—it’s a solution for busy weeknights, a crowd-pleasing dinner party option, and a comforting meal that brings a taste of Thailand to my home. I first discovered my love for Thai yellow curry during a memorable trip to Chiang Mai, where I was fortunate enough to take a cooking class from a local chef who patiently taught me the fundamentals of Thai cuisine.
What struck me most was how the complex flavors of Thai food could be accessible to home cooks with the right techniques. This slow cooker adaptation maintains those authentic flavors while fitting into our busy modern lives. The gentle, sustained heat of the crockpot mimics the traditional slow-simmered method, allowing all those beautiful spices to meld together into something truly special.
I hope this recipe brings as much joy to your table as it has to mine. There’s nothing quite like watching someone’s face light up with that first spoonful of fragrant curry and garlic rice—it’s a simple pleasure that makes all the cooking worthwhile.
Happy cooking!
Q&A Section
Q: How can I make my curry more authentic? A: For a more authentic flavor, consider making your own curry paste from scratch using a mortar and pestle. Fresh ingredients like galangal, lemongrass, and kaffir lime leaves make a tremendous difference. Also, don’t skip the fish sauce—it adds that characteristic umami flavor that defines Thai cuisine.
Q: My family members have different spice preferences. How can I serve this curry to please everyone? A: Make the curry base mild and provide a “spice station” at the table. Include sliced fresh chilies, chili oil, and even extra curry paste so each person can customize the heat level of their portion. This interactive approach works well for family dinners!
Q: What’s the best way to prepare this if I don’t have 6-7 hours for slow cooking? A: If you’re short on time, you can adapt this recipe for the stovetop. Use a heavy-bottomed Dutch oven, follow the same initial steps, then simmer covered on low heat for about 45 minutes to 1 hour, stirring occasionally. The flavors won’t be quite as developed, but it will still be delicious.
Q: Can I add other Thai herbs and spices to enhance the flavor? A: Absolutely! Consider adding fresh galangal slices, Thai bird’s eye chilies, or a stalk of fresh turmeric for even more authentic flavor. Fresh makrut lime leaves (another name for kaffir lime leaves) add a wonderful citrusy note if you can find them. Just remember to remove these aromatics before serving.
Q: How do I store leftover curry paste if I buy a large container? A: Curry paste freezes beautifully! Portion it into an ice cube tray (about 1 tablespoon per cube), freeze until solid, then transfer the cubes to a freezer bag. Label with the date and type of curry paste. Use frozen curry paste within 6 months for the best flavor. No need to thaw before using in recipes.