When I first started baking seriously, I constantly found myself in the middle of a recipe only to realize I was out of buttermilk. After countless trips to the grocery store and several failed attempts at substitutions, I decided to master the art of making buttermilk from scratch. What I discovered changed my baking game forever – and I’m excited to share everything I’ve learned with you.
Making buttermilk at home isn’t just about convenience; it’s about understanding one of baking’s most versatile ingredients and having complete control over its quality and freshness. Whether you’re a seasoned baker or just starting your culinary journey, this comprehensive guide will transform how you approach buttermilk in your kitchen.
Understanding Buttermilk: More Than Just Sour Milk
Before diving into the how-to, let me explain what buttermilk actually is. Traditional buttermilk was the liquid left behind after churning butter from cream. Today’s commercial buttermilk is quite different – it’s cultured buttermilk, made by adding bacterial cultures to regular milk.
Traditional Buttermilk : The liquid remaining after churning butter from cream, naturally tangy and thin in consistency
Cultured Buttermilk : Regular milk that has been fermented with lactic acid bacteria, creating the characteristic tangy flavor and thick texture
Acidified Buttermilk : Milk combined with an acid (like lemon juice or vinegar) to mimic the properties of cultured buttermilk
The beauty of homemade buttermilk lies in its versatility. I can control the tanginess, adjust the consistency, and ensure it’s always fresh when I need it. Plus, it’s significantly more economical than buying store-bought versions, especially if you bake frequently.
Method 1: The Quick Acid Method (My Go-To Technique)
This is my favorite method because it’s foolproof and takes just five minutes. I use this technique whenever I need buttermilk immediately for a recipe.
Ingredients You’ll Need:
| Ingredient | Amount | Purpose |
|---|---|---|
| Whole milk (room temperature) | 1 cup | Base liquid – provides richness and body |
| Fresh lemon juice OR white vinegar | 1 tablespoon | Acid component – creates the tangy flavor and causes milk proteins to curdle |
| Fine sea salt (optional) | 1/8 teaspoon | Enhances flavor and mimics commercial buttermilk taste |
Visit Amazon for any required items
Step-by-Step Process:
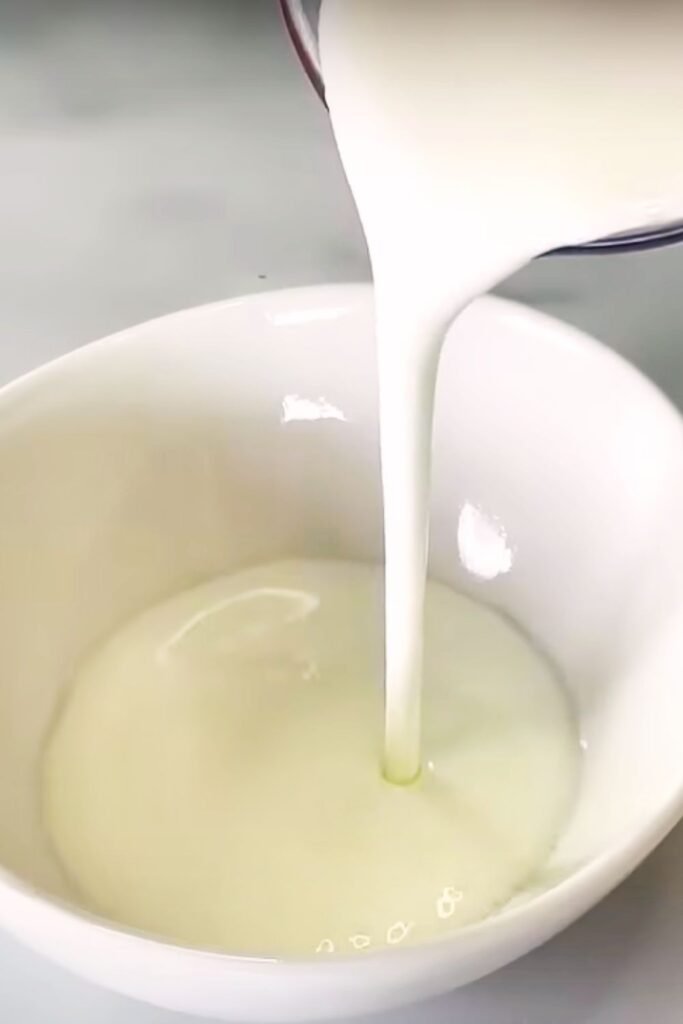
- Prepare your milk: Pour the milk into a clean glass measuring cup or bowl. I always use room temperature milk because cold milk doesn’t curdle as effectively, and the acid integration is slower.
- Add the acid: Slowly drizzle in your chosen acid while gently stirring. I prefer lemon juice for its clean, bright flavor, but white vinegar works equally well and has a more neutral taste.
- The waiting game: Let the mixture sit undisturbed for 5-10 minutes. You’ll notice the milk beginning to curdle and thicken – this is exactly what we want.
- Check for readiness: The buttermilk is ready when it appears slightly chunky and has thickened noticeably. It should coat a spoon lightly and have a pleasant, tangy aroma.

Pro Tips for Perfect Results:
- Temperature matters: Room temperature milk curdles faster and more evenly than cold milk
- Quality counts: Use the freshest milk possible – older milk may not curdle properly
- Timing is key: Don’t rush the process; proper curdling takes time
- Gentle handling: Stir minimally to avoid breaking up the curds too much
Visit Amazon for any required items
Method 2: The Cultured Approach (For Traditional Flavor)
When I want authentic, deeply flavored buttermilk, I use this traditional fermentation method. It takes longer but produces superior results for special recipes.
What You’ll Need:
| Component | Quantity | Notes |
|---|---|---|
| Whole milk | 2 cups | Must be pasteurized, not ultra-pasteurized |
| Commercial buttermilk (starter) | 2 tablespoons | Choose high-quality, active culture buttermilk |
| Clean mason jar | 1 quart size | Glass containers work best for fermentation |
Visit Amazon for any required items
The Fermentation Process:
- Heat the milk: Warm the milk to 110°F (43°C) – just barely warm to the touch. I use a candy thermometer for precision because temperature is crucial for proper culturing.
- Add the starter: Whisk in the commercial buttermilk thoroughly. This introduces the live cultures that will ferment your milk.
- Create the environment: Cover the jar with a clean kitchen towel or cheesecloth. Secure with a rubber band to allow airflow while keeping contaminants out.
- Fermentation time: Let it sit at room temperature (68-72°F) for 12-24 hours. Warmer environments speed up the process, while cooler temperatures slow it down.
- Check for completion: The buttermilk is ready when it’s thick, tangy, and coats a spoon. It should smell pleasantly sour, not off or spoiled.
Method 3: The Cream-to-Buttermilk Traditional Method
This is the historical method I learned from my grandmother. It’s time-consuming but produces the most authentic buttermilk with unmatched flavor complexity.
Traditional Churning Process:
Heavy cream preparation: Start with 2 cups of heavy cream at room temperature. The cream must be fresh and of high quality.
Churning technique: Using a butter churn, stand mixer with whisk attachment, or even a mason jar, agitate the cream until it separates into butter and buttermilk. This process typically takes 10-20 minutes depending on your method.
Separation and straining: Once the butter forms, strain the liquid through a fine-mesh sieve. This liquid is your traditional buttermilk – thin, tangy, and incredibly flavorful.
Visit Amazon for any required items
Troubleshooting Common Issues
Over the years, I’ve encountered various challenges when making buttermilk. Here are the most common problems and my solutions:
Problem-Solution Matrix:
| Issue | Cause | My Solution |
|---|---|---|
| Milk won’t curdle | Temperature too cold, acid too weak | Use room temperature milk, increase acid by 1/2 teaspoon |
| Too thin consistency | Insufficient acid, low-fat milk | Add more acid gradually, use whole milk |
| Overly sour taste | Too much acid, over-fermentation | Reduce acid next time, monitor fermentation closely |
| Grainy texture | Over-stirring, temperature fluctuations | Stir gently, maintain consistent temperature |
| No tangy flavor | Inactive cultures, insufficient time | Use fresh starter, extend fermentation time |
Storage and Shelf Life Guidelines
Proper storage is crucial for maintaining quality and safety. I’ve developed a system that ensures my homemade buttermilk stays fresh and flavorful.
Storage Best Practices:
Refrigeration requirements: Store all homemade buttermilk in the refrigerator immediately after preparation. Use clean, airtight glass containers to prevent contamination and flavor absorption.
Shelf life expectations:
- Acid method buttermilk: 3-5 days
- Cultured buttermilk: 1-2 weeks
- Traditional churned buttermilk: 5-7 days
Quality indicators: Fresh buttermilk should smell tangy but pleasant, with no off odors. The texture should be smooth with small, soft curds. Discard if you notice any unusual colors, strong unpleasant odors, or mold growth.
Using Your Homemade Buttermilk
The versatility of homemade buttermilk extends far beyond baking. I use it in numerous applications throughout my kitchen adventures.

Baking Applications:
Pancakes and waffles: The acid in buttermilk reacts with baking soda to create incredibly fluffy, tender results. I never make pancakes without it anymore.
Biscuits and scones: Buttermilk creates the perfect tender crumb while adding a subtle tangy flavor that complements both sweet and savory preparations.
Cakes and quick breads: The acidity tenderizes gluten, resulting in moist, tender baked goods with extended shelf life.
Cooking Uses:
Marinades: The acid in buttermilk breaks down proteins, making it excellent for tenderizing chicken, pork, or even vegetables before cooking.
Salad dressings: Buttermilk creates creamy, tangy dressings without the heaviness of mayonnaise-based alternatives.
Soups and sauces: Add richness and tang to cream soups or use as a base for herb-based sauces.
Visit Amazon for any required items
Nutritional Benefits and Considerations
Understanding the nutritional profile of buttermilk helps me make informed decisions about incorporating it into various recipes and dietary plans.
Nutritional Comparison Table:
| Nutrient (per cup) | Homemade Buttermilk | Commercial Buttermilk | Whole Milk |
|---|---|---|---|
| Calories | 152 | 98 | 150 |
| Protein (g) | 8.1 | 8.1 | 7.9 |
| Fat (g) | 8.2 | 2.2 | 8.1 |
| Carbohydrates (g) | 12.0 | 11.7 | 11.7 |
| Calcium (mg) | 282 | 284 | 276 |
| Probiotics | Variable | Present | None |
Health benefits: Buttermilk contains beneficial probiotics (especially the cultured version), which support digestive health. The fermentation process also makes some nutrients more bioavailable and easier to digest.
Dietary considerations: Those with lactose intolerance often tolerate buttermilk better than regular milk because the fermentation process breaks down some of the lactose.
Advanced Techniques and Variations
As I’ve grown more confident with buttermilk making, I’ve experimented with various modifications to create unique flavors and properties.
Flavor Variations:
Herb-infused buttermilk: Add fresh herbs like dill, chives, or parsley during the culturing process for savory applications.
Vanilla buttermilk: Include a small amount of vanilla extract for sweet preparations and dessert recipes.
Spiced buttermilk: Incorporate warming spices like cardamom or cinnamon during fermentation for international flavor profiles.
Consistency Modifications:
Thick buttermilk: Use heavy cream instead of milk for an ultra-rich, thick buttermilk perfect for luxury baking applications.
Light buttermilk: Combine low-fat milk with a small amount of cream to balance richness with lighter consistency.
Scaling Recipes for Different Needs
Whether I’m baking for two or preparing for a large gathering, I’ve learned to efficiently scale buttermilk production to match my needs.
Scaling Guidelines:
| Yield Needed | Milk Amount | Acid Amount | Notes |
|---|---|---|---|
| 1/2 cup | 1/2 cup | 1.5 teaspoons | Perfect for single recipe |
| 1 cup | 1 cup | 1 tablespoon | Standard batch size |
| 2 cups | 2 cups | 2 tablespoons | Great for multiple recipes |
| 1 quart | 4 cups | 4 tablespoons | Batch cooking preparation |
Visit Amazon for any required items
Cost Analysis: Homemade vs. Store-Bought
Making buttermilk at home offers significant savings, especially for frequent bakers. I’ve calculated the costs to help you understand the financial benefits.
Cost Comparison:
Homemade buttermilk cost: Approximately $0.75 per cup (using whole milk and lemon juice) Store-bought buttermilk cost: Approximately $1.25-$1.50 per cup Annual savings: For someone using 2 cups monthly, savings of approximately $12-18 per year
The savings increase dramatically if you bake frequently or have specific dietary requirements that necessitate higher-quality ingredients.
Frequently Asked Questions
Q: Can I use non-dairy milk to make buttermilk? A: Yes, I’ve successfully made buttermilk using full-fat coconut milk, cashew milk, and oat milk. The key is choosing a milk with sufficient fat content and protein to curdle properly. Coconut milk works best in my experience.
Q: Why does my buttermilk sometimes taste too sour? A: Over-acidification is usually the culprit. I recommend starting with less acid and gradually increasing until you achieve your preferred flavor balance. Also, ensure you’re not over-fermenting cultured versions.
Q: Can I freeze homemade buttermilk? A: While possible, I don’t recommend freezing buttermilk as it separates upon thawing and loses its smooth texture. If you must freeze it, plan to use it only in cooked applications where texture isn’t critical.
Q: How do I know if my buttermilk has gone bad? A: Trust your senses. Bad buttermilk will have an unpleasant, sharp odor (different from the normal tangy smell), may show signs of mold, or taste excessively sour or bitter. When in doubt, discard it.
Q: Can I use my homemade buttermilk as a starter for the next batch? A: Absolutely! This is one of my favorite techniques for maintaining a continuous supply. Use 2-3 tablespoons of your cultured buttermilk as starter for the next batch. However, after 4-5 generations, I recommend starting fresh with commercial buttermilk to maintain culture viability.
Q: What’s the difference between using lemon juice and vinegar? A: Both work effectively, but lemon juice imparts a slightly brighter, more citrusy flavor, while white vinegar provides a cleaner, more neutral tang. I choose based on the final application – lemon juice for sweet preparations, vinegar for savory ones.
Q: Can I make buttermilk with ultra-pasteurized milk? A: Ultra-pasteurized milk doesn’t culture as well due to the high-heat treatment that affects protein structure. I always use regular pasteurized milk for best results, especially when making cultured buttermilk.
Q: How can I make my buttermilk thicker? A: For thicker consistency, use whole milk or add a small amount of heavy cream. You can also let acid-method buttermilk sit longer (up to 15 minutes) for more pronounced curdling, or strain cultured buttermilk through cheesecloth to remove excess whey.
Making buttermilk from scratch has revolutionized my baking and cooking. The control over flavor, consistency, and freshness, combined with the cost savings and convenience of always having it available, makes this skill invaluable in any kitchen. Whether you choose the quick acid method for immediate needs or invest time in culturing for complex flavors, homemade buttermilk will elevate your culinary creations and give you a deeper understanding of this essential ingredient.
Start with the simple acid method today, and I guarantee you’ll be amazed at the difference fresh, homemade buttermilk makes in your favorite recipes. Once you experience the superior flavor and texture, store-bought buttermilk will become a thing of the past.