I’ve been making homemade garlic chili crisp oil for over five years now, and I can confidently say it’s one of those condiments that transforms everything it touches. This fiery, aromatic oil has become my secret weapon in the kitchen, elevating simple dishes into restaurant-quality meals. Whether you’re drizzling it over dumplings, stirring it into noodles, or using it as a dip for fresh bread, this homemade version will blow any store-bought alternative out of the water.
The beauty of making your own garlic chili crisp lies in the control you have over every ingredient. You can adjust the heat level, customize the aromatics, and create a version that perfectly suits your palate. Plus, the intoxicating smell that fills your kitchen during the cooking process is absolutely worth the effort alone.
What Makes Garlic Chili Crisp Oil Special
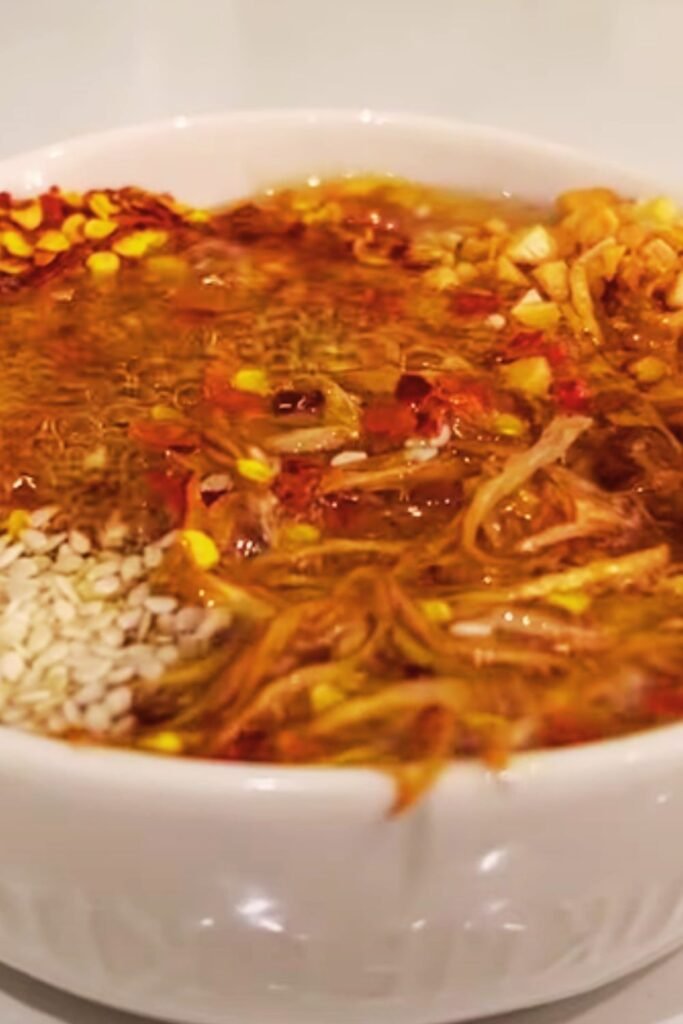
Garlic Chili Crisp Oil is a condiment that originated in Chinese cuisine, specifically popularized by brands like Lao Gan Ma. It’s essentially an infused oil loaded with crispy garlic, chili flakes, and various aromatics that create layers of flavor and texture.
Umami Bomb refers to the intense savory flavor that comes from the combination of fermented elements, nuts, and slow-cooked aromatics in the oil.
Maillard Reaction is the chemical process that occurs when the garlic and other ingredients are slowly fried, creating complex flavors and that irresistible golden-brown color.
Heat Level Customization means you can control the spiciness by choosing different types of chili flakes and adjusting quantities to your preference.
The magic happens when oil is slowly heated with aromatics, allowing flavors to infuse while creating those coveted crispy bits that give the condiment its signature texture. Unlike simple chili oils, this version includes substantial solids that add both flavor and satisfying crunch to every spoonful.
Essential Ingredients for Perfect Garlic Chili Crisp
The foundation of exceptional garlic chili crisp starts with quality ingredients. I’ve experimented with countless variations, and these components consistently deliver the best results:
Primary Ingredients
- Fresh Garlic: 8-10 large cloves, minced finely
- Neutral Oil: 1 cup (vegetable, canola, or peanut oil work best)
- Chili Flakes: 3-4 tablespoons (mix of Korean gochugaru and Sichuan chili flakes)
- Soy Sauce: 2 tablespoons (adds depth and umami)
- Rice Vinegar: 1 tablespoon (balances richness)
- Sugar: 1 teaspoon (helps with caramelization)
Flavor Enhancers
- Shallots: 2 medium, thinly sliced
- Ginger: 1-inch piece, minced
- Sesame Seeds: 2 tablespoons, toasted
- Peanuts: 1/4 cup, roughly chopped
- Star Anise: 1 whole pod
- Sichuan Peppercorns: 1/2 teaspoon
- Bay Leaves: 2 pieces
- Salt: 1/2 teaspoon

Detailed Ingredient Analysis
| Ingredient | Purpose | Substitution Options | Storage Tips |
|---|---|---|---|
| Fresh Garlic | Primary flavor base, creates crispy texture | Garlic powder (reduce by 75%) | Store in cool, dry place |
| Neutral Oil | Cooking medium, carries flavors | Avocado oil, sunflower oil | Room temperature storage |
| Chili Flakes | Heat and color | Crushed red pepper, chipotle flakes | Airtight container, away from light |
| Soy Sauce | Umami depth | Tamari, coconut aminos | Refrigerate after opening |
| Shallots | Sweet onion flavor | Yellow onion, scallion whites | Store in pantry, use within 2 weeks |
| Sesame Seeds | Nutty flavor, texture | Sunflower seeds, pine nuts | Freeze for extended freshness |
| Peanuts | Protein, crunch | Cashews, almonds | Airtight container, check for rancidity |
| Aromatics | Complex flavor layers | Adjust to taste preferences | Whole spices last longer |
Step-by-Step Cooking Process
Preparation Phase
- Mise en Place: Prepare all ingredients before starting. Mince garlic finely, slice shallots thin, and measure out all spices. This dish moves quickly once you start cooking.
- Toast Aromatics: In a dry pan, lightly toast sesame seeds and peanuts until fragrant. Set aside. Toast whole spices (star anise, Sichuan peppercorns) for 30 seconds.
- Prep Chili Flakes: If using whole dried chilies, remove stems and seeds, then pulse in a food processor until you have coarse flakes.
Cooking Phase
- Heat Oil Slowly: In a heavy-bottomed saucepan, heat oil over medium-low heat. Add bay leaves and star anise to infuse the oil as it warms.
- Add Aromatics: When oil reaches 250°F (or when a piece of garlic sizzles gently), add minced garlic and ginger. Cook slowly, stirring frequently, until garlic turns golden and crispy (8-10 minutes).
- Incorporate Shallots: Add sliced shallots and continue cooking until they’re golden and crispy (5-7 minutes). The oil should be bubbling gently, not aggressively.
- Add Chili Flakes: Remove from heat and immediately add chili flakes, stirring constantly. The residual heat will toast the chilies without burning them.
- Final Seasonings: Stir in soy sauce, rice vinegar, sugar, salt, toasted sesame seeds, and peanuts. Mix thoroughly.
Temperature and Timing Guidelines
| Stage | Temperature | Duration | Visual Cues |
|---|---|---|---|
| Oil Heating | 250°F | 5-7 minutes | Gentle bubbling around test ingredient |
| Garlic Cooking | 250-275°F | 8-10 minutes | Golden brown, crispy edges |
| Shallot Addition | 275°F | 5-7 minutes | Translucent to golden |
| Chili Addition | Off heat | 1-2 minutes | Fragrant, darkened color |
| Final Assembly | Room temp | 5 minutes | All ingredients incorporated |
Troubleshooting Common Issues
Burnt Garlic: If your garlic turns dark brown or black, the oil was too hot. Start over – burnt garlic will make the entire batch bitter.
Insufficient Crispiness: Garlic and shallots need time to dehydrate in the oil. Don’t rush this process by increasing heat.
Too Mild: Add more chili flakes after cooking, or use spicier varieties like bird’s eye chilies.
Oil Separation: This is normal and actually desirable. The oil will separate from the solids – just stir before using.
Inconsistent Texture: Ensure all ingredients are cut to similar sizes for even cooking.
Flavor Variations and Customizations
Regional Variations
- Sichuan Style: Add more Sichuan peppercorns and fermented black beans
- Korean Inspired: Use more gochugaru and add a touch of fish sauce
- Southeast Asian: Include lemongrass and galangal during oil infusion
- Mexican Fusion: Add chipotle flakes and a squeeze of lime juice
Dietary Adaptations
- Nut-Free: Omit peanuts, double the sesame seeds
- Low-Sodium: Reduce soy sauce, add more vinegar for acidity
- Vegan: Ensure soy sauce is vegan (some contain fish)
- Keto-Friendly: Already naturally keto-compliant

Storage and Shelf Life
Proper storage is crucial for maintaining both flavor and safety of your homemade garlic chili crisp oil.
Immediate Storage
Transfer the cooled oil to sterilized glass jars, leaving about 1/2 inch of headspace. Ensure all solids are submerged under oil to prevent spoilage.
Refrigeration Guidelines
- Fresh Garlic Version: Store in refrigerator for up to 1 month
- Shelf-Stable Version: Can be kept at room temperature for 2 weeks if properly sterilized
- Freezer Storage: Freeze in ice cube trays for portion control, keeps for 6 months
Safety Considerations
Always use clean utensils when scooping from the jar. Contamination can lead to botulism, especially with garlic-infused oils. When in doubt, refrigerate.
Nutritional Information
| Nutrient | Per 1 Tablespoon | % Daily Value |
|---|---|---|
| Calories | 125 | 6% |
| Total Fat | 14g | 21% |
| Saturated Fat | 2g | 10% |
| Sodium | 85mg | 4% |
| Carbohydrates | 1g | <1% |
| Protein | 1g | 2% |
| Vitamin E | 2mg | 13% |
| Healthy Fats | 12g | – |
Serving Suggestions and Pairings
Asian Dishes
- Drizzle over steamed dumplings or potstickers
- Mix into ramen or pho for extra heat
- Use as a dipping sauce for spring rolls
- Stir into fried rice or noodle dishes
Western Applications
- Spread on pizza before baking
- Mix into pasta for a spicy oil base
- Use as a marinade for grilled meats
- Add to salad dressings for complexity
Creative Uses
- Swirl into cream soups
- Mix with mayonnaise for spicy aioli
- Use as a finishing oil for roasted vegetables
- Incorporate into compound butter
Professional Tips from My Kitchen
After years of perfecting this recipe, I’ve learned several tricks that make the difference between good and exceptional garlic chili crisp:
Temperature Control: Use a candy thermometer to monitor oil temperature. Consistent heat prevents burnt garlic and ensures even cooking.
Ingredient Quality: Invest in good chili flakes – they’re the star of the show. Korean gochugaru provides excellent color and moderate heat.
Timing Matters: Don’t add all ingredients at once. Each component has its optimal cooking time and temperature.
Patience is Key: Slow cooking develops complex flavors. Rushing the process results in a one-dimensional condiment.
Tasting Notes: Keep a small spoon nearby to taste as you go. Adjust seasonings while the oil is still warm for better incorporation.
Questions and Answers
Q: Can I make this without fresh garlic? I don’t recommend it. Fresh garlic provides both flavor and the signature crispy texture that makes this condiment special. Garlic powder won’t give you the same results.
Q: How do I know when the oil is the right temperature? Drop a small piece of garlic into the oil. It should sizzle gently and slowly turn golden. If it bubbles aggressively or browns quickly, the oil is too hot.
Q: Can I use olive oil instead of neutral oil? While possible, I don’t recommend extra virgin olive oil as it has a low smoke point and strong flavor that can overpower the other ingredients. Light olive oil works better if you prefer olive oil.
Q: My chili crisp turned out too salty. How can I fix it? Add more oil to dilute the saltiness, or stir in a small amount of sugar to balance the flavors. You can also add more chili flakes to restore the heat balance.
Q: Is it normal for the oil to separate from the solids? Yes, this is completely normal and expected. The oil naturally separates from the solid ingredients. Simply stir before each use.
Q: Can I make a larger batch? Absolutely! This recipe scales well. Just maintain the same ratios and be patient with the cooking process. Larger batches may take slightly longer to cook evenly.
Q: What’s the best way to sterilize jars for storage? Wash jars in hot soapy water, then place them in a 200°F oven for 10 minutes. This ensures they’re completely clean and dry before filling.
Q: How can I make it spicier without adding more chili flakes? Try adding a small amount of cayenne pepper or hot sauce during the final assembly. You can also use spicier chili varieties like bird’s eye or habanero flakes.
Making homemade garlic chili crisp oil is one of those kitchen skills that pays dividends for months. Once you taste the difference between homemade and store-bought versions, you’ll never go back. The process is meditative, the results are spectacular, and the versatility is endless. I encourage you to start with this base recipe and then experiment with your own variations. Keep detailed notes of what works – you’ll want to recreate your perfect version again and again.
Remember, the key to exceptional chili crisp is patience, quality ingredients, and attention to detail. Take your time, trust the process, and soon you’ll have jars of liquid gold that will transform your cooking and impress everyone who tastes it.