There’s something absolutely magical about the first spoonful of authentic Hawaiian haupia that transports me straight to the islands, even when I’m thousands of miles away from those pristine beaches. I discovered this heavenly coconut pudding during my first trip to Maui, and it became my obsession to recreate that silky, tropical bliss in my own kitchen.
Haupia isn’t just any coconut dessert – it’s a cultural treasure that represents the heart of Hawaiian hospitality and tradition. This delicate, ivory-colored pudding has been gracing luau tables and local plate lunches for generations, and I’m thrilled to share my perfected recipe that captures every nuance of this beloved treat.
What Exactly is Haupia?
Haupia (pronounced “how-pee-ah”) is a traditional Hawaiian coconut pudding that’s been a cornerstone of island cuisine for centuries. Originally, Native Hawaiians created this dessert using fresh coconut milk, arrowroot starch, and natural sweeteners like sugar cane juice.
Traditional preparation involved extracting milk from freshly grated coconuts, then thickening it with pia (Polynesian arrowroot). The mixture was cooked over gentle heat until it achieved that signature creamy consistency that melts on your tongue.
Modern haupia maintains the same principles but adapts to contemporary kitchens using readily available ingredients like cornstarch or agar-agar for thickening, while preserving that authentic coconut flavor that makes this dessert so irresistible.
Cultural significance runs deep – haupia appears at virtually every Hawaiian celebration, from birthday parties to wedding receptions, representing prosperity and the sweetness of life.
Essential Ingredients for Perfect Haupia
Creating authentic haupia requires just a handful of quality ingredients, but choosing the right ones makes all the difference in achieving that restaurant-quality result I’ve come to love.
| Ingredient | Quantity | Purpose | Best Type/Brand |
|---|---|---|---|
| Coconut Milk | 2 cans (13.5 oz each) | Primary flavor base | Full-fat canned (Thai Kitchen preferred) |
| Cornstarch | 6 tablespoons | Thickening agent | Pure cornstarch, no additives |
| Sugar | 1/2 cup | Sweetener | Granulated white sugar |
| Salt | 1/4 teaspoon | Flavor enhancer | Fine sea salt |
| Vanilla Extract | 1/2 teaspoon | Aroma booster | Pure vanilla extract |
| Water | 1/2 cup | Consistency adjuster | Filtered water |
Ingredient Selection Tips
Coconut milk quality determines everything. I always choose full-fat canned coconut milk over light versions because the richness creates that luxurious mouthfeel. Thai Kitchen and Chaokoh brands consistently deliver the creaminess I need.
Cornstarch versus alternatives – while traditional recipes used arrowroot, cornstarch produces more reliable results in modern kitchens. It creates a smoother texture without the slight grittiness that sometimes occurs with other thickeners.
Sugar considerations matter more than you might think. Granulated white sugar dissolves completely and doesn’t interfere with the pristine white color that makes haupia so visually appealing.
Step-by-Step Haupia Preparation
My foolproof method ensures silky-smooth results every single time. I’ve refined this technique through countless batches, learning from both successes and those early disasters that taught me valuable lessons.
Phase 1: Creating the Slurry
- Combine dry ingredients in a medium mixing bowl, whisking together cornstarch, sugar, and salt until no lumps remain
- Add water gradually while whisking continuously to create a smooth slurry without any cornstarch pockets
- Check consistency – the mixture should flow like heavy cream without any granular texture
- Set aside while preparing the coconut base
Phase 2: Heating the Coconut Milk
- Pour coconut milk into a heavy-bottomed saucepan, reserving about 1/4 cup for later adjustment
- Heat gently over medium-low heat, stirring occasionally to prevent skin formation on the surface
- Watch for steam – you want the milk hot but not boiling, as excessive heat can cause separation
- Add vanilla extract once the milk is warmed through
Phase 3: The Critical Combining Process
- Temper the slurry by slowly drizzling about 1/2 cup of hot coconut milk into the cornstarch mixture while whisking vigorously
- Continue whisking for 30 seconds to ensure complete integration
- Pour tempered mixture back into the saucepan with remaining coconut milk
- Whisk constantly while cooking over medium-low heat
Phase 4: Achieving Perfect Consistency
- Cook while stirring for 8-12 minutes until the mixture thickens significantly and coats the back of a spoon
- Test thickness by drawing your finger across the spoon – the line should remain clear for 2-3 seconds
- Adjust consistency if needed by adding reserved coconut milk for thinner texture or cooking longer for thicker consistency
- Remove from heat immediately once desired thickness is achieved
Phase 5: Final Preparation and Setting
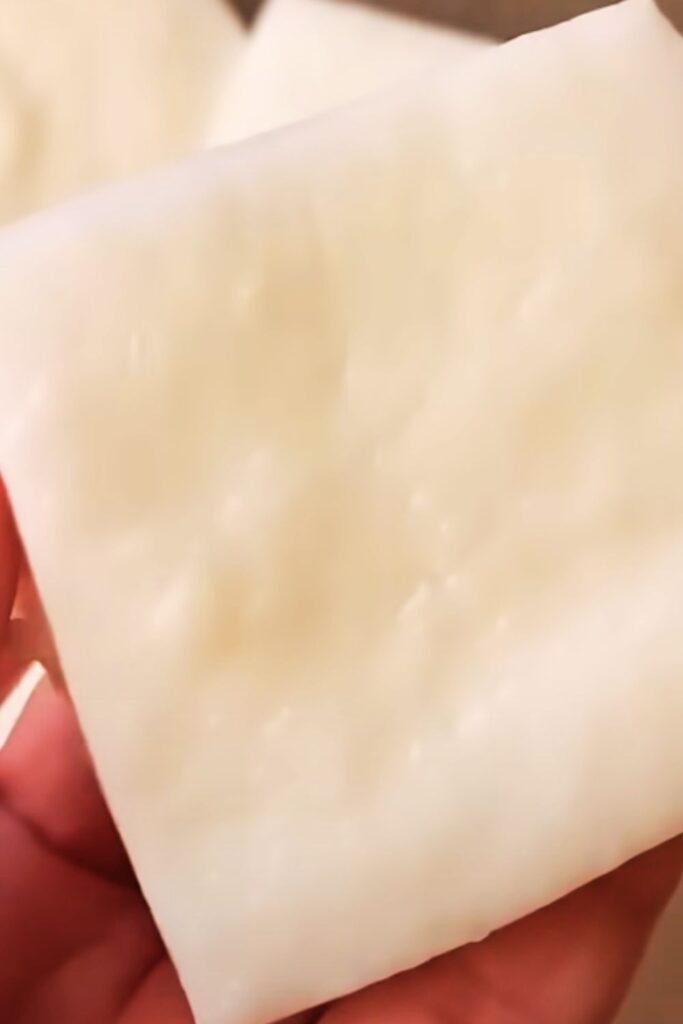
- Strain mixture through a fine-mesh sieve to eliminate any lumps or skin particles
- Pour into prepared pan – I use an 8×8 inch dish lined with plastic wrap for easy removal
- Smooth surface with an offset spatula to ensure even thickness
- Cover tightly with plastic wrap, pressing directly onto the surface to prevent skin formation
- Refrigerate for minimum 4 hours, though overnight produces the best texture
Troubleshooting Common Haupia Challenges
Through my years of haupia-making, I’ve encountered virtually every possible issue and developed solutions that guarantee success.
Lumpy Texture Solutions
Prevention approach: Always whisk dry ingredients thoroughly before adding liquid, and temper the slurry gradually with hot coconut milk.
Fix for existing lumps: Strain the mixture through a fine-mesh sieve, pressing solids through with the back of a spoon, then reheat gently while whisking.
Consistency Problems
Too thin results: Return mixture to heat and cook longer while stirring constantly. The thickening happens gradually, so patience is essential.
Overly thick outcome: Whisk in additional warm coconut milk, one tablespoon at a time, until desired consistency returns.
Separation Issues
Cause identification: Usually results from excessive heat or insufficient stirring during the cooking process.
Recovery method: Remove from heat immediately, whisk vigorously off the burner, then strain if necessary before proceeding with setting.
Nutritional Profile and Dietary Considerations
Understanding haupia’s nutritional content helps me make informed decisions about serving sizes and dietary accommodations.
| Nutrient | Per Serving (1/12 of recipe) | Daily Value % |
|---|---|---|
| Calories | 145 | 7% |
| Total Fat | 11g | 14% |
| Saturated Fat | 10g | 50% |
| Carbohydrates | 12g | 4% |
| Sugar | 11g | – |
| Protein | 2g | 4% |
| Fiber | 0g | 0% |
| Sodium | 55mg | 2% |
Dietary Modifications
Vegan compatibility: Traditional haupia is naturally vegan when made with plant-based ingredients, making it perfect for plant-based celebrations.
Gluten-free status: All standard haupia ingredients are naturally gluten-free, though always verify cornstarch packaging for cross-contamination warnings.
Reduced sugar options: I’ve successfully substituted up to half the sugar with coconut palm sugar or maple syrup, adjusting liquid ratios accordingly.
Lower fat alternatives: Light coconut milk works but produces a less rich result – I recommend using at least one can of full-fat milk for optimal texture.
Creative Serving and Presentation Ideas
The beauty of haupia lies not just in its flavor but in its versatility for creative presentations that wow guests every time.
Traditional Hawaiian Style
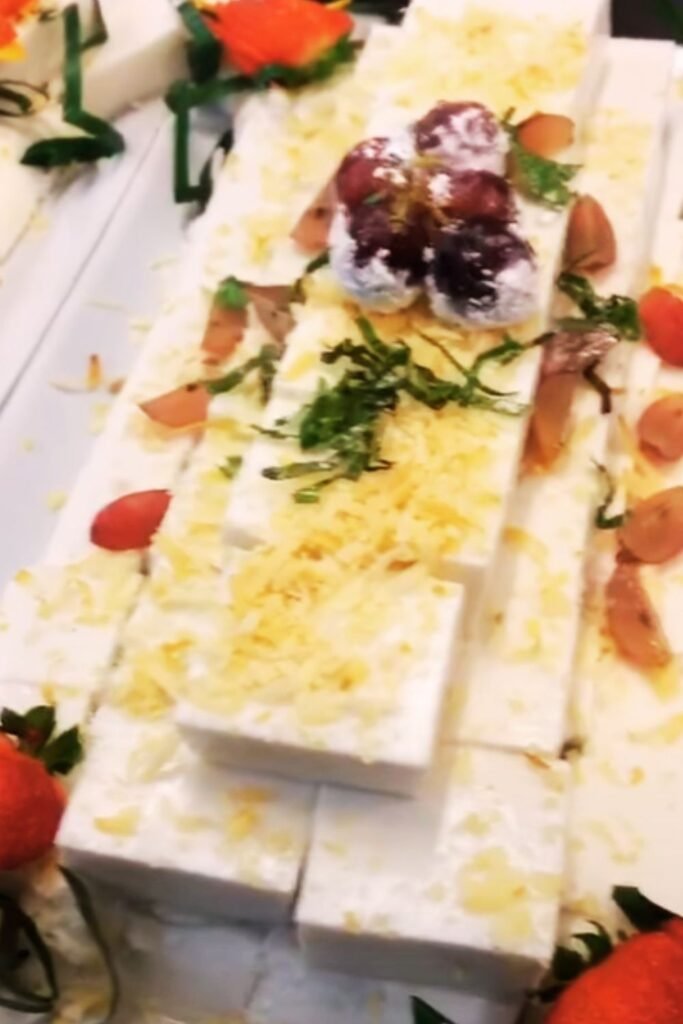
Square portions cut into neat 2-inch squares and served on banana leaves create an authentic island experience that honors the dessert’s cultural roots.
Garnish options include toasted coconut flakes, fresh pineapple chunks, or a delicate sprinkle of toasted sesame seeds for textural contrast.
Modern Plating Techniques
Individual ramekins create elegant single-serving presentations perfect for dinner parties or special occasions.
Layered presentations alternate haupia with fresh fruit purees or chocolate ganache for sophisticated flavor combinations.
Piped presentations using pastry bags create decorative swirls and professional-looking dessert plates.

Tropical Fusion Combinations
My favorite serving suggestions incorporate complementary tropical flavors:
- Fresh mango slices with lime zest and mint leaves
- Grilled pineapple rings with macadamia nuts and coconut flakes
- Passion fruit coulis drizzled artistically around the plate
- Tropical fruit salad featuring papaya, kiwi, and starfruit
- Coconut tuile cookies for elegant textural contrast
Haupia Variations and Flavor Innovations
While traditional haupia is perfection itself, I’ve developed several variations that add exciting twists while respecting the dessert’s cultural heritage.
Chocolate Haupia Fusion
Adding 3 tablespoons of unsweetened cocoa powder creates a rich chocolate-coconut combination that’s absolutely divine. I fold in the cocoa with the cornstarch for even distribution.
Tropical Fruit Infusions
Mango haupia incorporates 1/2 cup of pureed ripe mango, creating a sunset-colored dessert with intensified tropical flavor.
Pineapple variation uses 1/3 cup of pineapple juice as part of the liquid, adding subtle tartness that balances the coconut richness.
Texture Modifications
Haupia parfaits layer the pudding with crushed graham crackers and whipped coconut cream for a tropical take on classic parfaits.
Frozen haupia pops poured into popsicle molds create refreshing summer treats that kids absolutely love.
Storage, Shelf Life, and Make-Ahead Tips
Proper storage ensures your haupia maintains its perfect texture and flavor for several days, making it ideal for party planning and meal prep.
Refrigeration Guidelines
Optimal storage involves keeping haupia covered tightly in the refrigerator where it maintains peak quality for up to 5 days.
Container selection matters – shallow containers prevent the top layer from becoming too firm while deeper containers maintain consistent texture throughout.
Serving temperature is crucial – remove from refrigeration 10-15 minutes before serving for the ideal creamy consistency.
Make-Ahead Strategies
Timeline planning: I always make haupia at least 24 hours ahead for parties, allowing flavors to meld completely and ensuring firm setting.
Batch preparation: The recipe doubles or triples easily for large gatherings, though I recommend using multiple pans rather than one oversized container.
Transport considerations: For potluck events, I transport haupia in the same pan it set in, covered with plastic wrap and placed in an insulated cooler.
Frequently Asked Questions About Haupia
Q: Can I make haupia without canned coconut milk? I’ve experimented with fresh coconut milk, and while it’s possible, canned coconut milk provides more consistent results and convenience. Fresh coconut milk can vary significantly in fat content, affecting the final texture.
Q: Why did my haupia turn out grainy? Graininess usually results from insufficient whisking during the tempering process or cooking over too high heat. Always use medium-low heat and whisk constantly to prevent the cornstarch from clumping.
Q: How long does haupia take to set completely? Minimum 4 hours for basic firmness, but I recommend overnight setting for the best texture. The longer setting time allows the starches to fully hydrate and create that signature smooth consistency.
Q: Can I freeze haupia for longer storage? While technically possible, freezing changes the texture significantly. The pudding becomes slightly grainy and loses that silky mouthfeel that makes haupia special. I recommend enjoying it fresh within 5 days.
Q: What’s the difference between haupia and other coconut puddings? Haupia has a firmer, more set consistency than most coconut puddings, and traditionally uses minimal ingredients to let the coconut flavor shine. It’s less sweet than many Western coconut desserts and has a more refined texture.
Q: Can I make haupia sugar-free? Yes, I’ve successfully used sugar substitutes like erythritol or stevia, though you’ll need to adjust quantities since these sweeteners have different intensities. The texture remains nearly identical with most sugar substitutes.
Q: Why is my haupia too soft to cut into squares? This indicates either insufficient cooking time or incorrect ratios. The mixture should coat a spoon heavily before removing from heat. You can return soft haupia to the stove and cook longer while stirring.
Q: What tools do I absolutely need for making haupia? Essential tools include a heavy-bottomed saucepan, whisk, fine-mesh strainer, and measuring cups. A candy thermometer helps maintain proper temperature, though it’s not strictly necessary with careful attention.
Creating perfect haupia has become one of my greatest kitchen joys, connecting me to Hawaiian culture while sharing this incredible dessert with family and friends. The simplicity of ingredients belies the sophisticated flavor and texture that emerges from careful technique and attention to detail.
Every batch I make reminds me of that first taste in Maui – the way the coconut flavor bloomed across my palate, the perfect balance of sweetness and richness, and that incredibly smooth texture that seems to melt away just as you want to savor it longer. Now you have all the knowledge and techniques to create that same magical experience in your own kitchen, bringing a taste of aloha to any occasion.