Have you ever craved the soft, pillowy texture of traditional roti but needed a gluten-free alternative? I certainly have! After countless experiments in my kitchen, I’ve perfected a gluten-free roti recipe that doesn’t compromise on taste or texture. This soy-based flatbread has become a staple in my household, offering all the versatility of traditional roti without the gluten.
Why Gluten-Free Roti?
When I first discovered I needed to eliminate gluten from my diet, flatbreads were among the foods I missed most. Store-bought gluten-free options often lacked the authentic taste and flexibility I craved. That’s when I began experimenting with alternative flours.
Soy flour emerged as my secret weapon. Rich in protein and with a mild flavor profile, it creates a pliable dough that cooks into soft, foldable rotis. Whether you’re gluten-intolerant, have celiac disease, or simply looking to diversify your diet, these rotis will satisfy your flatbread cravings.
The Magic of Soy Flour
Before diving into the recipe, let’s understand what makes soy flour such an excellent choice for gluten-free rotis:
Soy Flour Benefits:
- High protein content (approximately 35-40%)
- Contains all essential amino acids
- Adds a subtle nutty flavor
- Creates an elastic texture that mimics gluten
- Provides excellent binding properties
- Rich in isoflavones and antioxidants
While pure soy flour can produce good results, I’ve found that blending it with other gluten-free flours creates the optimal texture. My tried-and-tested combination includes soy flour, rice flour, and a touch of tapioca starch for the perfect balance.
Essential Ingredients
For 6 medium-sized rotis, you’ll need:
| Ingredient | Quantity | Notes |
|---|---|---|
| Soy flour | 1 cup (120g) | Full-fat variety works best |
| White rice flour | 1/2 cup (75g) | Finely ground for smooth texture |
| Tapioca starch | 2 tablespoons (15g) | Adds elasticity |
| Xanthan gum | 1/2 teaspoon (2g) | Critical binding agent |
| Salt | 1/4 teaspoon (1g) | Adjust to taste |
| Warm water | 3/4 cup (180ml) | Approximately, adjust as needed |
| Oil | 2 tablespoons (30ml) | I prefer olive or avocado oil |
| Optional: dried herbs | 1 teaspoon | Rosemary, thyme, or fenugreek work well |
Equipment Needed
Before starting, ensure you have:
- Large mixing bowl
- Measuring cups and spoons
- Wooden spoon or spatula
- Clean work surface for rolling
- Parchment paper
- Rolling pin
- Cast iron skillet or non-stick pan
- Thin spatula for flipping
- Clean kitchen towel
Step-by-Step Preparation
Making the Dough
- In your large mixing bowl, combine soy flour, rice flour, tapioca starch, xanthan gum, and salt. Whisk thoroughly to ensure even distribution.
- Create a well in the center of your dry ingredients and add the oil.
- Gradually add warm water while mixing with a wooden spoon or your hands. Start with about 2/3 of the water and add more as needed.
- Mix until a soft, pliable dough forms. The dough should be slightly tacky but not sticky. If it’s too dry, add a tablespoon of water at a time. If too wet, add a sprinkle of rice flour.
- Knead the dough on a lightly floured surface (use rice flour) for about 3-4 minutes until smooth.
- Form the dough into a ball, coat with a thin layer of oil, and place it back in the bowl. Cover with a damp cloth and let it rest for 20-30 minutes. This resting period is crucial for the xanthan gum to fully hydrate and the dough to become more manageable.
Rolling the Rotis
Rolling gluten-free dough can be challenging, but I’ve developed some techniques that make it easier:
- Divide the rested dough into 6 equal portions and shape each into a ball.
- Place a piece of parchment paper on your work surface, sprinkle lightly with rice flour.
- Place one dough ball on the paper and gently flatten with your palm.
- Place another piece of parchment paper on top and roll the dough between the papers into a circle about 6-7 inches in diameter and 1/8 inch thick.
- For perfectly round rotis, use a plate or lid as a guide and trim the edges with a knife.
Pro tip: Unlike wheat flour rotis, these gluten-free rotis don’t need to be rolled paper-thin. A slightly thicker roti (around 1/8 inch) holds together better and still cooks beautifully.
Cooking the Rotis

- Heat a cast iron skillet or non-stick pan over medium-high heat. The pan must be thoroughly heated before cooking the first roti.
- Carefully peel the top parchment paper off your rolled roti. Place your hand under the bottom paper and flip the roti onto your palm.
- Gently peel off the second piece of parchment paper and carefully transfer the roti to the hot pan.
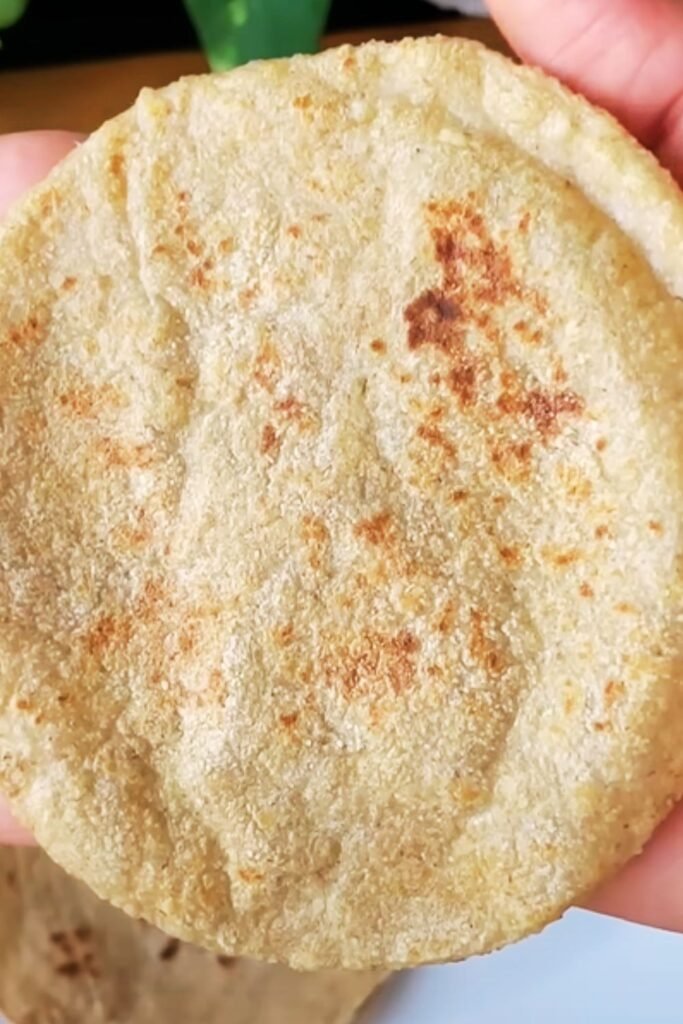
- Cook for about 45-60 seconds until small bubbles form on the surface and the bottom develops light golden spots.
- Flip and cook the other side for another 30-45 seconds.
- For the authentic slightly charred finish, you can place the roti directly on an open flame for a few seconds using tongs (optional but adds great flavor).
- Remove the roti and place it in a clean kitchen towel. Gently press or rub with a small amount of oil or ghee if desired.
- Repeat with the remaining dough balls, adjusting the heat as necessary.
- Stack the rotis inside the kitchen towel to keep them warm and soft.
Storage and Reheating
Unlike traditional wheat rotis, these gluten-free versions can be stored and reheated with excellent results:
| Storage Method | Duration | Notes |
|---|---|---|
| Room temperature | 4-6 hours | Keep wrapped in a towel |
| Refrigerator | 2-3 days | Store in airtight container with parchment between layers |
| Freezer | 1 month | Freeze with parchment paper between each roti |
To reheat refrigerated rotis:
- Sprinkle lightly with water
- Heat in a pan for 20-30 seconds per side
- Or microwave for 10-15 seconds between damp paper towels
For frozen rotis:
- Thaw at room temperature for 10-15 minutes
- Reheat in a pan with a sprinkle of water
- Or heat directly from frozen in a covered pan on low heat
Troubleshooting Common Issues
Even with the best recipe, gluten-free baking can sometimes be tricky. Here are solutions to common problems:
| Issue | Cause | Solution |
|---|---|---|
| Rotis crack when rolling | Dough too dry | Add more water, 1 teaspoon at a time |
| Dough too sticky | Too much water | Add more rice flour gradually |
| Rotis break when transferring | Rolled too thin | Make them slightly thicker |
| Rotis turn out hard | Overcooked | Reduce cooking time and heat |
| Rotis don’t puff | Pan not hot enough | Ensure pan is properly preheated |
| Uneven cooking | Uneven thickness | Practice consistent rolling technique |
Nutritional Information
For those watching their macros, here’s the approximate nutritional breakdown per roti:
| Nutrient | Amount | % Daily Value* |
|---|---|---|
| Calories | 142 | – |
| Protein | 6g | 12% |
| Carbohydrates | 18g | 6% |
| Fiber | 2.5g | 9% |
| Fat | 5g | 6% |
| Iron | 1.8mg | 10% |
| Calcium | 58mg | 4.5% |
| Potassium | 210mg | 4.5% |
*Based on a 2,000 calorie diet
Serving Suggestions
These versatile gluten-free rotis pair beautifully with numerous dishes:
- Dip into hearty vegetable curries or dals
- Wrap around grilled vegetables and hummus
- Serve alongside kebabs or tandoori dishes
- Use as a base for quick flatbread pizzas
- Fill with scrambled eggs and avocado for breakfast
- Serve with coconut chutney and sambar for a South Indian twist
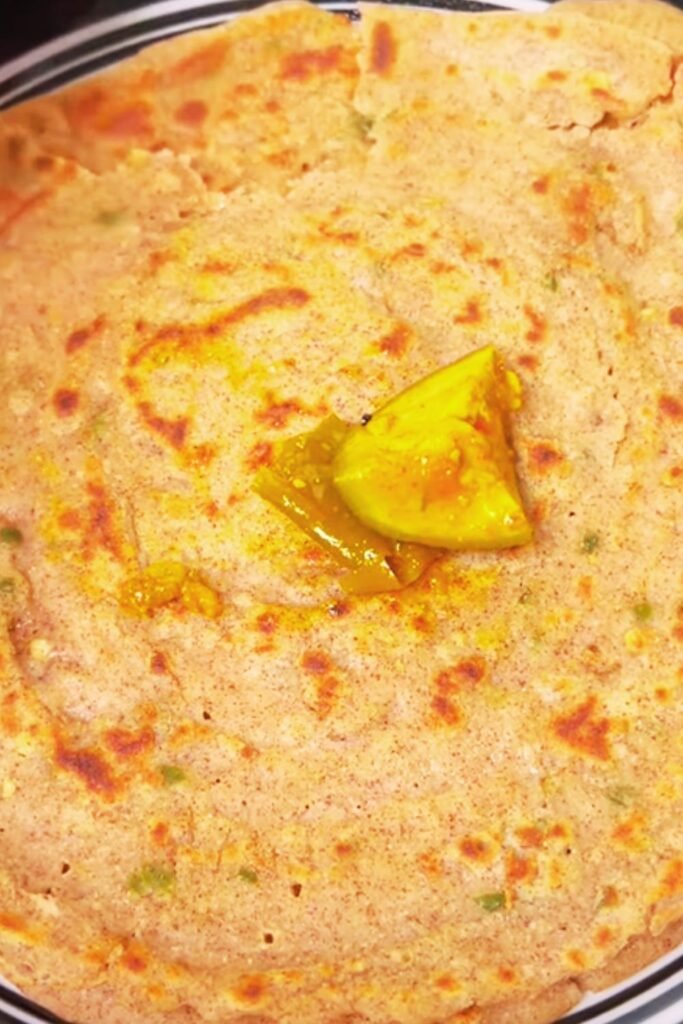
- Enjoy with plain yogurt and pickle for a simple meal
Variations to Try
Once you’ve mastered the basic recipe, consider these delicious variations:
Herb-Infused Rotis
Add 1 tablespoon of finely chopped fresh herbs like cilantro, mint, or dill to the dry ingredients.
Spiced Rotis
Incorporate 1/2 teaspoon of ground spices like cumin, coriander, turmeric, or garam masala for extra flavor.
High-Protein Version
Increase the soy flour to 1 1/2 cups and reduce rice flour to 1/4 cup for an even higher protein content.
Sweet Version
Add 1 tablespoon of coconut sugar and a pinch of cardamom for a subtly sweet option that pairs well with fruit compotes.
Multigrain Option
Replace half the rice flour with amaranth or millet flour for additional nutrition and a nuttier flavor.
Health Benefits
This gluten-free roti recipe offers several health benefits:
- High in protein: Soy flour provides complete protein with all essential amino acids.
- Good source of fiber: Contains more fiber than traditional wheat rotis.
- Lower glycemic index: The combination of protein and fiber helps maintain stable blood sugar levels.
- Rich in isoflavones: Soy contains compounds that may support heart health.
- Allergen-friendly: Free from gluten, dairy, nuts, and corn when made as directed.
Frequently Asked Questions
Can I substitute the soy flour with another gluten-free flour? Yes, chickpea flour (besan) can work as a substitute, though the texture and protein content will differ. You may need to adjust the water quantity slightly.
Why is my dough crumbling? Gluten-free doughs lack the natural binding properties of gluten. Ensure you’re using the recommended amount of xanthan gum and that your dough has rested properly. Adding a teaspoon of psyllium husk powder can also improve binding.
Can I make these rotis without xanthan gum? While xanthan gum provides the best results, you can substitute with 1 tablespoon of ground flaxseed mixed with 3 tablespoons of hot water (let it gel for 5 minutes before adding).
How can I make these rotis softer? Adding 2 tablespoons of plain yogurt or applesauce to the dough can enhance softness. Also, ensure you’re storing them properly wrapped in a cloth while still warm.
Can I use a tortilla press instead of rolling? Absolutely! A tortilla press works wonderfully with this dough when used with parchment paper on both sides.
Are these rotis suitable for diabetics? While lower in carbohydrates than traditional wheat rotis, individuals managing diabetes should monitor their personal response. The higher protein and fiber content generally supports better blood sugar management.
Can I add flavors to the basic recipe? Definitely! Garlic powder, onion powder, dried herbs, or spices can all be added to the dry ingredients before mixing the dough.
My Journey to Perfect Gluten-Free Rotis
I’ve always believed that dietary restrictions shouldn’t mean sacrificing favorite foods. When I had to eliminate gluten, finding substitutes for Indian flatbreads was particularly challenging. Commercial gluten-free breads often lacked the tender, pliable quality I craved in a good roti.
My early attempts using just rice flour produced brittle, cracker-like results. All-chickpea versions had strong flavors that overshadowed subtle curries. After months of testing different flour combinations, cooking techniques, and binding agents, I finally created this soy-based version that truly satisfies.
What makes this recipe special is the balance between protein-rich soy flour and starchy rice flour, plus the crucial addition of xanthan gum that mimics gluten’s elasticity. The result is a tender, flexible flatbread that performs remarkably like traditional roti while being completely gluten-free.
I hope this recipe brings the joy of freshly made rotis back to your table, regardless of dietary needs. With a little practice, you’ll be making perfect gluten-free rotis that everyone at your table will enjoy, whether they’re gluten-free or not!
Conclusion
Gluten-free cooking doesn’t mean compromising on traditional favorites. These soy-based rotis offer the perfect solution for enjoying authentic flatbreads without gluten. Their protein-rich profile, soft texture, and versatile nature make them an excellent addition to any meal.
I encourage you to try this recipe and experiment with your own variations. With a little practice, you’ll master the technique and perhaps even prefer these to traditional wheat rotis! Remember that gluten-free baking often requires a bit more patience and practice, but the results are absolutely worth it.
Share your experiences in the comments below, and don’t forget to tag your creations on social media. I’d love to see how your gluten-free rotis turn out!