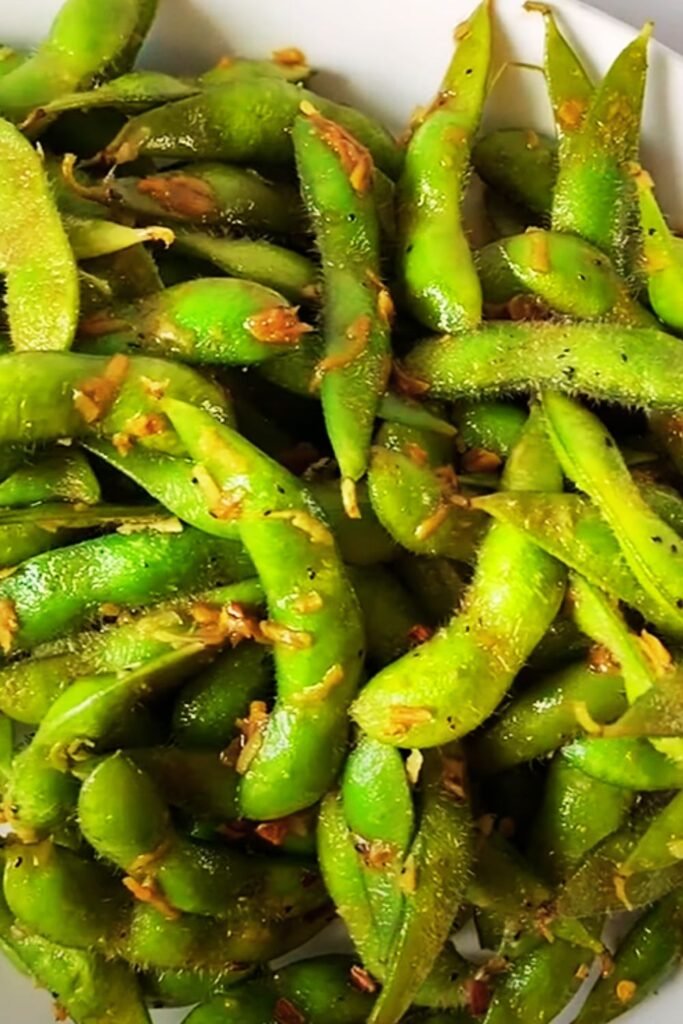
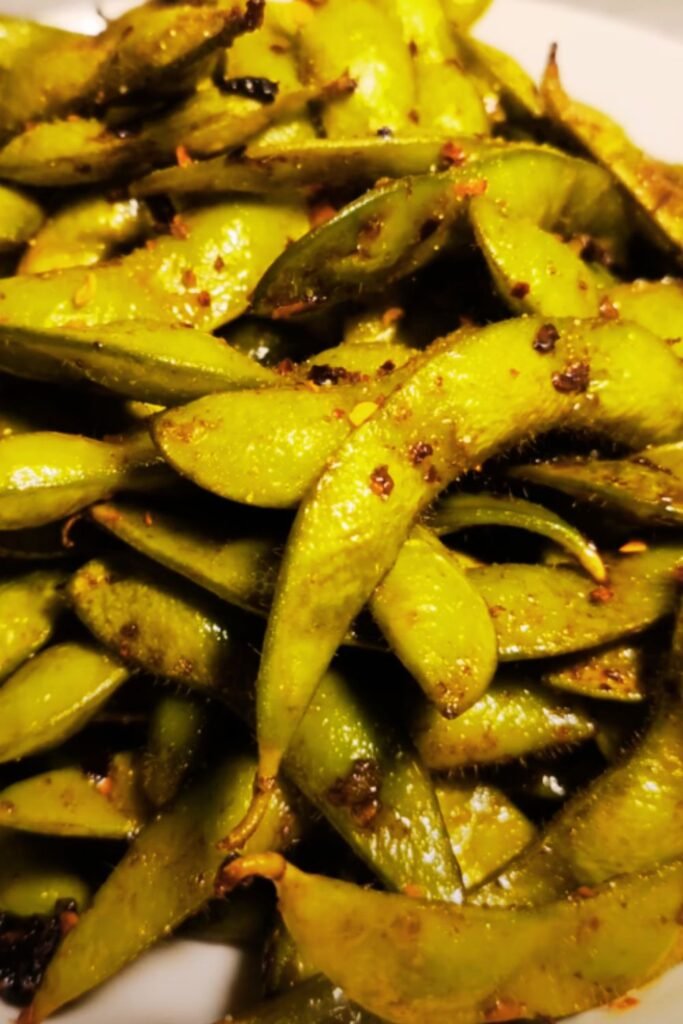
There’s something magical about the combination of buttery garlic and tender edamame that makes my taste buds dance with joy. I’ve been perfecting this garlic butter edamame recipe for years, and I can confidently say it’s become one of my most requested dishes at dinner parties. Whether you’re hosting friends or simply craving a nutritious snack, this recipe delivers incredible flavor with minimal effort.

My journey with edamame began during a trip to Japan, where I discovered these vibrant green soybeans served in countless creative ways. Upon returning home, I became obsessed with recreating the rich, garlicky versions I’d tasted. After dozens of attempts and plenty of taste-testing (the hardest part of my job!), I’ve developed what I believe is the perfect garlic butter edamame recipe.
What Makes This Garlic Butter Edamame Special
Unlike the simple salted edamame you might find at sushi restaurants, my version elevates these protein-packed pods into something truly extraordinary. The secret lies in the perfect balance of roasted garlic, high-quality butter, and carefully selected seasonings that complement rather than overpower the natural nutty flavor of the soybeans.
Key Terms and Definitions:
Edamame : Young soybeans harvested before they fully ripen, typically served in their pods
Blanching : A cooking technique involving briefly boiling vegetables then plunging them into ice water to stop the cooking process
Sauté : To cook quickly in a small amount of fat over relatively high heat
Umami : The fifth taste sensation, characterized by a savory, meaty flavor that enhances other tastes
The Complete Garlic Butter Edamame Recipe
Ingredients You’ll Need
| Ingredient | Quantity | Purpose | Substitutions |
|---|---|---|---|
| Frozen edamame (in pods) | 1 pound | Main ingredient | Fresh edamame (adjust cooking time) |
| Unsalted butter | 4 tablespoons | Rich, creamy base | Vegan butter, olive oil |
| Fresh garlic cloves | 6-8 cloves | Primary flavor | Garlic powder (2 tsp), roasted garlic |
| Sea salt | 1 teaspoon | Enhances flavors | Kosher salt, Himalayan pink salt |
| Black pepper | ½ teaspoon | Adds warmth | White pepper, red pepper flakes |
| Sesame oil | 1 tablespoon | Nutty depth | Toasted sesame oil (use less) |
| Fresh lemon juice | 2 tablespoons | Brightness and acidity | Lime juice, rice vinegar |
| Red pepper flakes | ¼ teaspoon | Subtle heat | Cayenne pepper, chili powder |
| Fresh parsley | 2 tablespoons | Color and freshness | Cilantro, green onions |
Step-by-Step Cooking Instructions
Preparation Phase:
- Remove the frozen edamame from the freezer and let them sit at room temperature for about 10 minutes
- Mince the garlic cloves finely – I prefer using a microplane grater for the most even distribution
- Chop the fresh parsley and set aside for garnishing
- Have all your seasonings measured and ready to go
Cooking Process:
- Blanch the edamame: Bring a large pot of salted water to a rolling boil. Add the edamame pods and cook for 3-4 minutes until they’re bright green and tender. The pods should give slightly when pressed but still maintain their shape.
- Ice bath treatment: Immediately transfer the cooked edamame to a bowl of ice water. This stops the cooking process and helps maintain that beautiful vibrant green color I love so much.
- Drain thoroughly: After 2-3 minutes in the ice bath, drain the edamame completely. I like to pat them dry with paper towels to prevent the butter sauce from becoming watery.
- Create the garlic butter: In a large skillet or wok, melt the butter over medium heat. Add the minced garlic and cook for 60-90 seconds until fragrant but not browned. The aroma should be heavenly at this point!
- Add the edamame: Toss the drained edamame into the skillet with the garlic butter. Stir constantly for 2-3 minutes, ensuring every pod gets coated with that gorgeous golden mixture.
- Season perfectly: Add the sesame oil, salt, black pepper, and red pepper flakes. Continue stirring for another minute, allowing all the flavors to meld together beautifully.
- Finish with brightness: Remove from heat and immediately drizzle with fresh lemon juice. Give everything one final toss to distribute the acidity evenly.
- Garnish and serve: Transfer to a serving bowl and sprinkle with fresh chopped parsley for that pop of color and fresh flavor.

Nutritional Benefits That’ll Make You Feel Good
One of the reasons I adore this recipe is how incredibly nutritious edamame is. These little green powerhouses are packed with benefits that make indulging feel virtuous.
Comprehensive Nutritional Breakdown
| Nutrient | Per 1 Cup Serving | Daily Value % | Health Benefits |
|---|---|---|---|
| Protein | 17g | 34% | Muscle building, satiety |
| Fiber | 8g | 32% | Digestive health, blood sugar control |
| Folate | 482mcg | 121% | Cell division, DNA synthesis |
| Vitamin K | 52mcg | 43% | Bone health, blood clotting |
| Iron | 3.5mg | 19% | Oxygen transport, energy |
| Magnesium | 99mg | 24% | Muscle function, heart health |
| Phosphorus | 421mg | 34% | Bone and teeth health |
| Potassium | 676mg | 14% | Blood pressure regulation |
| Calories | 224 | 11% | Energy provision |
| Fat | 12g | 15% | Essential fatty acids |
The protein content in edamame is particularly impressive – it’s one of the few plant foods that contains all nine essential amino acids, making it a complete protein source. This makes my garlic butter edamame not just delicious but also incredibly satisfying.
Serving Suggestions and Pairing Ideas
I’ve served this garlic butter edamame in countless situations, and it never fails to impress. Here are my favorite ways to present and pair this dish:
As an Appetizer:
- Serve in small bowls with cocktail napkins for easy eating
- Pair with other Asian-inspired appetizers like pot stickers or spring rolls
- Offer alongside a selection of dips and spreads for variety
As a Side Dish:
- Complements grilled fish, especially salmon or tuna
- Works beautifully with teriyaki chicken or beef
- Pairs wonderfully with fried rice or noodle dishes
For Casual Entertaining:
- Include in a mezze-style spread with hummus, olives, and crackers
- Serve at movie nights as a healthier alternative to chips
- Perfect for game day gatherings where you want something more sophisticated than typical bar food
Health-Conscious Meals:
- Add to Buddha bowls with quinoa and roasted vegetables
- Serve alongside grilled tofu for a plant-based protein powerhouse
- Include in bento boxes for nutritious lunch options
Storage and Meal Prep Tips
One of the practical aspects I love about this recipe is how well it stores and reheats. Here’s what I’ve learned through extensive testing:
Storage Guidelines
| Storage Method | Duration | Quality Notes | Reheating Instructions |
|---|---|---|---|
| Refrigerator | 3-4 days | Best texture and flavor | Microwave 30-60 seconds |
| Freezer | 2-3 months | Slight texture change | Thaw overnight, then reheat |
| Room temperature | 2 hours max | Food safety concern | Not recommended |
| Meal prep containers | 5 days | Portion-controlled | Individual microwave heating |
My Meal Prep Strategy:
I often make a double batch on Sunday and portion it into individual containers for the week. The garlic butter flavor actually intensifies slightly after a day, making the leftovers even more delicious than the original batch. I’ve found that storing them in glass containers preserves the flavor better than plastic.
Variations and Customizations
Over the years, I’ve experimented with countless variations of this basic recipe. Here are some of my most successful adaptations:
Spicy Version:
- Add 1-2 minced jalapeños with the garlic
- Increase red pepper flakes to ½ teaspoon
- Finish with a drizzle of sriracha or chili oil
Mediterranean Style:
- Substitute olive oil for half the butter
- Add fresh oregano and basil
- Include sun-dried tomatoes and kalamata olives
- Finish with crumbled feta cheese
Asian Fusion:
- Add 1 tablespoon soy sauce and 1 teaspoon rice vinegar
- Include fresh ginger with the garlic
- Garnish with toasted sesame seeds and green onions
- Drizzle with a touch of honey for sweetness
Herb Garden Version:
- Mix in fresh thyme, rosemary, and chives
- Add lemon zest along with the juice
- Include a splash of white wine during cooking
- Top with toasted pine nuts

Troubleshooting Common Issues
Through years of making this recipe and teaching it to others, I’ve encountered and solved various challenges. Here are the most common issues and my solutions:
Problem: Garlic burns and becomes bitter Solution: Keep the heat at medium and watch carefully. If the garlic starts browning too quickly, remove the pan from heat temporarily.
Problem: Edamame becomes mushy Solution: Don’t overcook during the blanching stage. The ice bath is crucial for stopping the cooking process.
Problem: Butter sauce separates or becomes greasy Solution: Make sure the edamame is thoroughly drained. Excess water causes the butter to break and separate.
Problem: Flavor seems flat or one-dimensional Solution: Don’t skip the lemon juice – the acidity is essential for balancing the rich butter and bringing all flavors together.
Problem: Edamame pods are tough to eat Solution: Ensure you’re using edamame specifically meant to be eaten in the pod, or consider using shelled edamame if texture is an issue.
The Science Behind Perfect Garlic Butter Edamame
Understanding the science behind this recipe has helped me perfect it over time. The blanching process breaks down the tough fibers in the edamame pods while preserving their vibrant color through the ice bath shock. The butter provides fat-soluble flavor carriers, while the garlic releases allicin compounds that create that distinctive aroma and taste we all crave.
The sesame oil adds polyunsaturated fats that enhance the absorption of fat-soluble vitamins, while the lemon juice provides citric acid that brightens all the flavors and helps preserve the green color of the edamame. It’s fascinating how each component serves both a culinary and scientific purpose!
Frequently Asked Questions
Q. Can I use fresh edamame instead of frozen?
Absolutely! Fresh edamame will actually give you even better flavor and texture. You’ll need to increase the blanching time to 5-6 minutes since fresh edamame pods are typically firmer than frozen ones. I always choose fresh when it’s available at my local farmers market.
Q. Is it safe to eat the edamame pods?
Yes, when properly cooked, edamame pods are completely safe and edible. However, some people prefer to remove the beans from the pods before eating. If you’re serving guests, I recommend mentioning that the pods are edible, as not everyone is familiar with this.
Q. Can I make this recipe vegan?
Definitely! I substitute the butter with high-quality vegan butter or extra virgin olive oil. The flavor profile changes slightly, but it’s still absolutely delicious. I sometimes add a pinch of nutritional yeast for extra umami depth when making the vegan version.
Q. How can I make this recipe less salty?
Start with half the amount of salt I recommend and taste as you go. Remember that the natural flavor of edamame is quite mild, so you want enough seasoning to enhance rather than overpower. You can always add more, but you can’t take it away!
Q. What’s the best way to eat edamame pods?
Hold the pod at one end and use your teeth to scrape the beans out, or you can squeeze the pod to pop the beans directly into your mouth. Some people prefer to bite into the whole pod – both methods work perfectly fine with this recipe.
Q. Can I prepare this dish ahead of time for a party?
I recommend preparing the components separately and combining them just before serving for the best texture and flavor. You can blanch the edamame and make the garlic butter mixture earlier in the day, then quickly combine and heat them when your guests arrive.
Q. Why does my garlic butter edamame taste different each time I make it?
This usually comes down to garlic freshness and size variations. I always taste and adjust seasonings at the end. Fresh, firm garlic cloves will give the most consistent results. Also, the size of your garlic cloves can vary significantly, so don’t be afraid to adjust quantities based on your taste preferences.
Q. Is this recipe suitable for people with soy allergies?
Unfortunately, no. Edamame are soybeans, so this recipe isn’t suitable for anyone with soy allergies. However, you could try adapting the garlic butter technique to other vegetables like green beans or snap peas for a similar flavor experience.
My garlic butter edamame has become more than just a recipe in my kitchen – it’s a gateway to exploring new flavors and sharing memorable meals with people I care about. The combination of nutrition, flavor, and simplicity makes it perfect for both everyday snacking and special occasions. I hope this detailed guide helps you create your own perfect version and inspires you to experiment with your own creative variations. Happy cooking!