Have you ever craved warm, homemade bread but felt intimidated by the lengthy process? I’ve been there too. That’s why I’m thrilled to share my foolproof easy flatbread recipe that’s changed my home cooking game forever. This versatile flatbread requires minimal ingredients, needs no yeast or lengthy proving time, and can be on your table in under 30 minutes.
What Makes This Flatbread Special
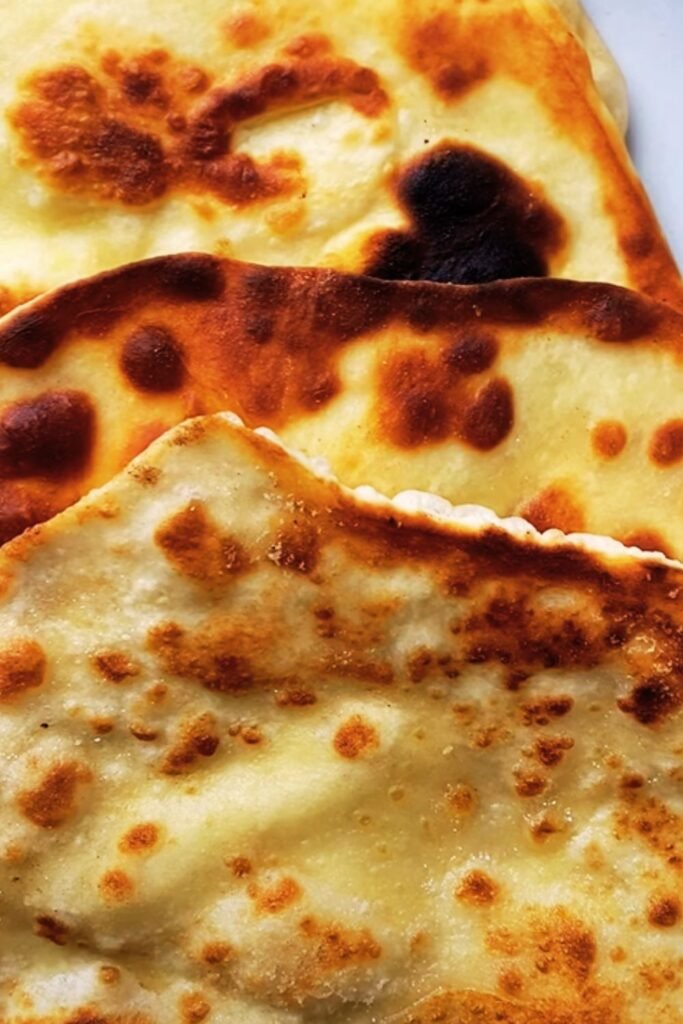
I’ve spent years perfecting this recipe, adjusting flour ratios and cooking techniques until I found the perfect balance of simplicity and taste. What sets this flatbread apart is its incredible versatility – it works as a vehicle for dips, a base for quick pizzas, or as an accompaniment to hearty stews and curries. The texture strikes that perfect balance: slightly chewy interior with a crisp, golden exterior.
Essential Ingredients
This flatbread recipe hinges on pantry staples you likely already have on hand:
- All-purpose flour: The backbone of our flatbread, providing structure
- Baking powder: Our leavening agent that helps create a light texture without yeast
- Salt: Enhances all the flavors and helps control the yeast activity
- Greek yogurt: Adds tanginess and creates a tender texture
- Olive oil: Enriches the dough and helps create that beautiful golden crust
- Warm water: Activates the baking powder and binds everything together
- Optional flavor enhancers: Garlic powder, dried herbs, or spices
The beauty of this recipe lies in its simplicity. With just these basic ingredients, you’ll create flatbreads that taste far more complex than their humble components suggest.
Equipment You’ll Need
I love this recipe because it doesn’t require specialized equipment. Here’s what you’ll need:
- Large mixing bowl
- Measuring cups and spoons
- Rolling pin (or a wine bottle in a pinch!)
- Cast iron skillet or non-stick pan
- Spatula for flipping
- Clean kitchen towel to keep flatbreads warm
Visit Amazon for any required items
Detailed Recipe
Base Flatbread Ingredients (Makes 6 flatbreads)
| Ingredient | Amount | Notes |
|---|---|---|
| All-purpose flour | 2 cups (250g) | Plus extra for dusting |
| Baking powder | 1 1/2 teaspoons | Must be fresh for proper rise |
| Salt | 1/2 teaspoon | Fine sea salt preferred |
| Greek yogurt | 3/4 cup (180g) | Full-fat works best for flavor |
| Olive oil | 2 tablespoons | Plus extra for cooking |
| Warm water | 1/4 cup (60ml) | Approximately 110°F/45°C |
| Optional herbs/spices | 1-2 teaspoons | Customizable to your preference |
Step-by-Step Instructions
- Combine dry ingredients: In a large mixing bowl, I whisk together the flour, baking powder, salt, and any dried herbs or spices if using.
- Add wet ingredients: Make a well in the center of the dry ingredients and add the Greek yogurt, olive oil, and about half the warm water.
- Mix and knead: Using a fork, I start mixing everything together, gradually adding more water as needed until a shaggy dough forms. Then I turn it out onto a lightly floured surface.
- Knead until smooth: I knead the dough for about 2-3 minutes until it becomes smooth and elastic. If it’s too sticky, I add a little more flour; if too dry, a splash more water.
- Rest the dough: I cover the dough with a clean kitchen towel and let it rest for about 15 minutes. This isn’t for rising (since there’s no yeast), but to relax the gluten and make the dough easier to roll.
- Divide the dough: After resting, I divide the dough into 6 equal portions and roll each into a ball.
- Roll out the flatbreads: On a lightly floured surface, I roll each ball into an oval or circle about 1/8-inch thick (approximately 8 inches in diameter).
- Heat the pan: I heat a cast-iron skillet or non-stick pan over medium-high heat until hot.
- Cook the flatbreads: Lightly brushing one side with olive oil, I place the flatbread oil-side down in the hot pan. Cook for about 1-2 minutes until bubbles form on the surface and the bottom develops golden-brown spots.
- Flip and finish: I brush the top side with a little olive oil, flip, and cook for another 1-2 minutes until golden spots appear on the second side.
- Keep warm: As each flatbread finishes cooking, I stack them on a plate and keep them covered with a clean kitchen towel to stay warm and soft.
Visit Amazon for any required items
Troubleshooting Common Issues
Even with such a simple recipe, I’ve encountered a few hiccups along the way. Here’s how I address common flatbread problems:
Tough or Dense Flatbreads
- Cause: Overworking the dough or using too much flour
- Solution: Work the dough just until smooth, and use only as much flour as needed to prevent sticking
Flatbreads Not Puffing Up
- Cause: Pan not hot enough or old baking powder
- Solution: Make sure the pan is properly preheated and check that your baking powder is fresh
Burning Before Cooking Through
- Cause: Heat too high
- Solution: Lower the heat slightly and adjust cooking time
Dough Too Sticky
- Cause: Not enough flour or too much liquid
- Solution: Add flour gradually while kneading until the dough feels tacky but not sticky
Flavor Variations
One of the reasons I keep coming back to this recipe is its incredible adaptability. Here are some of my favorite variations:
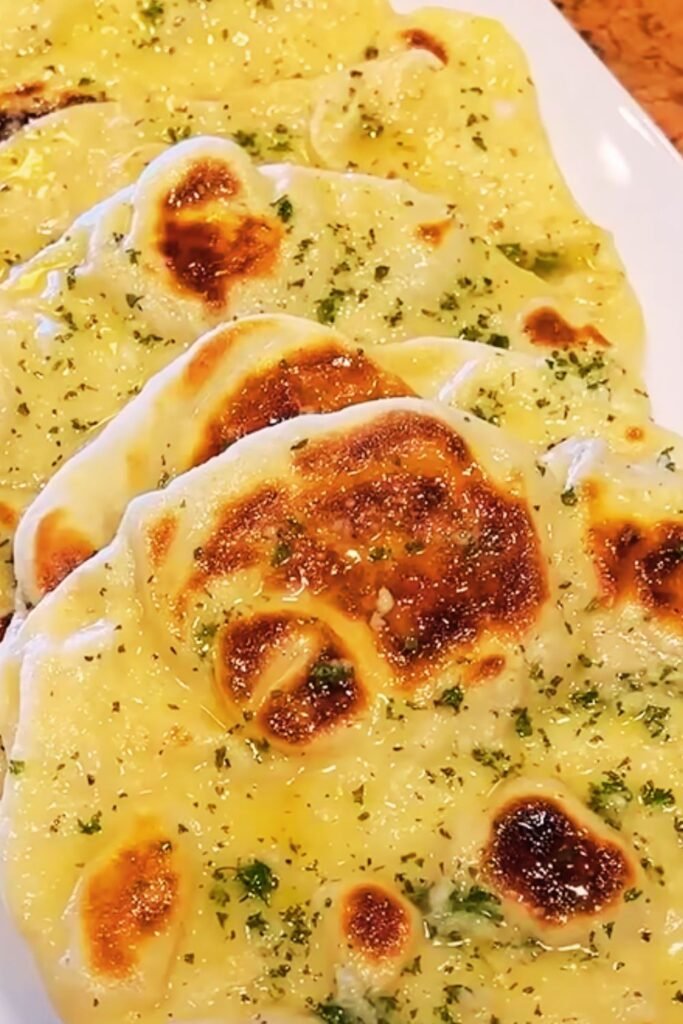
Herb-Infused Flatbread
| Addition | Amount | When to Add |
|---|---|---|
| Dried herbs (rosemary, thyme, oregano) | 1-2 teaspoons | Mix with dry ingredients |
| Fresh herbs (parsley, cilantro, basil) | 2-3 tablespoons, finely chopped | Fold into dough after initial mixing |
| Garlic powder | 1/2 teaspoon | Mix with dry ingredients |
| Fresh garlic | 2-3 cloves, minced | Sauté in olive oil and brush on after cooking |
Sweet Flatbread Variations
| Addition | Amount | Notes |
|---|---|---|
| Honey | 1 tablespoon | Add with wet ingredients |
| Cinnamon | 1/2 teaspoon | Mix with dry ingredients |
| Vanilla extract | 1/2 teaspoon | Add with wet ingredients |
| Dried fruit (raisins, cranberries) | 1/4 cup, finely chopped | Fold into dough after initial mixing |
Seeded Flatbreads
| Seed Type | Amount | Method |
|---|---|---|
| Sesame seeds | 1 tablespoon | Sprinkle on dough before cooking or mix into dough |
| Nigella seeds | 1 teaspoon | Mix into dough or sprinkle on top before cooking |
| Poppy seeds | 1 teaspoon | Sprinkle on oiled side before cooking |
| Sunflower seeds | 1 tablespoon, chopped | Mix into dough before kneading |
Visit Amazon for any required items
Serving Suggestions
My flatbreads rarely make it to the table untouched – the aroma filling the kitchen usually means I’m tearing off pieces while they’re still warm! However, when I manage to save them for a proper meal, here are my favorite ways to serve them:
As a Dipper
- Homemade hummus
- Baba ganoush
- Tzatziki
- Labneh with olive oil
- Muhammara (roasted red pepper dip)
As a Wrap or Sandwich Base
- Fill with grilled vegetables and feta
- Spread with mashed avocado and top with eggs
- Use for chicken shawarma with garlic sauce
- Stuff with falafel and tahini
As a Pizza Base
- Cook the flatbread on one side only
- Flip, add toppings to the cooked side
- Cover the pan for 2-3 minutes until cheese melts
- Finish under the broiler for extra crispiness
With Soups and Stews
- Tear into pieces to scoop up lentil soup
- Serve alongside vegetable curry
- Use to soak up the sauce from shakshuka
- Pair with hearty bean stews
Storage and Reheating
I often make a double batch of these flatbreads because they store beautifully. Here’s how I keep them fresh:
Short-term Storage
- Cool completely on a wire rack
- Stack with parchment paper between each flatbread
- Store in an airtight container at room temperature for up to 2 days
Freezing for Later
- Cool completely
- Wrap individually in plastic wrap or parchment paper
- Place in a freezer bag, removing as much air as possible
- Freeze for up to 3 months
Reheating Methods
| Method | Instructions | Best For |
|---|---|---|
| Microwave | 10-15 seconds per flatbread | Soft, pliable texture |
| Dry skillet | 30 seconds per side | Crisp exterior |
| Oven | 350°F for 3-4 minutes | Batch reheating |
| Toaster | Low setting, watch carefully | Quick single servings |
Nutritional Benefits
These homemade flatbreads aren’t just delicious – they bring nutritional benefits compared to many store-bought versions:
- No preservatives or additives: Just simple, wholesome ingredients
- Customizable for dietary needs: Can be adapted for various dietary restrictions
- Portion control: Make them larger or smaller based on your needs
- Greek yogurt addition: Provides protein and calcium
- Lower sodium option: Control the amount of salt added
Special Diet Adaptations
I’ve tested various modifications to make this recipe work for different dietary needs:
Gluten-Free Version
- Replace all-purpose flour with a 1:1 gluten-free flour blend
- Add 1/2 teaspoon xanthan gum if your blend doesn’t include it
- Increase resting time to 20-30 minutes
Dairy-Free Option
- Substitute Greek yogurt with dairy-free yogurt (coconut or almond-based work well)
- May need slightly less water as plant-based yogurts can be runnier
Lower-Fat Alternative
- Use low-fat Greek yogurt
- Reduce olive oil to 1 tablespoon in the dough
- Use cooking spray instead of additional oil for cooking
Cultural Significance
Flatbreads exist in virtually every cuisine around the world, each with their own unique characteristics:
- Naan in India and Pakistan: Often made with yogurt and cooked in a tandoor oven
- Pita in Mediterranean countries: Known for its pocket that forms during baking
- Lavash in Armenia and Turkey: Typically very thin and flexible
- Injera in Ethiopia: Fermented and slightly sour
- Tortilla in Mexico: Made with corn or wheat flour
My recipe draws inspiration from these traditional flatbreads while simplifying the process for everyday home cooking. The yogurt addition is reminiscent of naan, while the cooking method is similar to how lavash is prepared in some regions.
Pairing with Meals
These versatile flatbreads complement so many dishes. Here are some meal pairing suggestions:
Mediterranean Feast
- Grilled chicken souvlaki
- Greek salad
- Tzatziki
- Flatbreads for wrapping
Middle Eastern Spread
- Hummus and baba ganoush
- Tabbouleh salad
- Marinated olives
- Flatbreads for dipping
Indian-Inspired Meal
- Vegetable curry
- Cucumber raita
- Mango chutney
- Flatbreads for scooping
Breakfast Option
- Scrambled eggs with herbs
- Sliced avocado
- Fresh tomatoes
- Flatbreads as the base
Visit Amazon for any required items
Questions & Answers
Q: Can I make the dough ahead of time? A: Absolutely! I often make the dough up to 24 hours in advance and keep it refrigerated. Just bring it to room temperature for about 30 minutes before rolling and cooking.
Q: Why use Greek yogurt instead of regular yogurt? A: Greek yogurt is thicker and has less moisture, which creates a better dough consistency. If you only have regular yogurt, strain it through a coffee filter or cheesecloth for about 30 minutes before using.
Q: My flatbreads came out more like crackers. What went wrong? A: This typically happens when the dough is rolled too thin or cooked too long. Try making them slightly thicker (about 1/8 inch) and reducing cooking time.
Q: Can I bake these in the oven instead of cooking in a pan? A: Yes! Preheat your oven to 425°F (220°C) and bake on a preheated baking sheet or pizza stone for about 4-6 minutes until puffed and golden.
Q: How can I make my flatbreads more flavorful? A: Beyond herbs and spices in the dough, try brushing with flavored oils (garlic or herb-infused) right after cooking while still hot.
Q: My flatbreads didn’t puff up at all. Why? A: Check if your baking powder is fresh. Also, make sure your pan is hot enough before adding the flatbread – a preheated pan is crucial for those beautiful bubbles.
Q: Can I use this dough to make stuffed flatbreads? A: Definitely! Divide the dough, place filling in the center of one piece, top with another piece, seal the edges, and cook as directed, possibly at slightly lower heat to ensure the filling warms through.
Q: Is there a way to make these vegan? A: Yes! Replace the Greek yogurt with plant-based yogurt (coconut works best) or even a combination of plant milk with a tablespoon of lemon juice to mimic the tanginess.
A Final Note
The humble flatbread has transformed my home cooking. What began as a quick solution on busy weeknights has become a staple in my kitchen repertoire. I find there’s something profoundly satisfying about the simplicity of this recipe – the way the dough comes together in minutes, the satisfying sizzle as it hits the hot pan, and most of all, the delighted reactions when I bring a basket of warm flatbreads to the table.
Don’t be surprised if these flatbreads become your new signature dish. They’re simple enough for beginners but versatile enough to impress even the most experienced food enthusiasts. Whether you’re making a quick snack or planning an elaborate feast, these flatbreads will rise to the occasion every time.
Now, heat up that pan and get ready to experience the joy of freshly made flatbread in your own kitchen. I promise you won’t look back!