When I first discovered the magic of combining taco flavors with pasta, my weeknight dinners were forever changed. This cheesy taco pasta recipe has become my go-to meal when I need something quick, satisfying, and guaranteed to please everyone at the table. The beauty of this dish lies in its simplicity – it brings together the best of Mexican-inspired flavors with the comforting heartiness of pasta, all smothered in a rich, cheesy sauce that will have you coming back for seconds.
I’ve been perfecting this recipe for years, and what I love most about it is how it manages to be both incredibly easy and incredibly delicious. Unlike traditional tacos that can be messy and time-consuming to assemble, this pasta version gives you all those beloved flavors in one convenient, fork-friendly dish. The combination of seasoned ground beef, tender pasta, and melted cheese creates a symphony of textures and tastes that never fails to satisfy.
What Makes This Recipe Special
The secret to my cheesy taco pasta lies in layering flavors and textures. I start with perfectly seasoned ground beef that’s been cooked until it’s beautifully browned and aromatic. Then I add a blend of spices that mirrors the best taco seasoning – think cumin, chili powder, paprika, and just a hint of heat. The pasta provides the perfect backdrop for these bold flavors, while the cheese sauce brings everything together in the most delicious way possible.
What sets this recipe apart from others I’ve tried is the attention to detail in each component. I don’t just throw everything together and hope for the best. Instead, I carefully build each layer of flavor, ensuring that every bite delivers the perfect balance of meat, pasta, and cheese. The result is a dish that’s both comforting and exciting, familiar yet surprising.
Essential Ingredients for Perfect Cheesy Taco Pasta
Creating the perfect cheesy taco pasta requires the right combination of ingredients. I’ve experimented with various substitutions and combinations over the years, and I can confidently say that these ingredients work together to create something truly special.
Ground Beef Selection : I prefer using 85/15 ground beef for this recipe. It provides enough fat to keep the meat juicy and flavorful while not being overly greasy. The 85/15 ratio ensures that the beef will brown beautifully and develop those delicious caramelized edges that add so much depth to the dish.
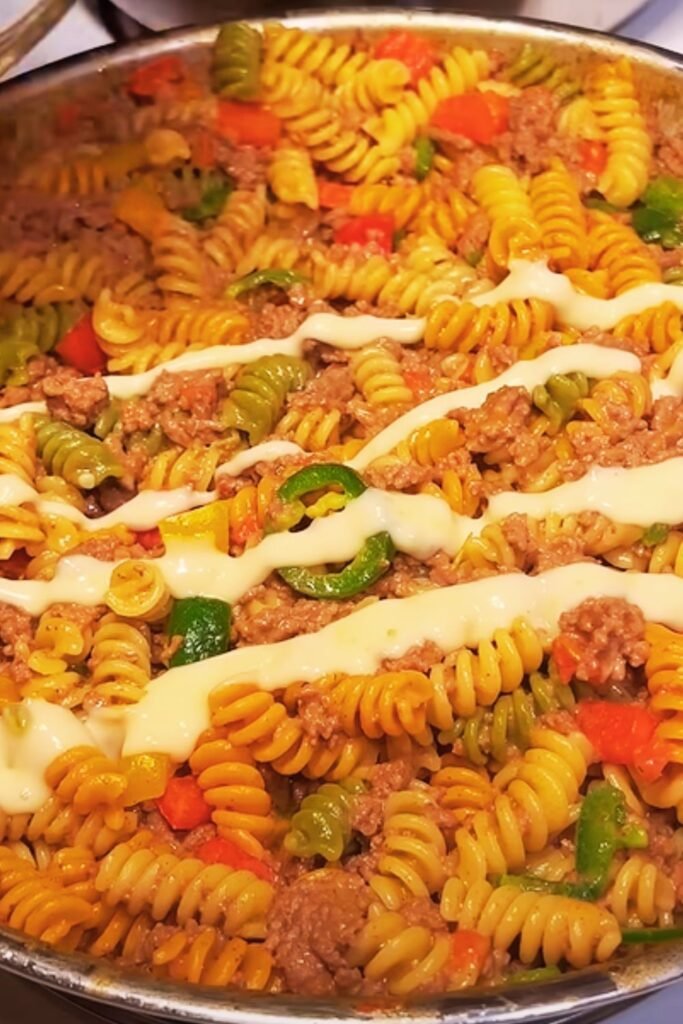
Pasta Choice : While you can use any pasta shape, I’ve found that penne, rotini, or shells work best. These shapes have nooks and crannies that hold onto the cheese sauce beautifully, ensuring every bite is packed with flavor. I always cook my pasta to al dente – it should have a slight bite to it since it will continue cooking when mixed with the other ingredients.
Cheese Combination : The cheese is where this dish really shines. I use a combination of sharp cheddar and Monterey Jack. The cheddar provides that classic sharp flavor, while the Monterey Jack adds creaminess and melts beautifully. I also like to add a touch of cream cheese to make the sauce extra rich and velvety.
Spice Blend : My homemade taco seasoning includes cumin, chili powder, paprika, garlic powder, onion powder, oregano, and a pinch of cayenne. This blend creates a complex flavor profile that’s warm, earthy, and just slightly spicy.
Step-by-Step Cooking Instructions
Making cheesy taco pasta is straightforward, but timing is everything. I’ve perfected my method over countless dinners, and I’m excited to share exactly how I do it.
Step 1: Prepare Your Workspace I always start by gathering all my ingredients and measuring everything out. This makes the cooking process much smoother and ensures I don’t forget anything important. I also like to have my pasta water ready to go – I fill a large pot with water and set it on the stove to start heating.
Step 2: Cook the Pasta I bring the water to a rolling boil and add a generous amount of salt – the water should taste like the sea. This is crucial for flavoring the pasta from the inside out. I add the pasta and cook it according to package directions, but I always test for doneness a minute or two before the recommended time. Remember, we want al dente because the pasta will continue cooking when we combine everything.
Step 3: Brown the Ground Beef While the pasta cooks, I heat a large skillet over medium-high heat. I add the ground beef and break it up with a wooden spoon. The key here is to let it brown properly – don’t stir it too much at first. Let it develop those beautiful caramelized edges that add so much flavor to the dish. This usually takes about 5-7 minutes.
Step 4: Add Aromatics and Spices Once the beef is nicely browned, I add diced onions and minced garlic. I cook these until the onions are translucent and the garlic is fragrant, about 3-4 minutes. Then I add my spice blend and cook for another minute until the spices are toasted and aromatic.
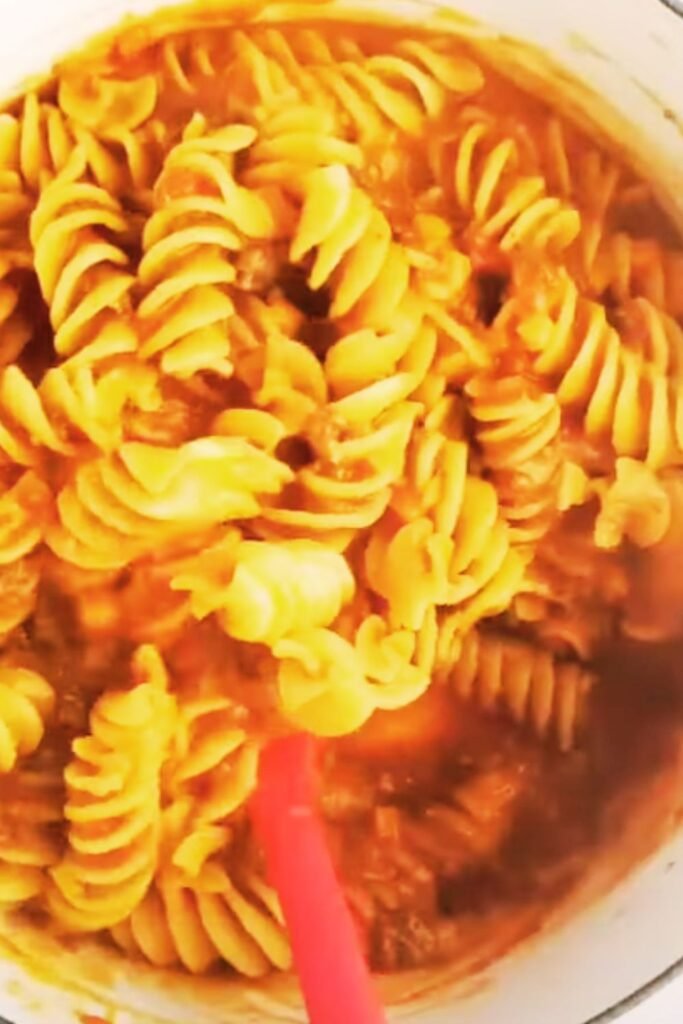
Step 5: Create the Sauce Base I add a can of diced tomatoes, some tomato paste, and a splash of beef broth. This creates a rich, flavorful base for our cheese sauce. I let this simmer for about 5 minutes, allowing the flavors to meld together beautifully.
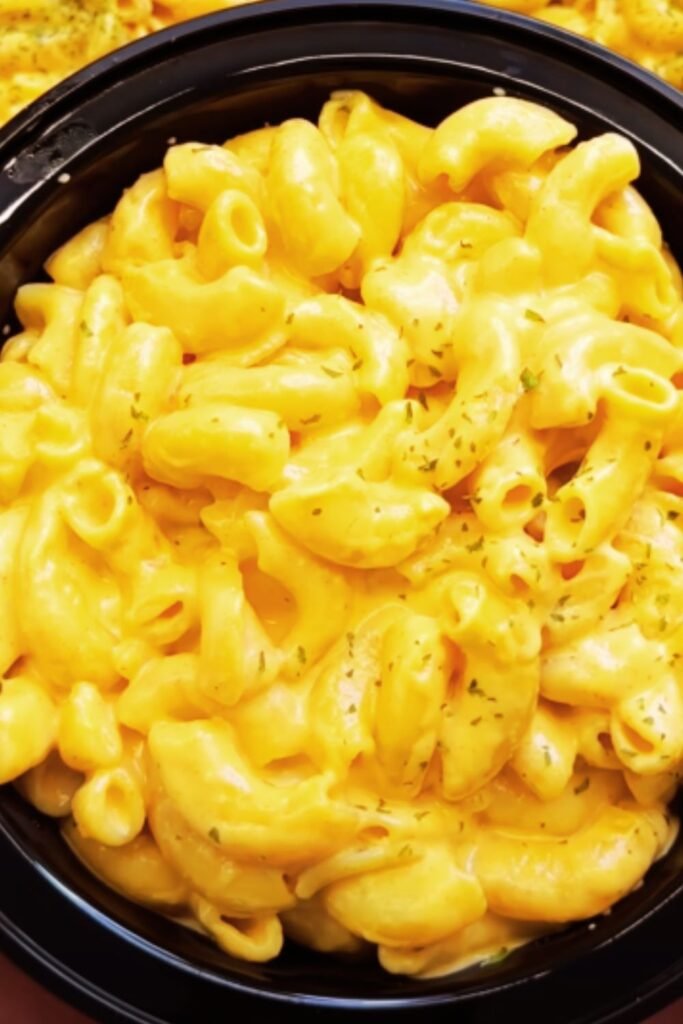
Step 6: Add the Cheese This is where the magic happens. I reduce the heat to low and gradually add the shredded cheese, stirring constantly to prevent it from clumping. I add it in handfuls, making sure each addition is completely melted before adding more. The cream cheese goes in last, and I stir until everything is smooth and creamy.
Step 7: Combine and Serve Finally, I add the cooked pasta to the skillet and toss everything together until the pasta is completely coated with the cheesy sauce. I taste and adjust seasonings as needed, then serve immediately while everything is hot and the cheese is perfectly melted.
Nutritional Information and Serving Details
Understanding the nutritional content of your meals is important, and I want to be transparent about what you’re getting with this delicious dish. Here’s a comprehensive breakdown of the nutritional information for my cheesy taco pasta:
| Nutrient | Per Serving (1 cup) | % Daily Value |
|---|---|---|
| Calories | 485 | 24% |
| Total Fat | 22g | 28% |
| Saturated Fat | 12g | 60% |
| Cholesterol | 75mg | 25% |
| Sodium | 890mg | 39% |
| Total Carbohydrates | 42g | 15% |
| Dietary Fiber | 3g | 11% |
| Sugars | 6g | – |
| Protein | 28g | 56% |
| Calcium | 320mg | 24% |
| Iron | 3.2mg | 18% |
| Vitamin A | 580 IU | 12% |
| Vitamin C | 8mg | 9% |
This recipe serves 6 people generously, making it perfect for family dinners or meal prep. Each serving provides a substantial amount of protein, thanks to the ground beef and cheese, while the pasta gives you the carbohydrates you need for energy. The dish is also a good source of calcium and iron.
Customization Options and Variations
One of the things I love most about this recipe is how adaptable it is. Over the years, I’ve experimented with numerous variations, and I’m excited to share some of my favorites with you.
Protein Variations While ground beef is classic, I’ve had great success with ground turkey, chicken, or even plant-based alternatives. Ground turkey creates a slightly lighter version while still maintaining all the flavor. If you’re using ground chicken, I recommend adding a bit more oil to prevent sticking, as it’s leaner than beef.
Vegetable Additions I often add vegetables to boost the nutritional content and add extra flavor. Bell peppers, corn, black beans, and diced jalapeños are all excellent additions. I typically sauté the vegetables along with the onions and garlic. Corn adds a lovely sweetness that complements the spices beautifully, while black beans provide additional protein and fiber.
Spice Level Adjustments The beauty of making your own taco seasoning is that you can adjust the heat level to your preference. For a milder version, I reduce or omit the cayenne pepper. For those who like it spicy, I add diced jalapeños or even a pinch of chipotle powder for a smoky heat.
Cheese Variations While I love my cheddar and Monterey Jack combination, I’ve experimented with other cheeses too. Pepper Jack adds a nice kick, while Mexican blend cheese provides authentic flavors. I’ve even tried adding a bit of queso fresco crumbled on top just before serving for an extra layer of flavor and texture.
Storage and Reheating Tips
Proper storage and reheating are crucial for maintaining the quality of your cheesy taco pasta. I’ve learned through experience that the right techniques can make the difference between a delicious leftover meal and a disappointing one.
Refrigerator Storage I store leftover cheesy taco pasta in airtight containers in the refrigerator for up to 4 days. It’s important to let the pasta cool completely before storing to prevent condensation, which can make the pasta soggy. I often divide it into individual serving containers for easy reheating later.
Freezer Storage This dish freezes beautifully for up to 3 months. I use freezer-safe containers and leave about an inch of space at the top for expansion. I always label containers with the date and contents. When I’m ready to eat it, I thaw it overnight in the refrigerator before reheating.
Reheating Methods For the best results, I reheat leftover pasta in a skillet over medium-low heat. I add a splash of milk or broth to help restore the creamy texture of the cheese sauce. I stir frequently to prevent sticking and ensure even heating. Microwave reheating works too, but I prefer to use 50% power and stir every 30 seconds to prevent the cheese from separating.
Perfect Pairings and Serving Suggestions
While cheesy taco pasta is satisfying on its own, I love serving it with complementary sides that enhance the overall dining experience. Here are some of my favorite pairings:
Fresh Salads A crisp, cool salad provides a wonderful contrast to the rich, warm pasta. I often serve it with a simple mixed greens salad dressed with lime vinaigrette. The acidity of the lime cuts through the richness of the cheese and brightens the entire meal.
Bread Options Warm, crusty bread is perfect for soaking up any extra cheese sauce. I particularly love serving it with garlic bread or cornbread. The cornbread adds a subtle sweetness that complements the Mexican-inspired flavors beautifully.
Vegetable Sides Roasted vegetables make an excellent side dish. I often roast bell peppers, zucchini, and onions with a drizzle of olive oil and Mexican seasoning. The vegetables add color, nutrition, and a nice textural contrast to the pasta.
Fresh Garnishes I always set out bowls of fresh toppings for people to customize their portions. Diced avocado, chopped cilantro, sliced green onions, sour cream, and lime wedges all make excellent additions. These fresh elements add brightness and help balance the richness of the dish.
Meal Prep and Planning Strategies
This recipe is fantastic for meal prep, and I often make a double batch to have easy meals throughout the week. Here’s how I approach meal prepping with cheesy taco pasta:
Batch Cooking I typically make this recipe on Sunday afternoons as part of my weekly meal prep. The recipe doubles easily, and I can have meals ready for several days. I find that having this prepared saves me so much time during busy weeknights.
Portion Control I use glass containers to portion out individual servings. This makes it easy to grab a healthy portion for lunch or dinner. I usually get about 6-8 servings from a double batch, which is perfect for my family’s needs.
Ingredient Prep If I don’t have time to make the full recipe, I at least prep the ingredients. I brown the ground beef, cook the pasta, and prepare the cheese sauce base. These components can be stored separately and quickly combined when I’m ready to eat.
Troubleshooting Common Issues
Over the years, I’ve encountered and solved various issues with this recipe. Here are the most common problems and my solutions:
Grainy Cheese Sauce This usually happens when the heat is too high or the cheese is added too quickly. I always remove the pan from heat before adding cheese and add it gradually while stirring constantly. If the sauce does become grainy, I try whisking in a tablespoon of cream or milk to smooth it out.
Dry Pasta If the pasta seems dry after combining with the sauce, I add a splash of pasta cooking water, milk, or broth. The starch in pasta water is particularly effective at bringing the sauce together and coating the pasta properly.
Overseasoned Dish If I accidentally add too much salt or spice, I can usually balance it out by adding more pasta or a bit of sour cream. The dairy helps temper strong flavors and creates a more balanced dish.
Sauce Separation This can happen if the dish is reheated too quickly or at too high a temperature. I always reheat gently and add a splash of liquid to help bring the sauce back together.
Special Dietary Considerations
I’ve adapted this recipe for various dietary needs over the years, and I’m happy to share some modifications that work well:
Gluten-Free Version Using gluten-free pasta is an easy swap that doesn’t affect the overall flavor of the dish. I’ve had great success with rice-based and corn-based pasta. Just be sure to follow the cooking instructions on the package, as gluten-free pasta can have different timing requirements.
Dairy-Free Modifications For those avoiding dairy, I’ve used nutritional yeast and cashew cream to create a cheese-like sauce. While it’s different from the traditional version, it’s still delicious and satisfying. Dairy-free cheese alternatives work too, though the melting properties can vary by brand.
Lower-Sodium Options To reduce sodium, I use low-sodium broth and reduce the amount of added salt. I also rinse canned beans and tomatoes if I’m using them. Fresh herbs and spices can help maintain flavor while reducing sodium content.
Vegetarian Version I’ve made this with plant-based ground meat alternatives, and it’s absolutely delicious. I sometimes add extra vegetables like mushrooms or lentils to boost the protein content and create a more substantial texture.
Seasonal Variations and Special Occasions
This recipe is versatile enough to adapt for different seasons and occasions. Here are some of my favorite variations:
Summer Version During summer, I love adding fresh corn cut from the cob and diced tomatoes. I also serve it with fresh salsa and guacamole on the side. The fresh ingredients brighten the dish and make it feel more appropriate for warm weather.
Winter Comfort In colder months, I sometimes add a can of diced green chiles or jalapeños for extra warmth. I also like to serve it with warm cornbread and a hearty soup as a starter.
Holiday Gatherings For parties or gatherings, I make this in a large roasting pan and keep it warm in a slow cooker. I set up a toppings bar with various garnishes so guests can customize their portions. It’s always a hit at potluck dinners.
Game Day Special This recipe is perfect for game day gatherings. I often make it in advance and reheat it in the slow cooker. I serve it alongside other crowd-pleasers like chips and dip, making it easy for people to grab a plate and enjoy the game.
Q&A Section
Q: Can I make this recipe ahead of time? Yes, absolutely! This recipe is perfect for making ahead. I often prepare it completely and refrigerate it for up to 2 days before serving. When I’m ready to serve, I reheat it gently in a skillet with a splash of milk or broth to restore the creamy texture.
Q: What’s the best pasta shape for this recipe? I prefer short pasta shapes like penne, rotini, or shells because they hold the cheese sauce beautifully. However, I’ve also used bow ties, cavatappi, and even elbow macaroni with great success. The key is choosing a shape with some texture that will grab onto the sauce.
Q: Can I use pre-shredded cheese? While you can use pre-shredded cheese, I always recommend shredding your own for the best melting properties. Pre-shredded cheese has anti-caking agents that can prevent it from melting as smoothly. If you do use pre-shredded, just be extra careful with the heat and add it gradually.
Q: How spicy is this recipe? As written, this recipe has a mild to moderate heat level. The spice comes primarily from the chili powder and a pinch of cayenne. If you’re sensitive to heat, you can omit the cayenne entirely. For those who like more heat, feel free to add jalapeños, hot sauce, or additional cayenne.
Q: Can I freeze this dish? Yes, this freezes beautifully! I freeze it in portioned containers for up to 3 months. The key is to let it cool completely before freezing and to reheat it gently to prevent the cheese sauce from separating. I often add a splash of milk when reheating frozen portions.
Q: What can I substitute for ground beef? Ground turkey, chicken, or pork all work well as substitutes. I’ve also had great success with plant-based ground meat alternatives. If using a leaner protein like turkey or chicken, you might need to add a bit more oil to prevent sticking.
Q: Is there a way to make this healthier? Absolutely! I often add extra vegetables like bell peppers, zucchini, or spinach to boost the nutrition. You can also use whole wheat pasta, lean ground turkey, and reduce the amount of cheese slightly. Adding beans increases the fiber and protein content too.
Q: Why does my cheese sauce sometimes get grainy? Grainy cheese sauce usually results from too high heat or adding cheese too quickly. I always remove the pan from heat before adding cheese and add it gradually while stirring constantly. Using freshly shredded cheese also helps prevent this issue.
Q: How long does this keep in the refrigerator? When stored properly in airtight containers, this dish keeps for up to 4 days in the refrigerator. I always make sure it’s completely cooled before storing, and I reheat portions gently to maintain the best texture.
Q: Can I make this in a slow cooker? While I prefer making it on the stovetop for better control over the cheese sauce, you can adapt it for a slow cooker. I recommend browning the meat first, then adding everything except the cheese to the slow cooker. Add the cheese in the last 30 minutes of cooking and stir until melted.
This cheesy taco pasta recipe has truly become a cornerstone of my weeknight dinner rotation. The combination of familiar flavors, easy preparation, and satisfying results makes it a winner every time. I hope you enjoy making and eating this dish as much as I do – it’s sure to become a favorite in your household too!