There’s something absolutely magical about biting into a perfectly made bombolone – that moment when your teeth pierce through the golden, slightly crispy exterior to reveal the pillowy soft interior, often bursting with luscious cream or jam. I’ve been making these Italian treasures for over a decade, and I can tell you that once you master the art of bomboloni, you’ll never look at regular donuts the same way again.
Bomboloni aren’t just any ordinary donuts – they’re a testament to Italian pastry craftsmanship, representing centuries of tradition wrapped up in a delightfully indulgent package. My journey with these delectable treats began during my first trip to Florence, where I witnessed a pasticciere (pastry chef) working his magic at 5 AM, preparing batches of bomboloni for the morning rush. The aroma alone was enough to convert me into a lifelong devotee.
What Are Bomboloni? Understanding Italy’s Beloved Donuts
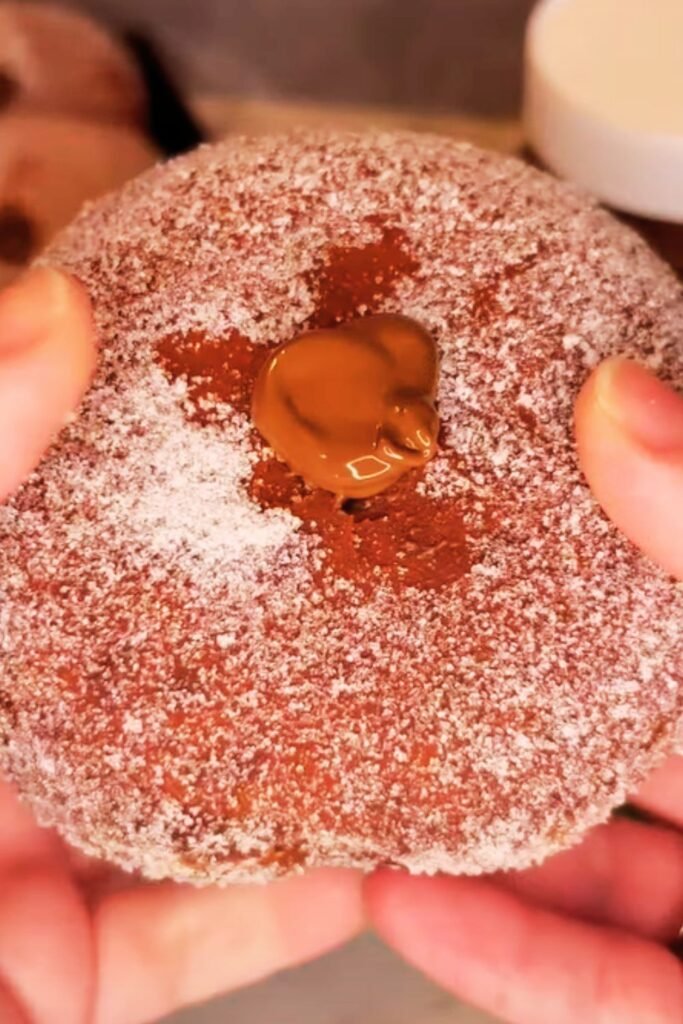
Bomboloni (singular: bombolone): Traditional Italian donuts that are typically round, yeast-raised, and deep-fried to golden perfection. Unlike their American counterparts, bomboloni are usually filled with pastry cream, jam, or Nutella, and dusted with granulated sugar or powdered sugar.
Lievitazione: The crucial rising process that gives bomboloni their characteristic light, airy texture through yeast fermentation.
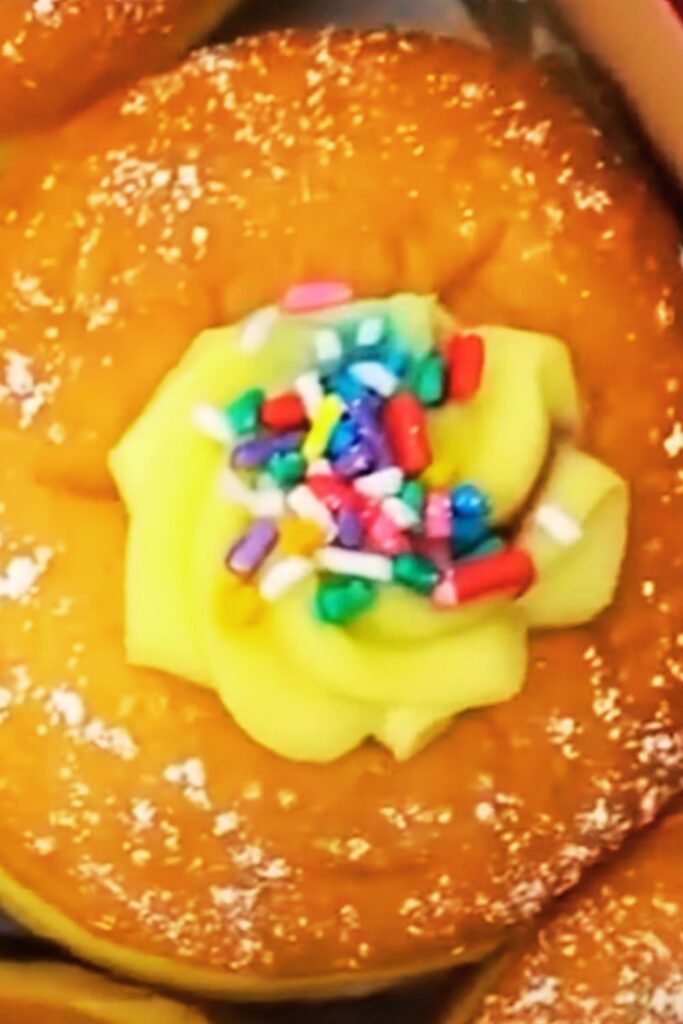
Pastry Cream (Crema Pasticcera): The classic Italian custard filling made with eggs, milk, sugar, and flour, often flavored with vanilla or lemon zest.
Frittura: The deep-frying technique that creates the perfect balance between a crispy exterior and tender interior.
The beauty of bomboloni lies in their versatility and the sheer joy they bring to anyone who tastes them. I’ve served these at family gatherings, coffee mornings with friends, and even fancy dinner parties – they never fail to impress. What sets them apart from regular donuts is their incredibly light texture and the way they practically melt in your mouth.
The Rich History Behind Bomboloni
My fascination with bomboloni extends beyond just their taste – their history is equally captivating. These delightful pastries trace their origins back to 16th century Tuscany, where they were initially created as a way to use up excess bread dough. The name “bombolone” comes from the Italian word “bomba” (bomb), likely referring to their round, explosive shape and the surprise filling hidden within.
During my research and travels throughout Italy, I discovered that different regions have their own variations. In Rome, they’re often called “maritozzi” when made in a slightly different shape, while in Southern Italy, you might find them filled with ricotta or local fruit preserves. Each variation tells a story of local ingredients and family traditions passed down through generations.
Essential Ingredients for Perfect Bomboloni
Creating authentic bomboloni requires understanding each ingredient’s role in the final product. I’ve experimented with countless variations over the years, and I can confidently say that quality ingredients make all the difference.
Detailed Ingredient Breakdown
| Ingredient | Quantity | Purpose | Quality Tips |
|---|---|---|---|
| Bread Flour | 500g | Provides structure and chewiness | Use high-protein flour (12-14%) for best results |
| Fresh Yeast | 25g | Creates lift and flavor | Can substitute with 12g active dry yeast |
| Whole Milk | 250ml | Adds richness and tenderness | Room temperature works best |
| Large Eggs | 3 whole | Enriches dough and adds color | Use room temperature eggs |
| Granulated Sugar | 80g | Feeds yeast and adds sweetness | Regular white sugar preferred |
| Unsalted Butter | 60g | Creates tender crumb | European-style butter recommended |
| Fine Sea Salt | 8g | Enhances flavors | Avoid table salt with additives |
| Vanilla Extract | 2 tsp | Adds aromatic depth | Pure vanilla extract only |
| Lemon Zest | 1 lemon | Brightens flavor profile | Use organic lemons when possible |
| Vegetable Oil | 2 liters | For deep frying | Neutral oil with high smoke point |
Premium Filling Options
| Filling Type | Preparation Time | Difficulty Level | Flavor Profile |
|---|---|---|---|
| Classic Pastry Cream | 30 minutes | Medium | Rich, vanilla, custard-like |
| Chocolate Pastry Cream | 35 minutes | Medium | Decadent, cocoa-forward |
| Strawberry Jam | 5 minutes (if store-bought) | Easy | Fresh, fruity, bright |
| Nutella | 2 minutes | Very Easy | Hazelnut, chocolate, creamy |
| Lemon Curd | 25 minutes | Medium-Hard | Tart, citrusy, luxurious |
| Ricotta Cream | 15 minutes | Easy | Light, slightly sweet, traditional |
The key to exceptional bomboloni lies in the balance of these ingredients. I always tell my students that baking is both science and art – you need precision in measurements but intuition in technique.
Step-by-Step Bomboloni Recipe
Having made thousands of bomboloni over the years, I’ve refined this recipe to ensure consistent, bakery-quality results every time. The process requires patience, but I promise the results are worth every minute.
Preparing the Dough
Dissolving the Yeast
- Warm 50ml of the milk to exactly 37°C (98°F) – I use a digital thermometer for accuracy
- Crumble the fresh yeast into the warm milk
- Add 1 tablespoon of sugar and whisk gently
- Let stand for 5-8 minutes until foamy and active
Creating the Base
- In a large mixing bowl, combine flour and remaining sugar
- Create a well in the center and add the activated yeast mixture
- Add beaten eggs, remaining milk, vanilla extract, and lemon zest
- Using a wooden spoon, gradually incorporate the flour from the edges
Developing the Dough
- Once roughly combined, add the softened butter and salt
- Knead by hand for 12-15 minutes until smooth and elastic
- The dough should be slightly tacky but not sticky
- Alternatively, use a stand mixer with dough hook for 8-10 minutes on medium speed
The First Rise
This is where patience becomes your best friend. I place the dough in a lightly oiled bowl, cover with a damp kitchen towel, and let it rise in a warm, draft-free place for 1.5-2 hours until doubled in size. During winter, I often place the bowl on top of the refrigerator or near a heating vent.
Shaping and Second Rise
- Gently punch down the risen dough to release air bubbles
- Turn onto a lightly floured surface
- Roll to about 2cm thickness
- Using a 8cm round cutter, cut out circles
- Place on parchment-lined baking sheets, spacing 5cm apart
- Cover with kitchen towels and rise for 45-60 minutes
The second rise is crucial – the bomboloni should feel light and slightly jiggly when gently touched. If they spring back immediately, they need more time.
The Frying Process
This is where many home bakers feel intimidated, but I’ll guide you through it step by step. Proper frying technique is what separates good bomboloni from extraordinary ones.
Temperature Control
- Heat oil to exactly 170°C (340°F)
- Use a deep, heavy-bottomed pot or deep fryer
- Maintain consistent temperature throughout frying
- I use a digital thermometer clipped to the pot side
Frying Technique
- Gently slide bomboloni into oil using a slotted spoon
- Fry 3-4 pieces at a time to avoid overcrowding
- Cook for 2-3 minutes per side until golden brown
- Turn only once using a slotted spoon
- Remove and drain on paper towels immediately
Filling and Finishing
Filling Process
- Allow bomboloni to cool completely before filling
- Use a bismarck tip or small knife to create a pocket
- Fill a piping bag with your chosen filling
- Pipe generously but don’t overfill
- Dust with powdered sugar immediately before serving
Traditional Fillings: From Classic to Creative
Over the years, I’ve experimented with countless filling combinations, but some remain timeless classics that never disappoint.
Classic Pastry Cream (Crema Pasticcera)
This is my go-to filling and the one I recommend for beginners. The technique I use comes from a Florentine pastry chef who taught me during my culinary training.
Ingredients:
- 500ml whole milk
- 6 large egg yolks
- 100g granulated sugar
- 50g cornstarch
- 1 vanilla bean (or 2 tsp vanilla extract)
- 30g unsalted butter
Method:
- Heat milk with vanilla bean (split and scraped) until just simmering
- Whisk egg yolks with sugar until pale and thick
- Add cornstarch and whisk until smooth
- Slowly temper hot milk into egg mixture
- Return to saucepan and cook, whisking constantly, until thick
- Remove from heat, whisk in butter
- Cover with plastic wrap directly on surface to prevent skin formation
Advanced Filling Variations
| Filling Type | Key Ingredients | Technique Notes | Shelf Life |
|---|---|---|---|
| Chocolate Cream | Pastry cream base + 100g dark chocolate | Melt chocolate into hot cream | 3 days refrigerated |
| Lemon Curd | Eggs, lemon juice, butter, sugar | Cook gently to avoid curdling | 1 week refrigerated |
| Ricotta Filling | Fresh ricotta, powdered sugar, vanilla | Strain ricotta for smoothness | 2 days refrigerated |
| Salted Caramel | Sugar, cream, butter, sea salt | Watch temperature carefully | 1 week refrigerated |
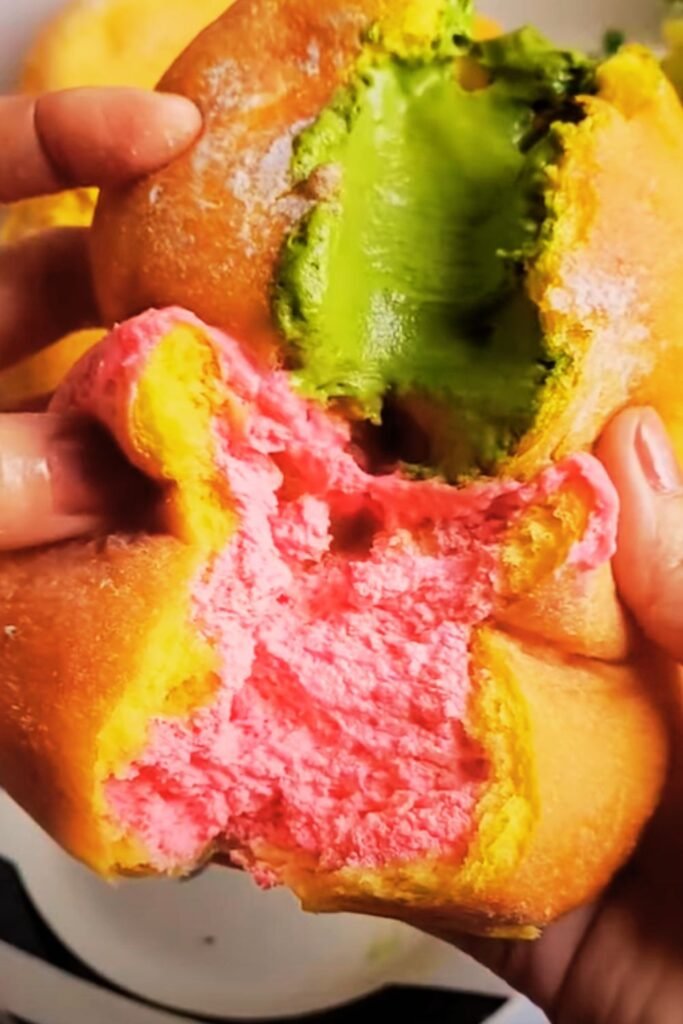
| Pistachio Cream | Pistachio paste, pastry cream | Use high-quality pistachio paste | 3 days refrigerated |
Professional Tips for Bomboloni Success
Through years of teaching and countless batches, I’ve identified the common pitfalls and their solutions. These insights will help you achieve professional results from your first attempt.
Troubleshooting Common Issues
Dense, Heavy Bomboloni
- Usually caused by insufficient rising time
- Check yeast freshness – it should foam vigorously
- Ensure proper kneading for gluten development
- Room temperature affects rising – adjust timing accordingly
Oil-Soaked Results
- Oil temperature too low (below 160°C)
- Overcrowding the fryer
- Not draining properly after frying
- Using old or degraded oil
Uneven Browning
- Inconsistent oil temperature
- Moving bomboloni too much during frying
- Oil depth insufficient (should be at least 7cm deep)
Filling Leakage
- Overfilling the bomboloni
- Filling while still warm
- Using too thin consistency filling
- Improper piping technique
Expert Techniques I’ve Learned
The Float Test: Properly risen bomboloni will float immediately when placed in oil. If they sink initially, they need more rising time.
Temperature Gradation: I start frying at 165°C and gradually increase to 175°C as the oil cools from adding dough.
The Poke Test: Gently poke the risen dough – it should spring back slowly, leaving a slight indentation.
Filling Distribution: I weigh each bombolone after filling to ensure consistency (typically 15-20g of filling per piece).
Nutritional Information and Dietary Considerations
Understanding the nutritional profile helps in portion planning and dietary accommodation. Here’s my detailed breakdown based on standard recipes:
Per Bombolone (with pastry cream filling)
| Nutrient | Amount | % Daily Value* |
|---|---|---|
| Calories | 285 | 14% |
| Total Fat | 12g | 15% |
| Saturated Fat | 4g | 20% |
| Cholesterol | 85mg | 28% |
| Sodium | 180mg | 8% |
| Total Carbohydrates | 38g | 14% |
| Dietary Fiber | 1g | 4% |
| Sugars | 18g | – |
| Protein | 7g | 14% |
| Calcium | 95mg | 7% |
| Iron | 2.1mg | 12% |
*Based on 2,000 calorie diet
Dietary Modifications I’ve Successfully Tested
Gluten-Free Version
- Substitute with gluten-free flour blend (1:1 ratio)
- Add 1 tsp xanthan gum if not included in blend
- Expect slightly denser texture
- Rising time may be 20-30% longer
Dairy-Free Adaptation
- Use plant-based milk (oat milk works best)
- Replace butter with vegan alternative
- Coconut cream makes excellent dairy-free pastry cream
- Texture remains remarkably similar
Reduced Sugar Options
- Reduce sugar in dough by up to 25% without affecting rise
- Use sugar-free preserves for filling
- Stevia-based pastry cream works well
- Dust with sugar-free powdered sweetener
Serving Suggestions and Pairings
My experience serving bomboloni at various occasions has taught me that presentation and pairing can elevate these treats from simple pastries to memorable experiences.
Traditional Italian Service
In authentic Italian style, bomboloni are typically served:
- Warm, within 2-3 hours of frying
- Dusted generously with powdered sugar
- Alongside espresso or cappuccino
- As part of a breakfast or mid-morning snack
Creative Serving Ideas I Love
Dessert Platter Presentation
- Arrange various filled bomboloni on a tiered stand
- Garnish with fresh berries and mint
- Provide small spoons for sharing
- Include flavor cards describing each filling
Coffee Shop Style
- Serve in individual paper bags with brand stickers
- Offer multiple filling options
- Pair with specialty coffee drinks
- Include napkins with Italian phrases
Elegant Dinner Party Finale
- Mini bomboloni (40% smaller) as petit fours
- Serve with dessert spoons and small plates
- Offer 2-3 different flavors per guest
- Accompany with digestifs (limoncello, grappa)
Beverage Pairings That Work Beautifully
| Bomboloni Filling | Hot Beverages | Cold Beverages | Special Occasions |
|---|---|---|---|
| Classic Cream | Espresso, Cappuccino | Iced Coffee, Cold Brew | Italian Sodas |
| Chocolate | Mocha, Hot Chocolate | Chocolate Milk, Iced Mocha | Sparkling Water |
| Lemon | Earl Grey Tea, Chamomile | Lemonade, Iced Tea | Prosecco (celebrations) |
| Strawberry | Green Tea, Herbal Teas | Strawberry Milk, Smoothies | Fruit Punches |
| Nutella | Turkish Coffee, Dark Roast | Hazelnut Milk, Iced Latte | Italian Hot Chocolate |
Storage and Make-Ahead Tips
One question I’m frequently asked is about storage and preparation timing. Here’s everything I’ve learned about keeping bomboloni fresh and planning ahead.
Optimal Storage Methods
Unfilled Bomboloni
- Store at room temperature for up to 2 days
- Wrap individually in plastic wrap
- Freeze for up to 1 month
- Reheat gently in low oven before filling
Filled Bomboloni
- Best consumed within 4-6 hours
- Refrigerate if holding longer than 2 hours
- Bring to room temperature before serving
- Never freeze filled bomboloni
Make-Ahead Strategies I Use
Dough Preparation
- Make dough through first rise
- Refrigerate up to 24 hours
- Remove 1 hour before shaping to come to room temperature
- Proceed with recipe as normal
Filling Preparation
- All fillings can be made 2-3 days ahead
- Store covered in refrigerator
- Bring to room temperature and re-whisk before using
- Strain if lumps have formed
Complete Make-Ahead Process For special events, I often prepare components separately:
- Day 1: Make all fillings
- Day 2: Prepare and shape dough, refrigerate overnight
- Day 3: Fry, fill, and serve
Regional Variations Across Italy
My travels throughout Italy have revealed fascinating regional differences in bomboloni preparation and serving styles. Each area brings its own cultural influences and local ingredients to these beloved pastries.
Northern Italy Variations
Lombardy Style
- Often filled with zabaglione (wine custard)
- Slightly smaller than traditional size
- Sometimes flavored with amaretto
Veneto Tradition
- Frequently filled with pastry cream mixed with candied fruits
- Popular during Carnival season
- Often shaped slightly oval rather than perfectly round
Central Italy Classics
Tuscan Bomboloni
- The most traditional version I learned in Florence
- Simple pastry cream or jam fillings
- Perfect round shape, generous dusting of sugar
Roman Style
- Sometimes called “maritozzi” when made larger
- Often includes pine nuts in the dough
- Filled with whipped cream rather than pastry cream
Southern Interpretations
Sicilian Variations
- Often filled with ricotta mixed with chocolate chips
- Sometimes include candied orange peel in the dough
- Dusted with powdered sugar mixed with cinnamon
Neapolitan Style
- Frequently filled with pastry cream flavored with limoncello
- Slightly denser dough texture
- Often served as part of elaborate dessert displays
Q&A Section: Your Bomboloni Questions Answered
Throughout my years of teaching and writing about bomboloni, certain questions come up repeatedly. Here are the most common concerns and my detailed responses.
Q: Why do my bomboloni turn out dense instead of light and airy?
The most common cause is insufficient kneading or inadequate rising time. I always tell my students that bomboloni dough needs to be kneaded until it’s smooth and elastic – this typically takes 12-15 minutes by hand or 8-10 minutes with a stand mixer. Additionally, rising times can vary dramatically based on room temperature and humidity. In winter, I often let my dough rise for up to 3 hours for the first rise. The dough should literally double in size, and when you gently poke it, it should spring back slowly.
Q: What’s the secret to getting the perfect golden color when frying?
Temperature control is absolutely crucial. I maintain my oil at exactly 170°C (340°F) using a digital thermometer. If the oil is too hot, the bomboloni will brown too quickly on the outside while remaining raw inside. Too cool, and they’ll absorb excess oil and become greasy. I also never overcrowd my pot – frying only 3-4 pieces at a time ensures the oil temperature doesn’t drop significantly when you add the dough.
Q: Can I bake bomboloni instead of frying them?
While it’s possible to bake them, they won’t have the same authentic texture and flavor that makes bomboloni special. However, if you prefer a healthier option, I recommend baking at 180°C (350°F) for 15-18 minutes until golden. Brush them with melted butter before and after baking to approximate the richness that frying provides. The texture will be more like a dinner roll than traditional bomboloni, but they’re still delicious.
Q: How do I prevent my filling from leaking out?
This is a technique issue I see frequently. First, make sure your bomboloni are completely cool before filling – warm pastry will cause cream fillings to melt and leak. Second, don’t overfill them. I use about 15-20g of filling per bombolone, which is roughly 1-2 tablespoons. When creating the pocket for filling, use a small sharp knife to make a clean cut rather than tearing. Finally, fill from the bottom or side rather than the top to prevent visible holes.
Q: What type of flour works best for bomboloni?
I always recommend bread flour because of its higher protein content (12-14%), which develops more gluten and creates the proper texture. All-purpose flour can work in a pinch, but your bomboloni won’t have quite the same chewiness and structure. If you can find Italian “00” flour, that’s even better – it’s finely milled and creates an incredibly tender texture while still providing good structure.
Q: Why does my yeast sometimes not activate properly?
Yeast is sensitive to both temperature and age. I always test my yeast by dissolving it in milk warmed to exactly 37°C (98°F) – any hotter and you’ll kill the yeast, any cooler and it won’t activate properly. Fresh yeast should foam vigorously within 5-8 minutes. If it doesn’t, either your yeast is dead or your milk temperature was wrong. Also, check expiration dates – even properly stored yeast loses potency over time.
Q: Can I make bomboloni ahead of time for a party?
This is tricky because bomboloni are absolutely best when fresh. However, I have several strategies for party preparation. You can make the dough through the first rise up to 24 hours ahead and refrigerate it. Shape and do the second rise on the day of serving. Alternatively, you can fry them completely up to 6 hours ahead, store at room temperature, and fill them just before serving. Never refrigerate filled bomboloni – the cream will make the pastry soggy.
Q: What’s the difference between bomboloni and regular donuts?
Bomboloni have a richer, more tender crumb due to the eggs and butter in the dough. They’re traditionally filled rather than glazed, and the filling is injected after frying rather than being incorporated into the dough. The texture is lighter and more delicate than most American-style donuts, and they’re typically served with a simple dusting of sugar rather than elaborate glazes or toppings.
Q: How do I know when the oil is the right temperature without a thermometer?
While I strongly recommend using a thermometer for consistent results, you can test oil temperature by dropping a small piece of bread into it. At the correct temperature (170°C/340°F), the bread should sizzle immediately and turn golden brown in about 30 seconds. If it browns much faster, the oil is too hot; if it takes longer than 45 seconds, it’s too cool.
Q: Why do my bomboloni sometimes have a raw taste even when they look cooked?
This usually indicates the oil temperature was too high, causing the outside to brown before the inside was fully cooked. The internal temperature of a properly cooked bombolone should reach about 90°C (195°F). If this keeps happening, lower your oil temperature by 10-15 degrees and cook slightly longer. Also, make sure you’re not rolling your dough too thick – 2cm is the maximum thickness I recommend.
Q: Can I use different types of sugar for dusting?
Absolutely! While powdered sugar is traditional, I love experimenting with different sugars. Vanilla sugar (made by storing vanilla beans in granulated sugar) adds beautiful flavor. Cinnamon sugar is delicious with chocolate-filled bomboloni. For special occasions, I sometimes use colored sanding sugar. Just avoid anything too coarse, as it won’t adhere well to the pastry surface.
Creating perfect bomboloni is both an art and a science, requiring patience, practice, and attention to detail. But I can assure you that once you master these techniques, you’ll have a skill that will bring joy to friends and family for years to come. The satisfaction of watching someone bite into a bombolone you’ve made from scratch – seeing their eyes light up with that first taste – makes every minute of preparation worthwhile.
Remember, even if your first batch isn’t perfect, each attempt teaches you something new. I’ve been making bomboloni for over a decade, and I still discover little improvements and variations that make them even better. The key is to start with good ingredients, follow the techniques I’ve shared, and most importantly, enjoy the process of creating something beautiful and delicious with your own hands.