I never imagined that my two favorite desserts could come together so beautifully until I created these baked crème brûlée donuts. The first time I bit into one of these golden beauties, with its crispy caramelized sugar top giving way to silky vanilla custard filling, I knew I had stumbled upon something truly special. This recipe combines the sophisticated charm of classic French crème brûlée with the beloved comfort of American donuts, creating a dessert that’s both familiar and wonderfully surprising.
What makes these donuts extraordinary isn’t just their flavor—it’s the technique. By baking rather than frying, we achieve a tender, cake-like texture that perfectly complements the rich custard filling. The torched sugar top adds that signature crème brûlée crack that makes every bite an experience. I’ve spent countless hours perfecting this recipe, and I’m thrilled to share every secret with you.
Understanding the Magic Behind Crème Brûlée Donuts
Before diving into the recipe, let me explain what makes these donuts so special. Traditional crème brûlée relies on a silky custard base topped with caramelized sugar, while donuts typically feature a sweet, yeasted or cake-based dough. My innovation lies in creating a donut that captures the essence of both desserts without compromising either.
Crème Brûlée: A classic French dessert consisting of rich custard topped with caramelized sugar, creating a contrast between the creamy interior and crispy exterior.
Baked Donuts: Unlike their fried counterparts, baked donuts offer a lighter texture and allow for more delicate flavors to shine through.
Pastry Cream: A thick custard used as filling, made with eggs, milk, sugar, and cornstarch, providing the creamy center that mimics traditional crème brûlée.
Torch Caramelization: The process of using a kitchen torch to melt and caramelize sugar, creating the signature crispy top layer.
Essential Equipment and Ingredients
Creating perfect crème brûlée donuts requires specific tools and high-quality ingredients. I’ve learned through experience that shortcuts here often lead to disappointing results.
Equipment Needed
- Donut pan (standard 6-cavity)
- Kitchen torch
- Stand mixer or hand mixer
- Medium saucepan
- Wire cooling racks
- Piping bags with round tips
- Fine-mesh strainer
- Digital scale (recommended)
Ingredient Quality Matters
The success of these donuts depends heavily on ingredient quality. I always use real vanilla extract rather than imitation, fresh eggs from local farms when possible, and high-fat dairy products for the richest flavor.
| Ingredient Category | Specific Requirements | Quality Tips |
|---|---|---|
| Dairy | Heavy cream (36% fat), whole milk, unsalted butter | Use European-style butter for richer flavor |
| Eggs | Large, room temperature | Farm-fresh eggs create more vibrant custard |
| Sweeteners | Granulated sugar, superfine sugar for torching | Avoid brown sugar in custard base |
| Flavorings | Pure vanilla extract, vanilla bean paste | Madagascar vanilla offers the best flavor profile |
| Flour | All-purpose flour, sifted | Cake flour creates too delicate a structure |
| Leavening | Fresh baking powder, baking soda | Check expiration dates for optimal rise |
The Perfect Donut Base Recipe
My donut base strikes the perfect balance between sturdy enough to hold custard filling and tender enough to complement the creamy interior. After testing dozens of variations, this recipe consistently delivers exceptional results.
Ingredients for Donut Base
- 2 cups all-purpose flour, sifted
- 3/4 cup granulated sugar
- 2 teaspoons baking powder
- 1/2 teaspoon salt
- 1/3 cup unsalted butter, melted
- 2 large eggs, room temperature
- 3/4 cup whole milk, warmed slightly
- 2 teaspoons vanilla extract
- 1/4 teaspoon nutmeg (optional)
Method for Perfect Donuts
I preheat my oven to 375°F (190°C) and generously grease my donut pans with butter or cooking spray. The key to tender donuts lies in gentle mixing—I never overmix the batter, which would create tough, dense results.
In my largest mixing bowl, I whisk together all dry ingredients until completely combined. Creating a well in the center, I pour in the melted butter, beaten eggs, warm milk, and vanilla extract. Using a wooden spoon, I fold the ingredients together just until the dry ingredients disappear. The batter should look slightly lumpy—this is perfect.
I fill each donut mold about 2/3 full using a piping bag or spoon. This prevents overflow while ensuring full, rounded shapes. Baking takes 12-15 minutes, until the tops spring back when lightly touched and a toothpick inserted comes out clean.
Mastering the Crème Brûlée Filling
The custard filling is where the magic truly happens. I’ve refined this recipe to achieve the perfect consistency—thick enough to pipe cleanly yet creamy enough to deliver that authentic crème brûlée experience.
Custard Ingredients
- 2 cups heavy cream
- 1/2 cup granulated sugar, divided
- 6 large egg yolks
- 3 tablespoons cornstarch
- 1/4 teaspoon salt
- 2 teaspoons vanilla extract
- 2 tablespoons unsalted butter
Custard Preparation Technique
I heat the cream in a heavy-bottomed saucepan over medium heat until it just begins to steam—never allowing it to boil. Meanwhile, I whisk egg yolks with half the sugar until pale and slightly thickened, then whisk in cornstarch and salt until smooth.
The tempering process requires patience and attention. I slowly pour about 1/4 of the hot cream into the egg mixture while whisking constantly, then gradually add the remaining cream. This prevents the eggs from scrambling and ensures silky smoothness.
Returning the mixture to the saucepan, I cook over medium-low heat, whisking constantly, until it thickens enough to coat the back of a spoon. The custard should hold its shape when piped but still flow smoothly. I remove it from heat and immediately whisk in vanilla extract and butter until glossy.
Pressing plastic wrap directly onto the surface prevents skin formation, and I refrigerate until completely cool, typically 2-3 hours.
Assembly and Finishing Techniques
The assembly process transforms ordinary baked donuts into extraordinary crème brûlée masterpieces. I’ve developed specific techniques that ensure consistent results every time.
Creating the Perfect Fill
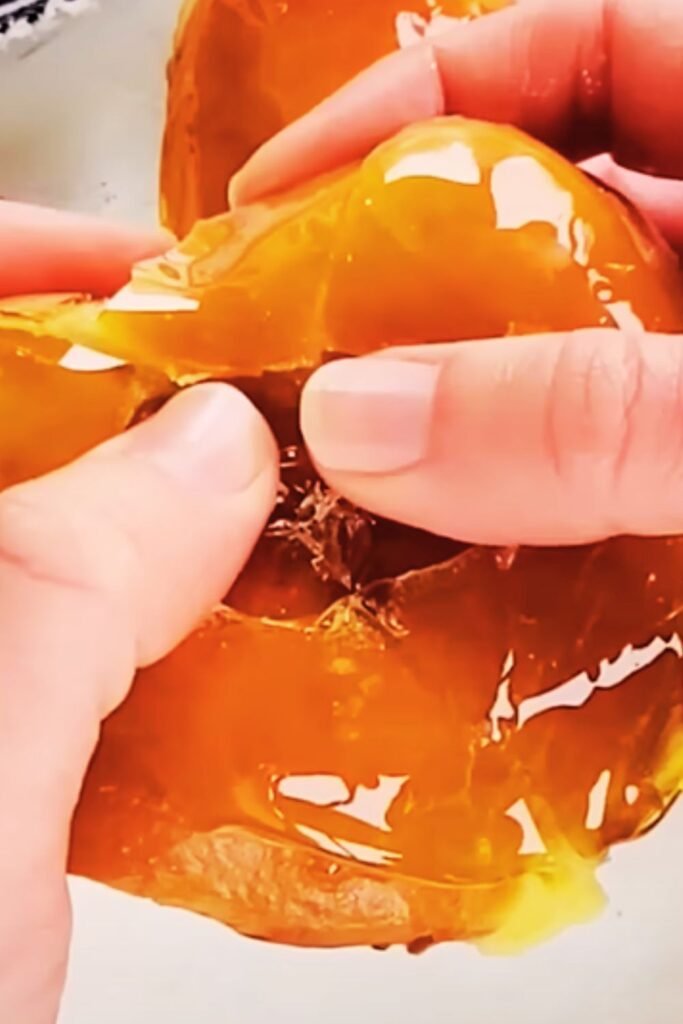
Once my donuts are completely cool, I use a small knife to create a pocket in each donut’s side, being careful not to puncture through to the other side. I transfer the chilled custard to a piping bag fitted with a round tip and carefully fill each donut until the custard just begins to appear at the opening.
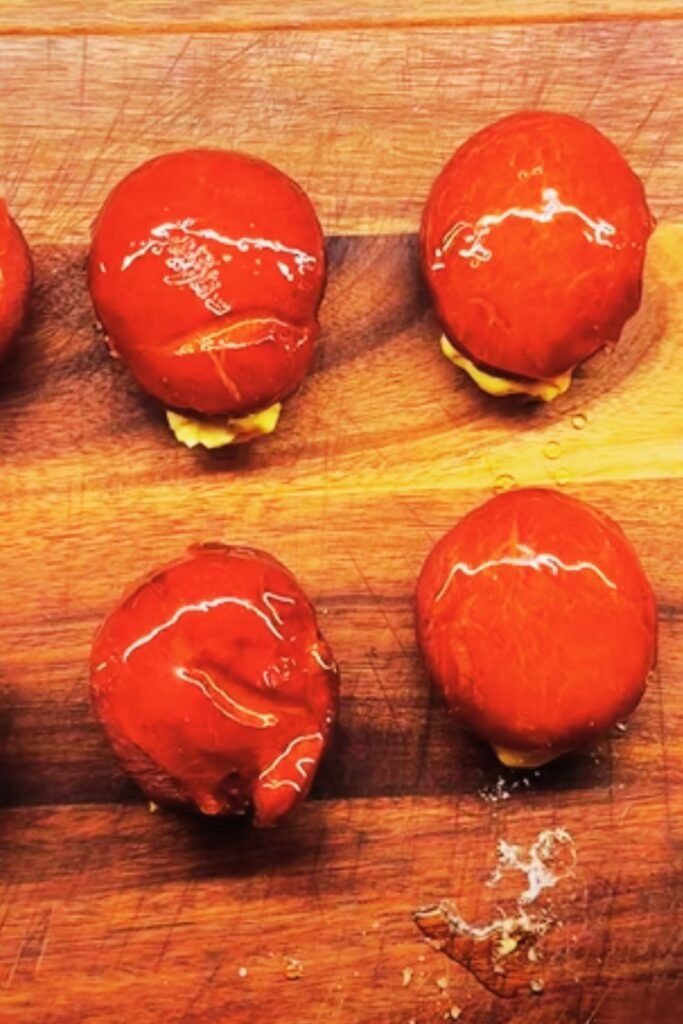
The Signature Caramelized Top
The torching process requires specific technique for consistent results. I dust each filled donut top with a thin, even layer of superfine sugar. Using circular motions with my kitchen torch, I caramelize the sugar until it turns deep amber and forms the characteristic crispy shell.
The key is maintaining constant motion to prevent burning while ensuring complete caramelization. I allow the sugar to cool for 30 seconds before serving, giving it time to harden into that satisfying crack.
Flavor Variations and Creative Adaptations
After mastering the basic recipe, I’ve experimented with numerous variations that maintain the core concept while offering exciting new flavor profiles.
Popular Flavor Adaptations
| Variation | Custard Modification | Additional Elements | Serving Notes |
|---|---|---|---|
| Chocolate Crème Brûlée | Add 3 oz melted dark chocolate to custard | Cocoa powder dusting | Pairs beautifully with coffee |
| Lavender Honey | Infuse cream with dried lavender | Honey in place of some sugar | Elegant afternoon treat |
| Espresso | Add 2 shots strong espresso to custard | Coffee bean garnish | Perfect morning indulgence |
| Orange Cardamom | Orange zest and ground cardamom | Candied orange peel topping | Sophisticated flavor combination |
| Maple Bourbon | Maple syrup and bourbon extract | Toasted pecan pieces | Adult-friendly dessert |
Seasonal Inspirations
I love adapting these donuts for different seasons. During autumn, I incorporate pumpkin spice into the donut base and add a touch of cinnamon to the custard. Spring versions might feature fresh berry compotes alongside the traditional custard, while winter calls for peppermint or eggnog variations.
Storage and Make-Ahead Strategies
Understanding proper storage ensures these donuts maintain their quality and safety. I’ve developed specific guidelines based on extensive testing and food safety principles.
Short-Term Storage Guidelines
Filled donuts require refrigeration due to the dairy-based custard. I store them in airtight containers for up to 3 days, though they’re truly best within 24 hours of assembly. The caramelized sugar may soften slightly over time, but a quick re-torching restores the crispy texture.
Make-Ahead Components
The beauty of this recipe lies in its component-friendly nature. I often prepare donut bases up to 2 days ahead, storing them wrapped in plastic at room temperature. The custard keeps beautifully for up to 4 days refrigerated, actually improving in flavor as it mellows.
For entertaining, I assemble the donuts completely except for the final sugar torching, which I do just before serving to ensure maximum impact.
Troubleshooting Common Issues
Through years of making these donuts, I’ve encountered and solved numerous challenges. Here are the most common issues and my proven solutions.
Dense or Heavy Donuts
This typically results from overmixing the batter or using ingredients at the wrong temperature. I always ensure my eggs and milk are at room temperature and mix just until ingredients combine.
Custard Problems
Lumpy custard usually means the eggs were heated too quickly. I always temper gradually and maintain gentle heat throughout cooking. If lumps do form, I strain the custard through a fine-mesh sieve while still warm.
Caramelization Challenges
Uneven browning occurs when the sugar layer isn’t uniform or the torch moves too slowly. I’ve learned to dust sugar evenly and maintain steady, circular motions with the torch.
Nutritional Information and Dietary Considerations
Understanding the nutritional profile helps in planning these treats as part of a balanced diet.
| Nutritional Aspect | Per Donut (Approximate) | Notes |
|---|---|---|
| Calories | 285-320 | Varies with size and filling amount |
| Fat | 14-16g | Primarily from dairy and eggs |
| Carbohydrates | 35-40g | Includes natural and added sugars |
| Protein | 6-8g | From eggs and dairy |
| Calcium | 120-140mg | Significant contribution from dairy |
| Vitamin A | 15% DV | From eggs and dairy |
Dietary Modifications
For those with dietary restrictions, I’ve successfully adapted this recipe. Gluten-free versions work well using a high-quality all-purpose gluten-free flour blend, though the texture differs slightly. Dairy-free adaptations using coconut cream and plant-based milk create delicious alternatives, though the custard requires additional thickening agents.
Perfect Pairings and Serving Suggestions
These donuts shine in various serving contexts, from elegant dinner party desserts to special breakfast treats.
Beverage Companions
Coffee and tea pairings elevate the experience significantly. I particularly enjoy serving these with:
- French press coffee with a touch of vanilla
- Earl Grey tea for its complementary bergamot notes
- Hot chocolate during colder months
- Fresh fruit juices for brunch settings
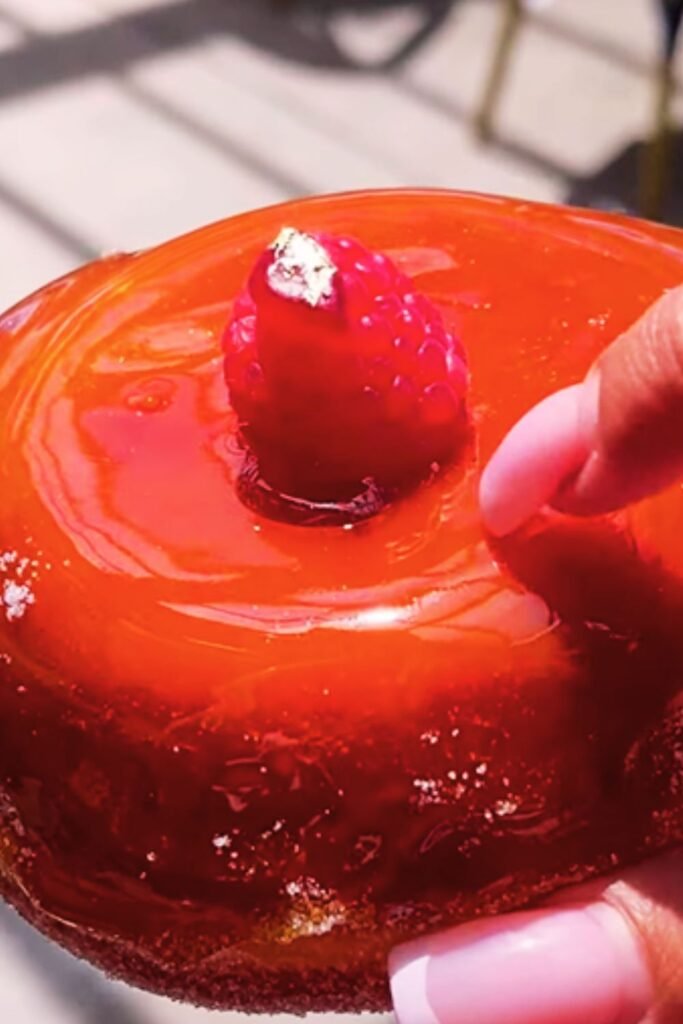
Presentation Ideas
For special occasions, I plate these donuts with fresh berries, a drizzle of berry coulis, and perhaps a small quenelle of vanilla ice cream. The contrast of temperatures and textures creates a restaurant-quality dessert experience.
Professional Tips for Success
After making hundreds of these donuts, I’ve developed specific techniques that consistently deliver professional results.
The most crucial factor is timing—I always plan the process across two days, making components separately and assembling fresh. This prevents rushed preparation and ensures optimal flavor development.
Temperature control throughout the process makes an enormous difference. Room temperature ingredients combine more easily, properly heated cream creates smoother custard, and completely cooled components assemble more cleanly.
I invest in quality equipment, particularly a reliable kitchen torch and heavy-bottomed saucepan. These tools directly impact the final result and make the process more enjoyable.
Q&A Section
Q: Can I make these donuts without a kitchen torch for the caramelized top?
I understand not everyone owns a kitchen torch, but it’s really essential for achieving the signature crème brûlée effect. You could try using your oven’s broiler, but it’s much more difficult to control and often creates uneven results. I highly recommend investing in a basic kitchen torch—they’re affordable and useful for many other desserts.
Q: How far in advance can I prepare these donuts for a party?
I typically prepare the donut bases and custard filling up to 2 days ahead, storing them separately. I fill the donuts the morning of serving and torch the sugar tops just before presenting them. This ensures the best texture and visual impact.
Q: Why do my donuts come out dense instead of light and fluffy?
Dense donuts usually result from overmixing the batter or using old leavening agents. I always check that my baking powder is fresh (replace every 6 months) and mix the batter just until the dry ingredients disappear. The batter should look slightly lumpy—smooth batter means overmixing.
Q: Can I use a different type of sugar for the caramelized topping?
Superfine sugar works best because it melts and caramelizes evenly. Regular granulated sugar can work but may create a less smooth finish. I don’t recommend brown sugar as it burns too easily and doesn’t create the classic crème brûlée appearance.
Q: What’s the best way to fill the donuts without making a mess?
I create a small pocket in the side of each cooled donut using a sharp knife, then use a piping bag with a round tip to inject the custard. Fill slowly and stop when the custard just begins to appear at the opening. This method is much cleaner than trying to slice and fill.
Q: My custard turned out lumpy—can I fix it?
If your custard has lumps, strain it through a fine-mesh sieve while it’s still warm. This will remove most lumps and create a smooth texture. To prevent lumps in the future, temper the eggs more gradually and maintain gentle heat throughout cooking.
Q: How do I know when the sugar is properly caramelized?
The sugar should turn a deep amber color and create a hard shell when cooled. I usually torch in circular motions until I see this color change, then allow it to cool for 30 seconds. The surface should crack when tapped gently with a spoon.
Q: Can I freeze these donuts for later?
I don’t recommend freezing the assembled donuts as the custard texture changes significantly when thawed. However, you can freeze the unfilled donut bases for up to 1 month. Thaw completely before filling and finishing.
Q: What size donut pan should I use?
I use standard 6-cavity donut pans, which create donuts about 3 inches in diameter. Mini donut pans work too but require adjusted baking times (about 8-10 minutes) and smaller amounts of filling.
Q: Is there a way to make these donuts healthier?
While these are definitely an indulgent treat, you can make some modifications. Using cake flour creates a lighter texture, reducing the sugar slightly in both components still maintains good flavor, and adding a touch of Greek yogurt to the custard provides protein while maintaining creaminess. However, the essential character of the dessert relies on the rich dairy components.
These baked crème brûlée donuts represent the perfect marriage of two beloved desserts, creating something entirely new yet wonderfully familiar. The process requires patience and attention to detail, but the results are absolutely worth the effort. Each bite delivers the satisfying crack of caramelized sugar, followed by tender donut cake and silky vanilla custard—a true celebration of texture and flavor that never fails to impress.