There’s nothing quite like the aroma of freshly baked hot cross buns wafting through my kitchen during the Easter season. These spiced, fruit-studded treats marked with their distinctive cross have been an Easter staple for centuries, and for good reason. Sweet but not overly so, studded with juicy dried fruits, and perfumed with warm spices—they’re truly one of baking’s simple pleasures.
I’ve spent years perfecting my hot cross bun recipe, through countless batches of testing, tweaking, and tasting. What started as a yearly tradition has become something of an obsession, and I’m thrilled to share my ultimate hot cross bun recipe with you today.
Whether you’re a seasoned baker or trying your hand at these traditional treats for the first time, I’ll walk you through every step of the process to ensure perfect results. From understanding the perfect dough consistency to achieving that glossy, sticky glaze, this comprehensive guide covers everything you need to know.
The Rich History Behind Hot Cross Buns
Before diving into the recipe, I think it’s worth appreciating the fascinating history of these beloved buns. Hot cross buns have roots dating back hundreds of years, with mentions in English texts as early as the 16th century.
The cross on top, now typically made from a simple flour paste or icing, originally symbolized the crucifixion of Jesus, making these buns particularly significant during Easter celebrations. In England during the Tudor period, Queen Elizabeth I even issued a decree limiting the sale of hot cross buns to Good Friday, Christmas, and for funerals.
Throughout history, hot cross buns have been surrounded by superstition and folklore. Some believed that buns baked on Good Friday would never go moldy, while others kept them hanging in their kitchens to protect against evil spirits or ensure that all bread baked that year would turn out perfectly.
While I don’t hang buns from my kitchen ceiling (though I’m tempted to try it for science!), I do appreciate how this humble baked good connects us to centuries of tradition each time we make them.
Key Ingredients for Perfect Hot Cross Buns
The beauty of hot cross buns lies in their harmonious blend of simple ingredients that create something truly special. Here’s what you’ll need for my tried-and-true recipe:
For the Buns:
- Strong bread flour – Provides the structure needed for perfect, fluffy buns
- Caster sugar – Adds just the right sweetness without overwhelming the spices
- Mixed spice – The traditional warm spice blend (I’ll share my own mix below)
- Ground cinnamon – For that distinctive warming flavor
- Salt – Enhances all the flavors and balances the sweetness
- Unsalted butter – Creates tenderness in the dough
- Fresh yeast or instant dried yeast – The leavening agent that makes them rise
- Full-fat milk – Adds richness and helps activate the yeast
- Eggs – Provide structure, richness, and color
- Mixed dried fruits – Typically currants, raisins, and candied citrus peel
- Orange zest – Adds a fresh, aromatic note
For the Cross:
- Plain flour – Forms a paste that holds its shape during baking
- Water – To create the right consistency
For the Glaze:
- Apricot jam – Creates a beautiful, shiny finish
- Water – Thins the jam for easy brushing
My Special Mixed Spice Blend
While you can purchase mixed spice at most grocery stores, I prefer making my own blend for the freshest, most vibrant flavor. Here’s my personal mix:
| Spice | Quantity | Notes |
|---|---|---|
| Ground cinnamon | 2 tablespoons | Provides warmth and sweetness |
| Ground allspice | 2 teaspoons | Adds complexity with notes of cinnamon, nutmeg, and cloves |
| Ground nutmeg | 2 teaspoons | Contributes earthy, aromatic notes |
| Ground mace | 1 teaspoon | Adds a delicate, warm flavor similar to nutmeg but more delicate |
| Ground cloves | 1 teaspoon | Gives a powerful aromatic punch (use sparingly) |
| Ground ginger | 1 teaspoon | Adds a gentle heat and brightness |
| Ground coriander | ½ teaspoon | Provides subtle citrus notes |
Simply mix all spices together and store in an airtight container away from light and heat. This blend will keep for up to 3 months and can be used in other baked goods like fruit cakes, puddings, and cookies.
The Complete Hot Cross Buns Recipe
Now, let’s dive into the full recipe. While it may seem like a lot of steps, I promise the effort is worthwhile when you bite into these fragrant, perfectly textured buns.
Ingredients
For the Buns:
- 500g strong bread flour, plus extra for dusting
- 75g caster sugar
- 2 teaspoons mixed spice (store-bought or homemade blend)
- 1 teaspoon ground cinnamon
- 1 teaspoon salt
- 50g unsalted butter, cubed and at room temperature
- 14g (2 sachets) fast-action dried yeast
- 300ml full-fat milk, warmed to lukewarm
- 1 large egg, beaten
- 200g mixed dried fruits (combination of currants, raisins, and candied peel)
- Zest of 1 orange
For the Cross:
- 75g plain flour
- Approximately 5-6 tablespoons water
For the Glaze:
- 3 tablespoons apricot jam
- 1 tablespoon water
Equipment Needed
| Equipment | Purpose |
|---|---|
| Large mixing bowl | For combining ingredients and kneading dough |
| Measuring cups and spoons | For accurate measurements |
| Small saucepan | For warming milk |
| Pastry brush | For applying the glaze |
| Baking tray | For baking the buns |
| Parchment paper | To line the baking tray |
| Kitchen towel or plastic wrap | For covering dough while rising |
| Piping bag with small nozzle | For creating the crosses |
| Wire cooling rack | For cooling the baked buns |
| Sharp knife or dough scraper | For dividing the dough |
| Kitchen scale | For precise measurement of ingredients |
Method
Step 1: Prepare the Dough
- In a large mixing bowl, combine the flour, sugar, mixed spice, cinnamon, and salt. Mix thoroughly.
- Add the cubed butter and rub it into the flour mixture using your fingertips until it resembles fine breadcrumbs.
- Create a well in the center of the mixture and add the yeast.
- Warm the milk until it’s just lukewarm (too hot will kill the yeast). Add the beaten egg to the milk and whisk lightly.
- Pour the milk-egg mixture into the well in the flour mixture.
- Mix initially with a wooden spoon, then use your hands to bring everything together into a sticky dough.
Step 2: Knead the Dough
- Turn the dough out onto a lightly floured surface.
- Knead for approximately 10 minutes until the dough becomes smooth, elastic, and no longer sticky. The dough should pass the “windowpane test” – when a small piece is stretched between your fingers, it should become thin enough to see light through without tearing.
- Form the dough into a ball.
Step 3: First Rise
- Place the dough ball in a lightly oiled bowl and cover with a clean kitchen towel or plastic wrap.
- Leave in a warm, draft-free place for about 1-1.5 hours, or until doubled in size.
Step 4: Add the Fruits
- Once risen, gently punch down the dough to knock out the air.
- Flatten the dough and sprinkle over the mixed dried fruits and orange zest.
- Knead the fruits and zest into the dough until evenly distributed. This may take about 5 minutes – be patient, as the fruit tends to pop out initially.
Step 5: Shape the Buns
- Divide the dough into 12 equal pieces, weighing approximately 85-90g each for consistency.
- Roll each piece into a smooth ball by cupping your hand over the dough and moving in a circular motion on an unfloured surface to create tension.
- Arrange the buns on a baking tray lined with parchment paper, leaving about 2cm between each bun (they will expand as they prove).
Step 6: Second Rise
- Cover the tray loosely with oiled plastic wrap or a clean kitchen towel.
- Leave in a warm place for 45-60 minutes, or until the buns have noticeably increased in size and are touching each other.
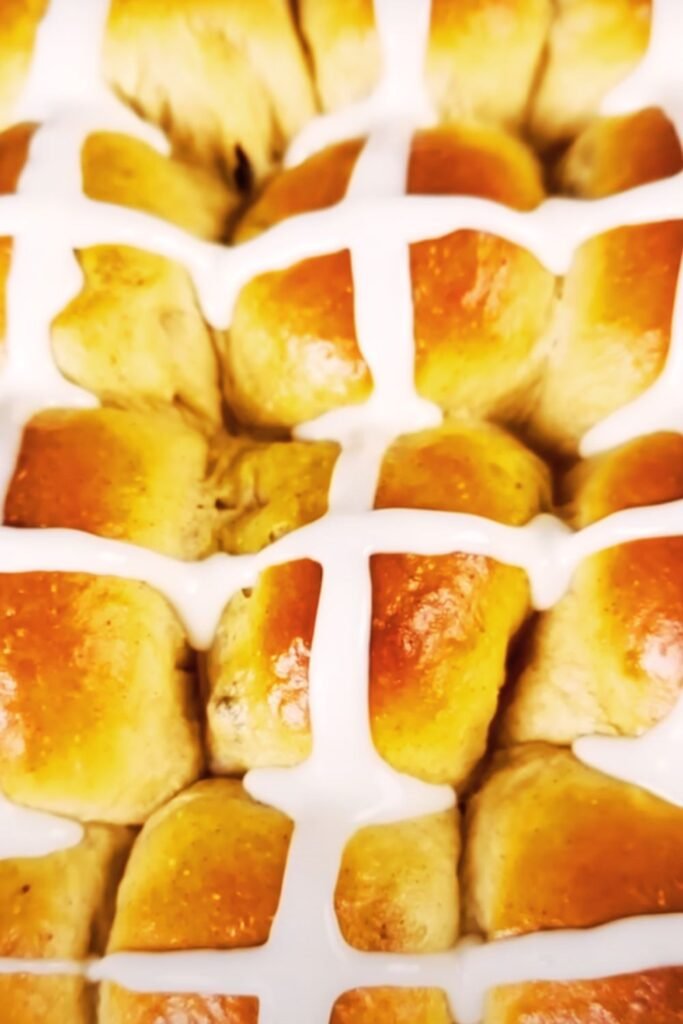
Step 7: Make the Crosses
- Preheat your oven to 200°C (180°C fan/gas mark 6).
- Mix the plain flour with enough water to create a thick paste with a consistency similar to toothpaste.
- Spoon the mixture into a piping bag fitted with a small plain nozzle (or use a plastic food bag with a corner snipped off).
- Pipe crosses onto each bun by drawing a continuous line down the center of each row, then repeat in the other direction.
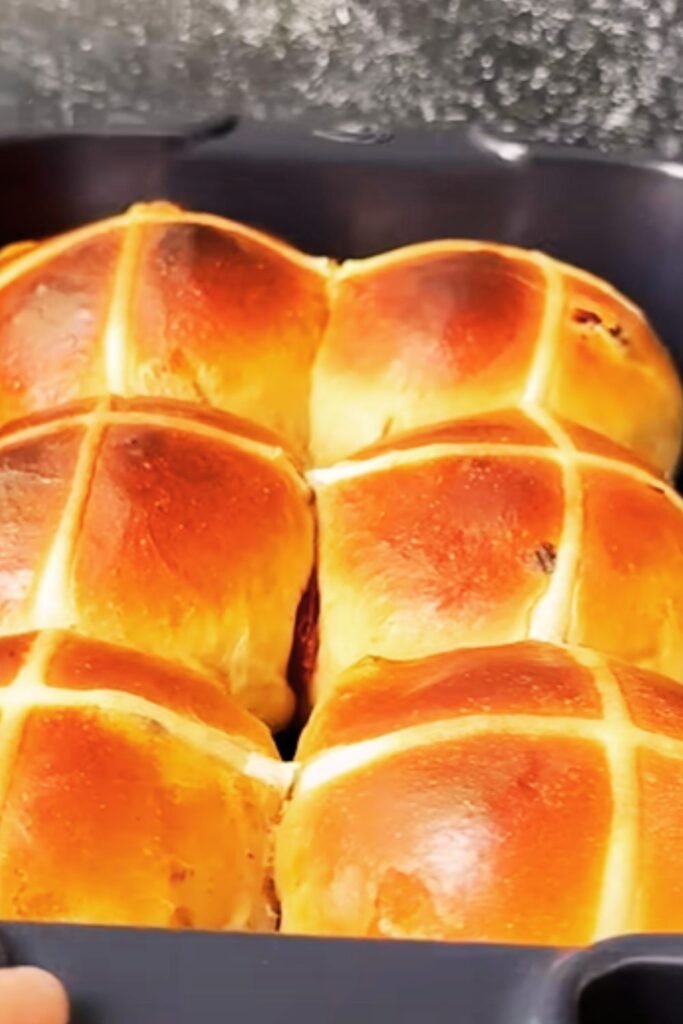
Step 8: Bake
- Bake in the preheated oven for 20-25 minutes until golden brown. The buns should sound hollow when tapped on the bottom.
Step 9: Glaze
- While the buns are still hot, prepare the glaze by warming the apricot jam with the water in a small saucepan until melted and smooth.
- Pass through a sieve if there are large pieces of fruit in the jam.
- Brush the glaze generously over the top of the warm buns.
- Allow to cool on a wire rack.

Tips for Hot Cross Bun Success
Through years of baking hot cross buns, I’ve gathered some invaluable tips that can help ensure your buns turn out perfectly every time:
Perfecting the Dough
- Temperature matters: Ensure your milk is lukewarm, not hot. Too hot will kill the yeast, while too cold will slow down activation.
- Windowpane test: To check if you’ve kneaded enough, take a small piece of dough and stretch it between your fingers. If it stretches thin enough to see light through without breaking, it’s ready.
- Be patient with fruit incorporation: Adding dried fruit to dough can be frustrating as the fruit tends to pop out. Keep folding and kneading patiently until everything is evenly distributed.
Proving and Rising
- Create a warm environment: If your kitchen is cold, create a proving environment by placing the covered dough in a turned-off oven with a bowl of hot water at the bottom.
- Don’t rush the rise: Proper rising develops flavor. A slower rise in a cooler environment actually produces better-tasting buns.
- Use the poke test: To check if your dough is properly proved, gently poke it with a floured finger. If the indentation springs back slowly but not completely, it’s ready to bake.
Perfect Crosses and Glaze
- Cross consistency matters: The flour paste for crosses should be thick enough to hold its shape but thin enough to pipe easily. Test on a plate first.
- Apply glaze while hot: The buns absorb the glaze better when they’re fresh from the oven, creating that characteristic sticky, shiny top.
Storage and Serving
- Best eaten fresh: Hot cross buns are at their absolute best within 24 hours of baking.
- Freezing option: Freeze any extras on the day of baking. Defrost at room temperature and warm in the oven before serving.
- Refresh stale buns: If they’re a day old, split and toast them for a delicious alternative way to enjoy them.
Troubleshooting Common Hot Cross Bun Problems
Even experienced bakers sometimes encounter issues. Here are solutions to common hot cross bun problems:
| Problem | Possible Cause | Solution |
|---|---|---|
| Buns are dense and heavy | Insufficient kneading or rising time | Knead dough until it passes the windowpane test; ensure adequate proving time |
| Crosses disappear during baking | Paste too thin | Make a thicker paste with less water |
| Fruit sinks to bottom of buns | Fruits too heavy or wet | Toss dried fruits in a little flour before adding; ensure fruits are well incorporated |
| Buns are pale | Oven temperature too low | Increase oven temperature slightly; ensure oven is properly preheated |
| Buns spread too much | Dough too wet or overproved | Add a little more flour if dough seems too sticky; don’t let second prove go too long |
| Crosses are too thick/dominant | Paste too thick | Add a little more water to thin the paste |
| Buns not rising properly | Inactive yeast or temperature issues | Check yeast expiration date; ensure milk is warm but not hot |
Creative Variations to Try
While I’m a traditionalist at heart, I’ve experimented with several delicious variations over the years:
Chocolate Orange Hot Cross Buns
Replace 50g of the dried fruit with chopped dark chocolate and increase the orange zest to two oranges. The combination of chocolate and orange is divine, especially when the buns are served warm and the chocolate is still melty.
Apple and Cinnamon Hot Cross Buns
Replace half the dried fruit with small chunks of dried apple and double the cinnamon. Add 1/2 teaspoon of ground cardamom for an extra dimension of flavor.
Sourdough Hot Cross Buns
For a deeper flavor profile, replace the commercial yeast with 200g of active sourdough starter. Reduce the flour by 100g and the milk by 100ml. The proving time will be longer, but the complex flavor is worth the wait.
Extra Spicy Hot Cross Buns
Double all the spices in the recipe and add 1/4 teaspoon of ground black pepper for an extra warmth that subtly builds with each bite.
Serving Suggestions
Hot cross buns can be enjoyed in various ways, depending on your preference:
- Traditional: Split and spread with good quality butter while still slightly warm.
- Decadent breakfast: Split, toast, and top with ricotta and honey or maple syrup.
- Sweet treat: Use as the base for a bread pudding with custard.
- Sophisticated dessert: Split, toast, and serve with mascarpone and fresh berries.
- Luxurious option: Split and fill with clotted cream and premium fruit preserves.
- Afternoon tea: Serve alongside a selection of cheese (particularly nice with a creamy blue cheese or aged cheddar).
Frequently Asked Questions
Q: Can I make hot cross buns ahead of time?
A: Yes! You can prepare the dough through the first rise, then refrigerate overnight. The next day, bring to room temperature, shape, prove, and bake. Alternatively, you can freeze baked buns and reheat when needed.
Q: Why do my hot cross buns always turn out dense?
A: Dense buns usually indicate insufficient kneading, inadequate rising time, or expired yeast. Ensure you knead until the dough passes the windowpane test and allow adequate time for proving.
Q: Can I use all-purpose flour instead of bread flour?
A: While bread flour gives the best texture due to its higher protein content, you can use all-purpose flour in a pinch. The buns may be slightly less chewy but will still be delicious.
Q: How do I know when the buns are properly proved?
A: Properly proved buns will have visibly increased in size (usually by about 50-70%) and will spring back slowly when gently poked with a finger. If the indentation doesn’t spring back at all, they’re overproved.
Q: Can I make these without eggs?
A: Yes, you can replace the egg with 60ml of additional milk mixed with 1 tablespoon of oil. The texture will be slightly different, but still good.
Q: Why did my crosses run off during baking?
A: If your cross mixture is too runny, it won’t hold its shape. The paste should be thick enough to pipe and hold its shape, similar to toothpaste consistency.
Q: Can these be made vegan?
A: Absolutely! Replace the butter with a plant-based block butter, the milk with a plant milk (oat works well), and omit the egg or replace with a flax egg (1 tablespoon ground flaxseed mixed with 3 tablespoons water).
Q: My dried fruit keeps falling out when I’m kneading. What am I doing wrong?
A: This is normal! Dried fruit incorporation requires patience. Keep folding and kneading, and eventually, the fruit will stay in the dough. You can also try tossing the fruit in a little flour before adding it.
Q: How long do homemade hot cross buns stay fresh?
A: For best quality, eat within 1-2 days. After that, they’re best toasted. You can freeze them for up to 3 months; defrost at room temperature and warm in the oven before serving.
Final Thoughts
Hot cross buns are more than just a seasonal treat—they’re a connection to centuries of tradition, a way to create lasting memories, and quite simply, one of the most satisfying things to bake at home. The process might seem lengthy, but each step contributes to creating that perfect balance of spiced, fruity goodness encased in a soft, yielding crumb.
I find there’s something deeply meditative about the kneading, shaping, and watching these buns rise. It’s baking at its most fundamental and rewarding. The anticipation as the aroma fills your kitchen is matched only by the satisfaction of pulling a perfect batch from the oven, their crosses proudly displayed, their tops glistening with sweet glaze.
Whether you’re continuing a family tradition or starting a new one, I hope this recipe brings as much joy to your kitchen as it has to mine. Happy baking!