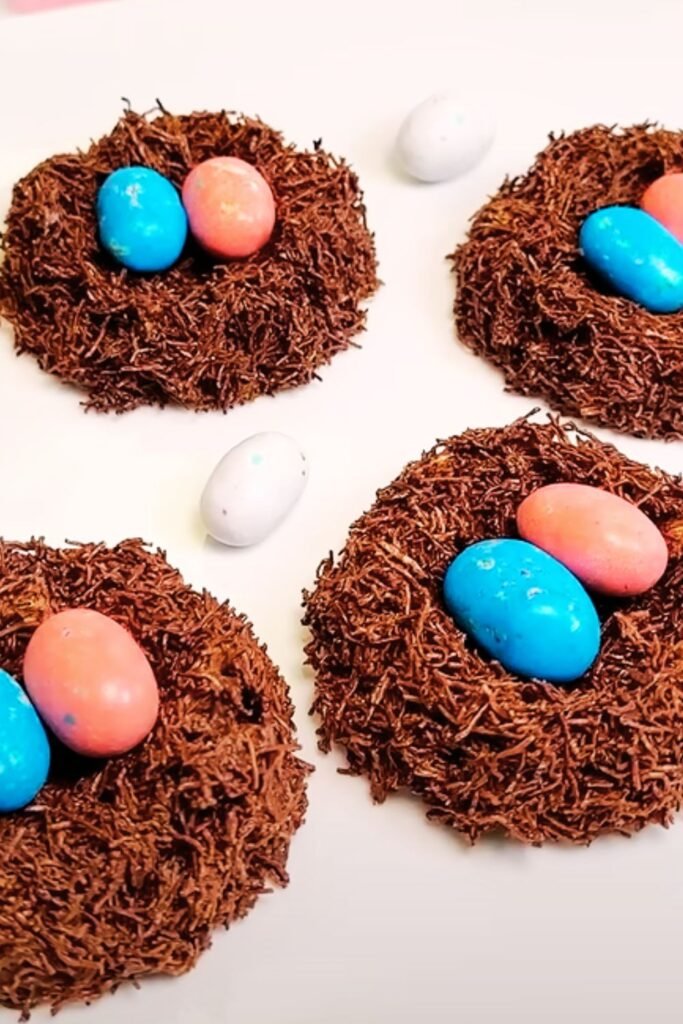
Spring has always been my favorite season for baking. There’s something magical about the way seasonal treats capture the essence of renewal and celebration. Today, I’m sharing one of my absolute favorite springtime creations: Malted Milk Chocolate Robin’s Egg Pop Tarts. These homemade pastries combine the nostalgic flavor of malted milk with rich chocolate and a splash of spring color that reminds me of those speckled candy-coated chocolate eggs we all loved as kids.
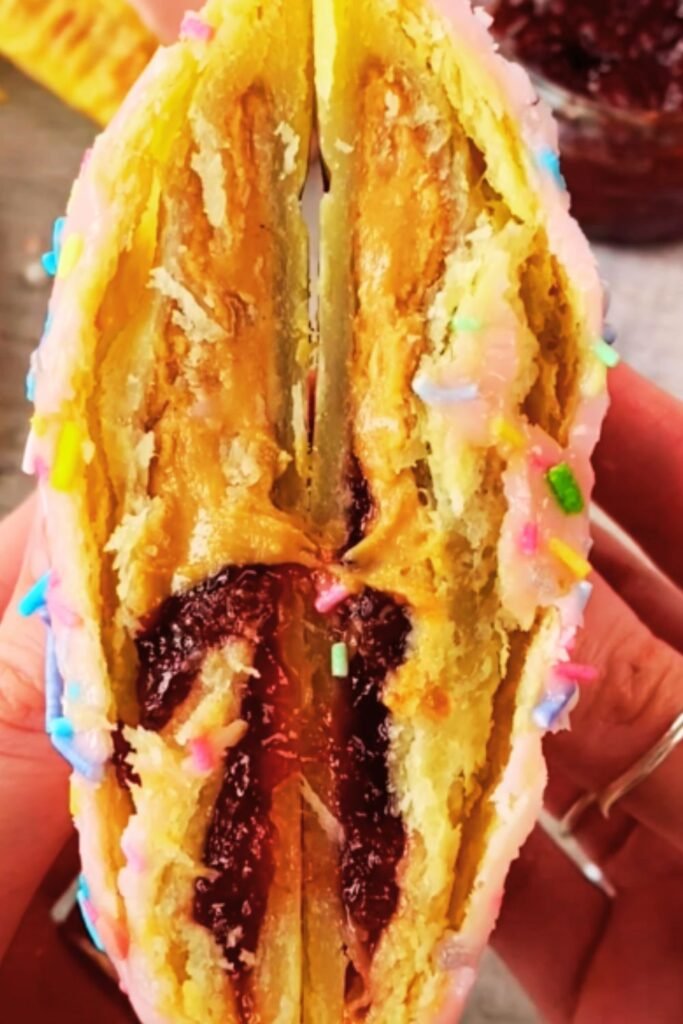
Unlike store-bought versions, these pop tarts deliver a buttery, flaky crust that shatters beautifully with each bite. The filling is a decadent malted milk chocolate ganache that’s perfectly balanced—not too sweet, with that distinctive malty flavor that pairs wonderfully with chocolate. And the piece de resistance? A vibrant robin’s egg blue icing decorated with that signature speckled pattern that makes these treats as beautiful as they are delicious.
I’ve tested this recipe countless times to ensure it’s accessible for home bakers while still delivering that wow factor for your spring celebrations. Whether you’re preparing an Easter brunch, hosting a spring gathering, or simply want to bring some seasonal joy to your breakfast table, these pop tarts are guaranteed to impress both visually and in flavor.
The Magic of Malted Milk
Before we dive into the recipe, let’s talk about what makes malted milk so special. Malted milk powder is created from malted barley, wheat flour, and evaporated whole milk. The malting process develops unique enzymes that break down starches into simpler sugars, creating that distinctive flavor that’s both toasty and sweet.
In these pop tarts, malted milk powder serves three important purposes:
- It adds a complex, nostalgic flavor that elevates the chocolate filling
- It contributes a subtle sweetness without being cloying
- It creates a creamier texture in the ganache filling
While you could make chocolate pop tarts without it, the malted milk component transforms these pastries into something truly special that captures the essence of those beloved robin’s egg candies.
Ingredients
For the Pastry Dough
- 2½ cups (350g) all-purpose flour
- 1 tablespoon granulated sugar
- 1 teaspoon kosher salt
- 1 cup (226g) cold unsalted butter, cubed
- ¼ cup (60ml) ice water
- 1 large egg, beaten (for egg wash)
For the Malted Milk Chocolate Filling
- 8 oz (226g) semisweet chocolate (60-70% cacao), finely chopped
- ⅓ cup (80ml) heavy cream
- 3 tablespoons malted milk powder
- 2 tablespoons unsalted butter, room temperature
- ¼ teaspoon fine sea salt
For the Robin’s Egg Blue Icing
- 2 cups (240g) powdered sugar, sifted
- 3-4 tablespoons whole milk
- ½ teaspoon vanilla extract
- Sky blue gel food coloring
- Royal blue gel food coloring
- 1 teaspoon cocoa powder
- ½ teaspoon vanilla extract (for speckle mixture)
Equipment
| Essential Equipment | Purpose | Notes |
|---|---|---|
| Food processor | Making pastry dough | A pastry cutter can be used as an alternative |
| Rolling pin | Rolling out dough | Ideally a smooth wooden or marble pin |
| Ruler | Measuring dough rectangles | Ensures uniform pop tarts |
| Baking sheets | Baking the pop tarts | Use heavy-duty sheets to prevent burning |
| Parchment paper | Lining baking sheets | Prevents sticking and makes cleanup easier |
| Small offset spatula | Applying icing | Creates smooth, even surfaces |
| Fine mesh strainer | Creating speckled effect | Necessary for the authentic robin’s egg look |
| Small, clean paintbrush | Creating speckles | A new, unused toothbrush can also work |
| Wire cooling rack | Cooling pop tarts | Allows icing to set properly |
Making the Pastry Dough
The foundation of any great pop tart is a buttery, flaky pastry dough. Mine strikes the perfect balance between structure and tenderness.
- Combine the flour, sugar, and salt in a food processor and pulse briefly to mix.
- Add the cold cubed butter and pulse 8-10 times until the mixture resembles coarse crumbs with some pea-sized pieces of butter remaining. These butter pieces are crucial for creating flaky layers in your pastry.
- With the processor running, drizzle in the ice water through the feed tube just until the dough begins to form clumps. You may not need all the water—stop when the dough just begins to come together when pinched between your fingers.
- Turn the dough out onto a lightly floured surface and gather it into a ball. Divide in half and flatten each piece into a rectangle about 1-inch thick. Wrap each piece tightly in plastic wrap and refrigerate for at least 1 hour or up to 2 days.
Baker’s Note: The key to flaky pastry is keeping everything cold. If at any point your dough becomes too soft or the butter starts to melt, pop it back in the refrigerator for 15-20 minutes before continuing.
Preparing the Malted Milk Chocolate Filling
While your dough chills, prepare the filling that gives these pop tarts their distinctive flavor.
- Place the finely chopped chocolate in a medium heatproof bowl.
- In a small saucepan, heat the heavy cream over medium heat until it just begins to simmer around the edges. Remove from heat.
- Whisk the malted milk powder into the hot cream until completely dissolved.
- Pour the hot cream mixture over the chopped chocolate and let stand for 2 minutes.
- Gently stir with a spatula until the chocolate is completely melted and the mixture is smooth and glossy.
- Add the room temperature butter and salt, stirring until fully incorporated.
- Allow the ganache to cool to room temperature, stirring occasionally. It should thicken to a spreadable consistency. If it’s too runny, refrigerate for 10-15 minutes, then stir again.
Assembling the Pop Tarts
This is where precision matters. Taking your time during assembly will ensure beautiful pop tarts with filling that stays put during baking.
- Remove one portion of dough from the refrigerator and let it sit at room temperature for about 5 minutes to make it easier to roll.
- On a lightly floured surface, roll the dough into a rectangle approximately 9×13 inches and about ⅛-inch thick.
- Using a ruler and a sharp knife or pizza cutter, trim the edges to create a neat 9×12-inch rectangle. Then cut the rectangle into nine 3×4-inch rectangles.
- Transfer these rectangles to a parchment-lined baking sheet and refrigerate while you roll out the second piece of dough in the same manner.
- Once you have 18 rectangles (9 for tops, 9 for bottoms), remove the first batch from the refrigerator.
- Place a heaping tablespoon of the malted milk chocolate filling in the center of each of the 9 bottom rectangles, spreading it evenly but leaving a ½-inch border around the edges.
- Lightly brush the borders with beaten egg wash.
- Place the remaining 9 rectangles on top of the filled ones. Use your fingers to gently press around the filling to seal, then use a fork to crimp the edges all around.
- Use a toothpick to poke 6-8 small holes in the top of each pop tart to allow steam to escape during baking.
- Place the assembled pop tarts on a parchment-lined baking sheet, spacing them about 2 inches apart. Refrigerate for 30 minutes to firm up the dough. This helps prevent the butter from melting too quickly in the oven, which ensures flakier layers.
Baking
- Preheat your oven to 375°F (190°C) while the assembled pop tarts are chilling.
- Just before baking, brush the tops of the pop tarts lightly with the remaining egg wash for a golden finish.
- Bake for 20-25 minutes, rotating the pan halfway through, until the pop tarts are golden brown.
- Transfer to a wire rack and allow to cool completely before icing.
Baker’s Note: Don’t worry if some filling leaks out during baking—this is normal! Any escaped filling will caramelize and become deliciously chewy.
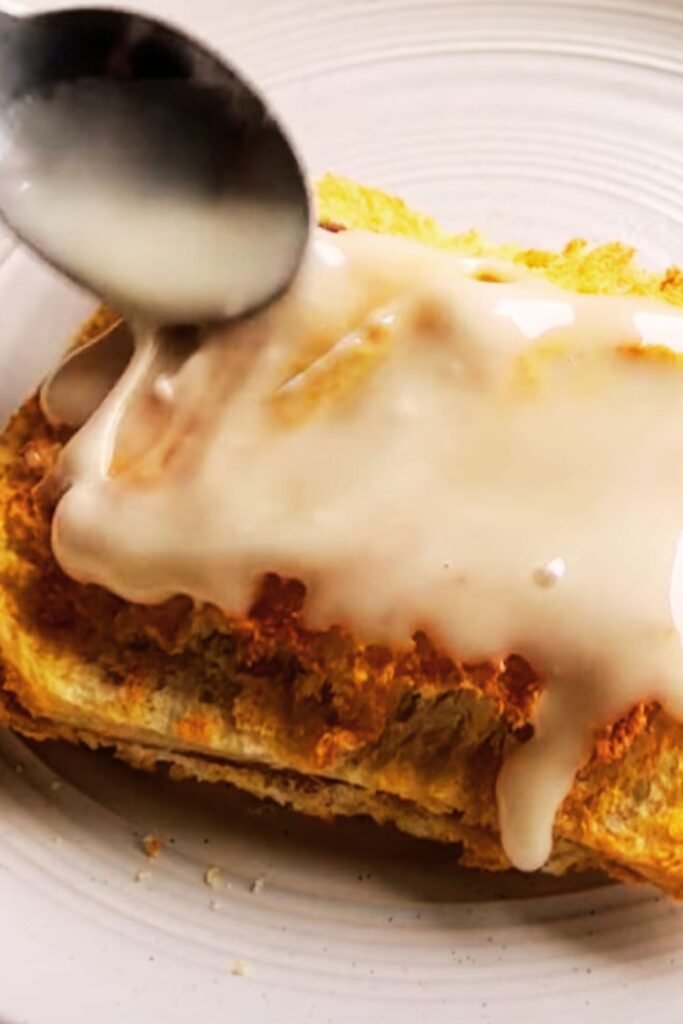
Creating the Robin’s Egg Blue Icing
The vibrant blue icing with chocolate speckles is what transforms these from simple chocolate pop tarts to spring-themed delights.
- In a medium bowl, whisk together the sifted powdered sugar, 3 tablespoons of milk, and vanilla extract until smooth.
- Add more milk, a teaspoon at a time, until you reach a thick but pourable consistency. It should be similar to honey—if you drizzle some from a spoon, it should hold its shape for a moment before melting back into the bowl.
- Add a very small amount of sky blue gel food coloring and stir thoroughly. Keep adding tiny amounts until you achieve a pale robin’s egg blue color. Add a tiny dot of royal blue if you want to adjust the tone.
- Once your pop tarts are completely cool, spoon about 1-2 tablespoons of icing onto each pop tart and use an offset spatula to spread it evenly over the top, allowing some to drip slightly down the sides.
- Let the icing set slightly (about 5 minutes) before adding the speckles.
Creating the Speckled Effect
This technique creates that signature robin’s egg appearance:
- In a small bowl, mix 1 teaspoon cocoa powder with ½ teaspoon vanilla extract to create a dark brown liquid.
- Dip a small, clean paintbrush into the mixture, then hold it over the pop tarts.
- Use your finger to flick the bristles, creating a random pattern of small speckles across the surface of the icing. Work in small batches and reapply the cocoa mixture to the brush as needed.
- Practice on a piece of parchment paper first to get comfortable with the technique.
- Allow the icing and speckles to set completely, at least 2 hours at room temperature or 1 hour in the refrigerator.
Storage and Serving Suggestions
| Storage Method | Duration | Notes |
|---|---|---|
| Room temperature | 2-3 days | Store in airtight container |
| Refrigerated | Up to 1 week | Bring to room temperature before serving |
| Frozen (unfrosted) | Up to 3 months | Wrap individually in plastic wrap and then foil |
| Frozen (frosted) | Up to 1 month | Freeze on baking sheet until solid, then wrap |
Serving Suggestions
- Serve at room temperature for the best texture and flavor
- Pair with a glass of cold milk or hot coffee
- For brunch, serve alongside fresh spring berries and whipped cream
- Create a spring dessert board with these pop tarts as the centerpiece, surrounded by fresh fruits and chocolate truffles
- For an elegant dessert, warm an unfrosted pop tart slightly and serve with a scoop of malted milk ice cream
Variations and Substitutions
While I love this recipe as written, here are some adaptations to consider:
Dietary Adaptations:
- Gluten-Free: Substitute a 1:1 gluten-free flour blend for the all-purpose flour. Note that you may need to add ¼ teaspoon xanthan gum if your blend doesn’t already include it.
- Dairy-Free: Use plant-based butter, dairy-free chocolate, and coconut cream instead of heavy cream. For the malted milk flavor, look for dairy-free malt powder or substitute with 2 tablespoons Ovaltine.
Flavor Variations:
- Dark Chocolate Lovers: Use 70-85% dark chocolate for a more intense chocolate flavor.
- Mocha Edition: Add 1 tablespoon of espresso powder to the filling for a coffee-chocolate combination.
- Salted Caramel: Swirl 2-3 tablespoons of salted caramel sauce into the chocolate filling before assembling.
- Nutty Version: Add 3 tablespoons of finely chopped toasted hazelnuts or almonds to the filling.
Seasonal Adaptations:
- Halloween: Use orange icing with black specks and cut the pop tarts into pumpkin shapes.
- Christmas: Create a mint chocolate filling and decorate with red and green sprinkles.
- Valentine’s Day: Add freeze-dried raspberry powder to the icing for a pink color and natural berry flavor.
Troubleshooting Tips
| Problem | Possible Cause | Solution |
|---|---|---|
| Dough is cracking while rolling | Too cold | Let sit at room temperature for 5-10 minutes before rolling |
| Filling leaks during baking | Overfilled or poorly sealed edges | Use less filling and ensure edges are well-crimped |
| Pastry is tough, not flaky | Overworked dough | Handle dough minimally and keep ingredients cold |
| Icing is too runny | Too much liquid | Add more powdered sugar, 1 tablespoon at a time |
| Icing is too thick | Not enough liquid | Add more milk, ½ teaspoon at a time |
| Speckles smear | Icing not set enough | Let icing set for 5-10 minutes before speckling |
| Uneven baking | Oven hot spots | Rotate pan halfway through baking time |
The Science Behind the Recipe
Understanding a few key principles will help you master this recipe:
- Cold Butter: The cold butter in the pastry creates steam pockets during baking, which results in flaky layers. This is why we keep the dough cold throughout the process.
- Malted Milk Chemistry: Malted milk powder contains enzymes that break down starches into simpler sugars. This not only contributes to flavor but affects the texture of the ganache, making it smoother and creamier.
- Chocolate Tempering: The gradual melting method used for the ganache helps maintain the chocolate’s structure and prevents it from becoming grainy. Adding the butter at the end creates an emulsion that gives the filling its silky texture.
- Icing Consistency: The powdered sugar to liquid ratio matters for the icing. Too much liquid will create a thin icing that runs off the pop tarts, while too little will make it difficult to spread and won’t create the smooth surface needed for the speckled effect.
Q&A Section
Q: Can I make these pop tarts ahead of time for a brunch party?
A: Absolutely! You have several options for make-ahead preparation:
- Prepare the dough up to 2 days in advance and keep it refrigerated.
- Make the chocolate filling up to 3 days ahead and store in an airtight container in the refrigerator. Bring to room temperature before assembling.
- Assemble and bake the pop tarts the day before, then store unfrosted in an airtight container.
- Apply the icing and speckles the morning of your event for the freshest appearance.
Q: I can’t find malted milk powder. What can I substitute?
A: If you can’t find malted milk powder, you have a few options:
- Ovaltine or Horlicks can work as substitutes, though they contain added sugars and flavors.
- In a pinch, you can omit it entirely and add 1 tablespoon of milk powder plus 1 teaspoon of honey for a similar creamy sweetness.
- Look for malted milk powder online or in the hot beverage section of well-stocked grocery stores.
Q: Can I toast these pop tarts like the store-bought kind?
A: While homemade pop tarts have a different texture than commercial ones, you can gently warm them in a toaster oven (not a standard toaster) if they’re unfrosted. For frosted pop tarts, I recommend warming them in an oven at 300°F for about 5 minutes. Be careful, as the homemade pastry is more delicate and the filling gets hotter than store-bought versions.
Q: Why did my pastry shrink during baking?
A: Pastry shrinkage usually happens for one of three reasons:
- The dough was overworked, developing too much gluten.
- The dough wasn’t properly chilled before baking.
- The dough was stretched rather than rolled to size.
Make sure to handle the dough gently, keep it cold throughout the process, and always roll it slightly larger than needed to avoid stretching.
Q: How do I get the perfect robin’s egg blue color?
A: Getting the perfect robin’s egg blue requires a light touch:
- Start with a very small amount of sky blue gel food coloring (dip just the tip of a toothpick into the gel).
- Mix thoroughly and assess the color before adding more.
- Add tiny amounts of royal blue to adjust the tone if needed.
- Remember that the color will appear more vibrant when first mixed and will dry slightly lighter on the pop tarts.
Q: My chocolate filling seems too firm to spread. What should I do?
A: If your chocolate filling has become too firm:
- Do not microwave it, as this can cause the chocolate to seize.
- Instead, place the bowl of filling over a pan of barely simmering water (double boiler method).
- Stir gently until it just softens enough to spread.
- Remove immediately from heat and use while still workable.
Alternatively, let it sit at room temperature for 15-20 minutes, which often softens it enough to use.
Final Thoughts
These Malted Milk Chocolate Robin’s Egg Pop Tarts represent everything I love about spring baking—nostalgic flavors, whimsical decoration, and the perfect balance of chocolate richness with buttery pastry. While they require some time and attention to detail, the result is well worth the effort.
The combination of malted milk and chocolate creates a flavor that’s both familiar and sophisticated, while the robin’s egg decoration transforms them into a seasonal statement piece worthy of any spring celebration. Whether you’re an experienced baker or trying your hand at homemade pastry for the first time, these pop tarts are sure to bring joy to your kitchen and delight to anyone lucky enough to taste them.
Remember that baking is as much art as science, so don’t be afraid to adjust and experiment as you go. The most important ingredient, as always, is the love and care you put into creating something special to share with others.