There’s something magical about cracking through the caramelized sugar top of a classic crème brûlée. That moment when your spoon breaks the brittle surface to reveal the silky custard beneath is one of dessert’s greatest pleasures. But what happens when you combine this French classic with America’s favorite handheld treat? You get crème brûlée cupcakes—a dessert that brings together the best of both worlds.
As someone who’s spent years perfecting the art of baking, I can tell you that these cupcakes are game-changers. They maintain the portable convenience of cupcakes while delivering that unmistakable crème brûlée experience. The contrast between the fluffy vanilla cake, creamy custard filling, and that signature caramelized sugar top creates a symphony of textures and flavors that will impress even the most discerning dessert connoisseurs.
The History Behind This Delightful Fusion
Before we dive into the recipe, let’s appreciate where these two desserts come from. Crème brûlée, with its origins in 17th-century France, has long been considered the pinnacle of sophisticated desserts. Its name literally translates to “burnt cream,” referring to the caramelized sugar crust that tops the rich custard. Meanwhile, cupcakes emerged in the United States in the 19th century as convenient, portion-controlled cakes baked in cups—hence their name.
Combining these two beloved desserts represents the best of culinary innovation. I first attempted this fusion years ago when preparing for a friend’s birthday. She loved both desserts equally and couldn’t decide between them. Rather than making both, I thought, “Why not merge them?” The result was so spectacular that I’ve been refining the recipe ever since.
What Makes These Cupcakes Special
What truly sets these crème brûlée cupcakes apart is their authentic approach to both desserts. I don’t just add vanilla and call it “crème brûlée flavored.” These cupcakes feature:
- A real custard filling that mimics the texture and flavor of traditional crème brûlée
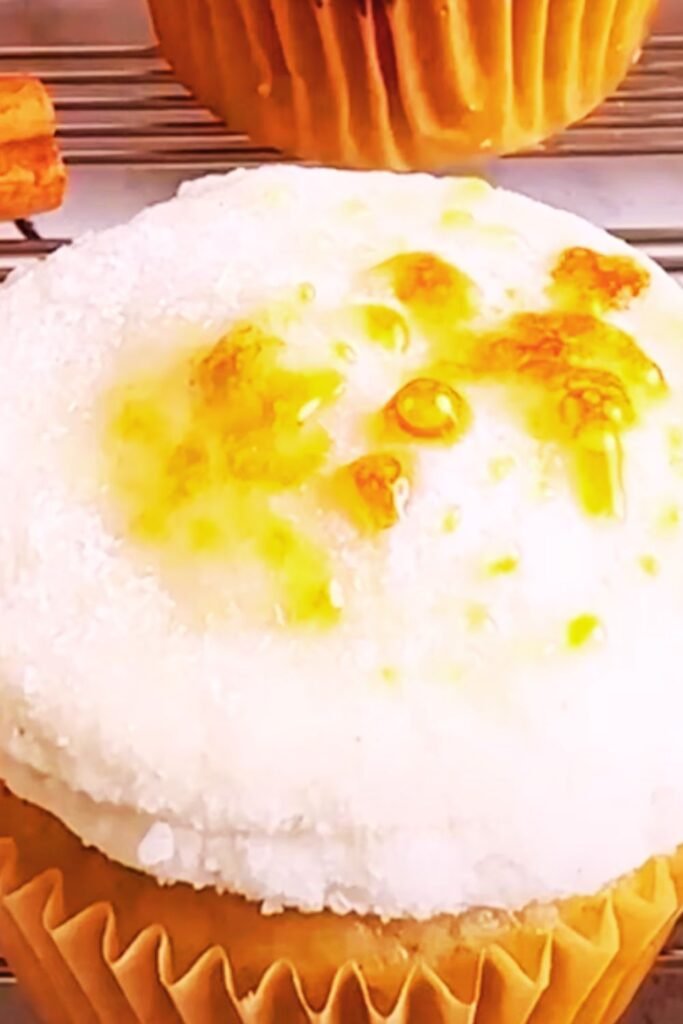
- An actual caramelized sugar top that you crack with your fork or spoon
- A light vanilla cake that complements rather than competes with the star components
- A balanced sweetness that allows the vanilla notes to shine through
Let’s get to the recipe, shall we?
Ingredients
For the Vanilla Cupcakes:
- 1¾ cups (210g) all-purpose flour
- 1½ teaspoons baking powder
- ¼ teaspoon salt
- ½ cup (113g) unsalted butter, at room temperature
- 1 cup (200g) granulated sugar
- 2 large eggs, at room temperature
- 2 teaspoons pure vanilla extract (or 1 vanilla bean, seeds scraped)
- ¾ cup (180ml) whole milk, at room temperature
For the Crème Brûlée Filling:
- 5 large egg yolks
- ½ cup (100g) granulated sugar
- 2 cups (480ml) heavy cream
- 1 vanilla bean, split and seeds scraped (or 1 tablespoon pure vanilla extract)
- Pinch of salt
For the Vanilla Bean Buttercream:
- 1 cup (226g) unsalted butter, at room temperature
- 3½ cups (420g) confectioners’ sugar, sifted
- 2 tablespoons heavy cream
- 1 vanilla bean, seeds scraped (or 2 teaspoons pure vanilla extract)
- ¼ teaspoon salt
For the Caramelized Sugar Topping:
- ½ cup (100g) granulated sugar
Equipment Needed
Understanding the right tools makes all the difference when creating these sophisticated cupcakes:
Baking essentials: : Standard 12-cup muffin tin, cupcake liners, mixing bowls, hand or stand mixer
For the custard: : Medium saucepan, fine-mesh strainer, heatproof bowl, whisk
For the caramelized top: : Kitchen torch (essential for the authentic crème brûlée effect)
For assembly: : Cupcake corer or small knife, piping bag with round tip, small offset spatula
Step-by-Step Instructions
Making the Cupcakes:
- Preheat your oven to 350°F (175°C) and line a standard muffin tin with cupcake liners.
- In a medium bowl, whisk together the flour, baking powder, and salt. Set aside.
- In a large bowl, beat the butter and sugar with an electric mixer until light and fluffy, about 3-4 minutes.
- Add the eggs one at a time, beating well after each addition. Stir in the vanilla extract.
- Gradually add the flour mixture, alternating with the milk, beginning and ending with the flour mixture (flour → milk → flour → milk → flour). Mix just until incorporated.
- Divide the batter evenly among the cupcake liners, filling each about two-thirds full.
- Bake for 18-20 minutes, or until a toothpick inserted into the center comes out clean.
- Allow the cupcakes to cool in the pan for 5 minutes before transferring to a wire rack to cool completely.
Making the Crème Brûlée Filling:
- In a medium bowl, whisk together the egg yolks and sugar until pale and slightly thickened.
- In a medium saucepan, heat the heavy cream, vanilla bean seeds and pod (or extract), and salt over medium heat until small bubbles form around the edges (do not boil).
- Remove from heat and discard the vanilla bean pod if using.
- Gradually whisk about half of the hot cream into the egg yolk mixture to temper the eggs.
- Pour the egg-cream mixture back into the saucepan with the remaining cream.
- Cook over medium-low heat, stirring constantly with a wooden spoon, until the custard thickens enough to coat the back of the spoon (about 170°F/77°C if using a thermometer).
- Immediately strain the custard through a fine-mesh sieve into a bowl.
- Cover with plastic wrap, pressing it directly onto the surface of the custard to prevent a skin from forming.
- Refrigerate until completely chilled and set, at least 2 hours or overnight.
Making the Vanilla Bean Buttercream:
- In a large bowl, beat the butter with an electric mixer until creamy, about 2 minutes.
- Gradually add the confectioners’ sugar, mixing on low speed until incorporated.
- Add the heavy cream, vanilla bean seeds (or extract), and salt.
- Increase the speed to medium-high and beat until light and fluffy, about 3-4 minutes.
- Transfer to a piping bag fitted with a round tip and set aside.
Assembling the Cupcakes:
- Once the cupcakes are completely cool, use a cupcake corer or small knife to remove the centers, creating a cavity for the filling. Save the removed cake pieces.
- Fill each cavity with the chilled crème brûlée custard, leaving a small space at the top.
- Trim the saved cake pieces and place them back on top of the filled cavities to seal in the custard.
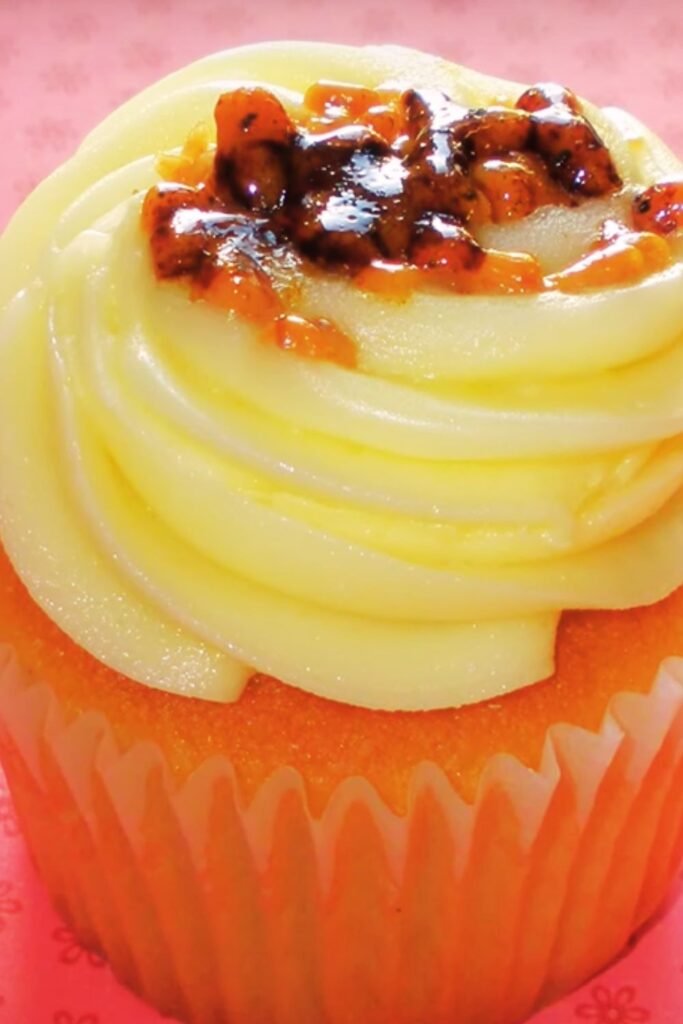
- Pipe a ring of buttercream around the edge of each cupcake, creating a well in the center where the custard is.
- Sprinkle about 1-2 teaspoons of granulated sugar evenly over the exposed custard in the center of each cupcake.
- Using a kitchen torch, carefully caramelize the sugar until it melts and turns amber. Keep the torch moving to prevent burning.
- Allow the caramelized sugar to cool and harden for a few minutes before serving.
The Science Behind Perfect Crème Brûlée Cupcakes
Understanding a few key baking principles will help ensure your cupcakes turn out perfectly every time:
Temperature control: : Room temperature ingredients are crucial for the cupcake batter. Cold ingredients don’t incorporate properly, leading to dense cupcakes.
Tempering eggs: : When making the custard, tempering the eggs (slowly adding hot cream) prevents them from scrambling, ensuring a silky-smooth filling.
Proper caramelization: : The sugar topping requires careful attention—too little heat and it won’t caramelize properly; too much and it will burn. Aim for an even amber color.
Custard thickness: : The custard must be thick enough to hold its shape when piped into the cupcakes. If it’s too runny, it will soak into the cake and disappear.
Common Mistakes and How to Avoid Them
In my years of making these cupcakes, I’ve encountered nearly every possible pitfall. Here’s how to avoid the most common ones:
- Overbeating the cupcake batter: Mix just until ingredients are incorporated to avoid tough cupcakes.
- Undercooking the custard: Make sure it reaches the proper thickness—it should coat the back of a spoon and hold a line when you run your finger through it.
- Rushing the cooling process: Both the cupcakes and custard need to be completely cool before assembly.
- Overfilling the cupcake cavities: Leave a small space at the top to accommodate the cake “lid” and prevent custard from spilling out.
- Burning the sugar topping: Keep the torch moving constantly and maintain a proper distance (about 2-3 inches) from the sugar.
Variations to Try
Once you’ve mastered the basic recipe, consider these delicious variations:
Chocolate Crème Brûlée Cupcakes
Add 1/3 cup cocoa powder to the cake batter and use a chocolate custard filling by adding 4 ounces of melted chocolate to the crème brûlée base.
Coffee Crème Brûlée Cupcakes
Infuse the cream for the custard with 2 tablespoons of coffee beans (strain before using) and add 1 teaspoon of espresso powder to the cupcake batter.
Citrus Crème Brûlée Cupcakes
Add 1 tablespoon of lemon or orange zest to both the cupcake batter and the custard filling for a refreshing twist.
Seasonal Berry Crème Brûlée Cupcakes
Place a few fresh raspberries or blueberries at the bottom of each cupcake cavity before adding the custard filling.
Storage and Make-Ahead Tips
These cupcakes require some planning, but components can be prepared in advance:
Cupcakes: : Can be baked up to 2 days ahead and stored in an airtight container at room temperature.
Custard filling: : Can be made up to 3 days ahead and kept refrigerated in an airtight container.
Buttercream: : Can be made 1 day ahead and stored in the refrigerator. Bring to room temperature and rewhip before using.
Fully assembled cupcakes: : Best enjoyed within 4-6 hours of caramelizing the sugar top. The caramel will begin to soften if stored in the refrigerator.
Pro tip: If making ahead, assemble everything except the caramelized sugar top. Add the sugar and torch just before serving for that perfect crack!

Nutritional Information
For those who are calorie-conscious or have dietary considerations, here’s the approximate nutritional breakdown per cupcake:
| Nutrient | Amount per Cupcake |
|---|---|
| Calories | 425 |
| Total Fat | 28g |
| Saturated Fat | 17g |
| Cholesterol | 165mg |
| Sodium | 125mg |
| Total Carbohydrates | 42g |
| Dietary Fiber | 0g |
| Sugars | 35g |
| Protein | 4g |
Serving Suggestions
These cupcakes are spectacular on their own, but can be elevated even further with thoughtful presentation:
- Serve with a small cup of espresso or coffee to balance the sweetness
- Add a few fresh berries or a mint leaf for a pop of color
- For special occasions, place on a dessert platter with a light dusting of powdered sugar around the edges
- Drizzle a small amount of caramel sauce on the serving plate for an elegant touch
- Pair with a glass of sparkling water with lemon to cleanse the palate between bites
Frequently Asked Questions
Can I make these cupcakes without a kitchen torch? While a torch provides the best caramelization, you can carefully use your oven’s broiler. Place the sugar-topped cupcakes on a baking sheet and broil for 30-60 seconds, watching VERY carefully to prevent burning.
Can I prepare these cupcakes gluten-free? Yes! Substitute the all-purpose flour with a 1:1 gluten-free baking flour blend. The custard filling is naturally gluten-free.
Why did my custard not set properly? The most common reason is undercooking. Make sure to cook until the custard coats the back of a spoon and reaches about 170°F. Also, ensure it chills long enough to set, at least 2 hours.
How do I prevent the caramelized sugar from becoming soggy? The crackable sugar top is best when freshly torched. If you need to prepare in advance, assemble everything else and save the sugar caramelization for just before serving.
Can I freeze these cupcakes? I don’t recommend freezing the fully assembled cupcakes as the texture of the custard and caramelized top will suffer. You can freeze the unfilled cupcakes for up to 1 month.
What if I don’t have vanilla beans? Pure vanilla extract works perfectly fine as a substitute. Use 1 tablespoon of extract for each vanilla bean called for in the recipe.
My buttercream is too stiff. How can I fix it? Add 1 teaspoon of heavy cream at a time until you reach the desired consistency. Be careful not to add too much or it will become too soft to pipe.
The Secret to That Perfect “Crack”
The most satisfying part of a crème brûlée is breaking through that caramelized sugar top, and achieving the perfect “crack” in these cupcakes requires attention to detail. Here’s my foolproof method:
- Use granulated sugar (not powdered or brown sugar) for the topping
- Apply an even, thin layer of sugar—too thick and it won’t caramelize properly
- Ensure the custard surface is dry before applying sugar
- Keep your torch moving in small circular motions
- Allow the caramelized sugar to cool completely (about 2-3 minutes) before serving
When done correctly, your guests will experience that distinctive cracking sound when their fork or spoon breaks through the top—a moment that makes these cupcakes truly special.
A Personal Note
I remember the first time I served these cupcakes at a dinner party. The room fell silent as everyone took their first bite, followed by expressions of pure delight. One friend said, “It’s like you’ve managed to capture the essence of a fancy restaurant dessert in a cupcake!” That’s exactly what these are—an accessible way to enjoy the luxury of crème brûlée in a format that’s perfect for gatherings, celebrations, or whenever you want to treat yourself to something extraordinary.
The combination of the light vanilla cake, rich custard filling, and that signature crackable top creates an experience that’s greater than the sum of its parts. While they require a bit more effort than standard cupcakes, I promise the results are well worth it. The look on people’s faces when they crack through that sugar top for the first time is priceless.
Whether you’re an experienced baker looking for a challenge or someone wanting to impress at your next gathering, these crème brûlée cupcakes are sure to become a favorite in your recipe collection. Happy baking!
Q&A Section
Are these cupcakes difficult for a beginner baker? While they involve multiple components, don’t be intimidated! The recipe breaks everything down into manageable steps. The trickiest part is making the custard, but as long as you’re patient and keep the heat low, you’ll succeed. Start with all ingredients measured and ready to go (mise en place), and you’ll find the process enjoyable rather than overwhelming.
How long does it take to make these cupcakes from start to finish? Plan for about 3-4 hours total, but much of that is cooling and chilling time. The active preparation takes about 60-90 minutes. If you’re short on time, spread the work over two days by making the custard and cupcakes one day and assembling the next.
What makes homemade crème brûlée cupcakes better than store-bought? The difference is night and day! Store-bought versions often use artificial flavors and stabilizers that can’t replicate the pure vanilla notes and textural contrast of homemade. Plus, that freshly torched sugar top simply cannot be preserved in a bakery case—it’s an experience that must be created shortly before enjoying.
Can I use a vanilla custard pudding mix as a shortcut for the filling? I strongly advise against this. Pudding mixes contain thickeners and artificial flavors that won’t give you the authentic crème brûlée experience. The homemade custard is creamier, richer, and has a pure vanilla flavor that’s worth the extra effort.
Is there a way to make these less sweet? Absolutely! Reduce the sugar in the cupcake batter to 3/4 cup and in the buttercream to 3 cups. The custard should maintain its sugar content for proper texture, but you can reduce the caramelized sugar topping slightly by using just enough to cover the surface thinly.
What’s the best way to transport these cupcakes to an event? Transport the components separately if possible. Bring the filled and frosted cupcakes, the granulated sugar, and your torch. Caramelize the tops at the destination shortly before serving. If you must transport fully assembled, use a cupcake carrier with tall compartments and drive carefully to preserve the sugar tops.
Can I make mini versions of these cupcakes for a dessert bar? Yes! Use a mini muffin tin and reduce the baking time to 10-12 minutes. The assembly is more delicate with smaller cupcakes, but they make perfect two-bite desserts for parties. You’ll need to work quickly when torching the sugar on mini versions to prevent overheating the custard beneath.