Have you ever bitten into a piece of garlic bread that was so perfect it made you close your eyes and savor the moment? That magical combination of crispy exterior, soft interior, buttery richness, and that unmistakable punch of garlic? I’m obsessed with creating the perfect garlic bread, and after years of tweaking and testing, I’ve finally perfected a recipe that consistently delivers that transcendent garlic bread experience.
In this comprehensive guide, I’ll share everything I’ve learned about creating truly exceptional garlic bread. From selecting the right bread and butter to perfecting your garlic mixture and mastering the baking process, I’ll cover all the elements that elevate simple garlic bread to something extraordinary. Whether you’re serving it alongside pasta, using it to sop up soup, or just enjoying it as a snack, this recipe will become your new go-to.
What Makes Great Garlic Bread?
Great garlic bread isn’t just about slapping some garlic butter on a loaf and calling it a day. The best garlic bread achieves perfect harmony between several key elements:
- The bread: Creates the foundation with the right balance of crust and chew
- The butter mixture: Delivers richness and mouthfeel
- The garlic: Provides that signature pungent flavor that’s properly mellowed
- The herbs and seasonings: Add complexity and brightness
- The cooking method: Ensures the perfect texture contrast between exterior and interior
When these elements come together perfectly, you get garlic bread that’s impossible to resist – crusty yet tender, rich but not greasy, with garlic flavor that’s pronounced but not overwhelming.
Choosing Your Bread
The foundation of any great garlic bread is, of course, the bread itself. While you can technically make garlic bread with almost any type of bread, certain varieties yield superior results:
Best Bread Options for Garlic Bread
- Italian or French baguette: The classic choice with a crisp crust and soft interior. I find French baguettes tend to have a slightly crispier crust, while Italian loaves often have a bit more chew.
- Ciabatta: Features large air pockets that beautifully capture pools of garlic butter.
- Sourdough: Adds a subtle tangy flavor that complements the garlic butter beautifully.
- Cuban bread: Has a thin crust and light texture that crisps up wonderfully.
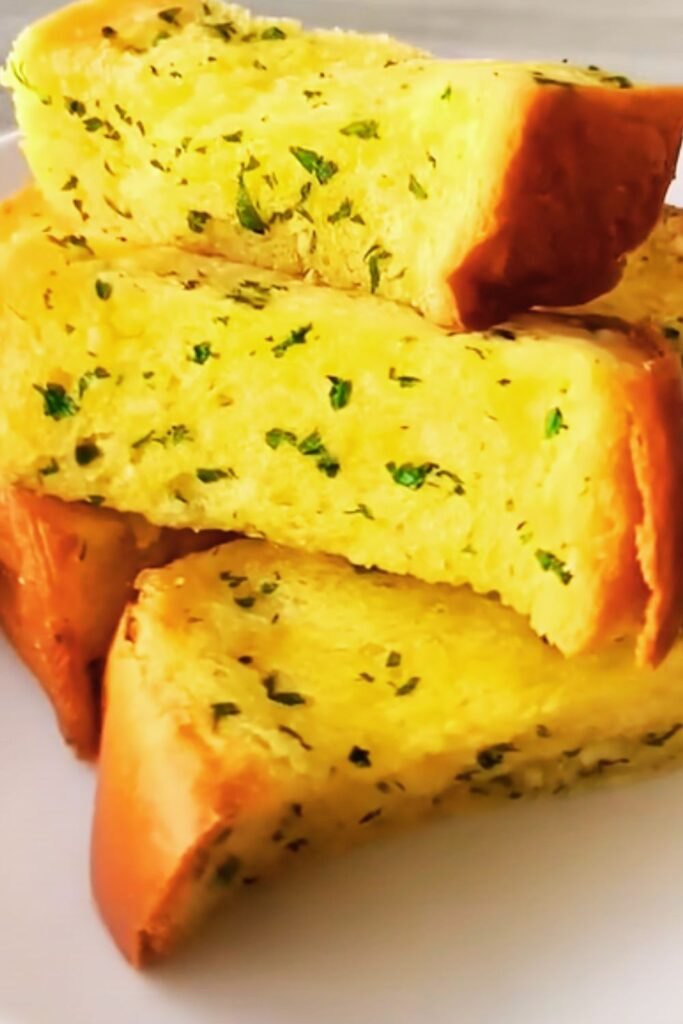
Whatever bread you choose, freshness is paramount. Day-old bread can work fine, but anything older will likely be too dry. If you’re using an unsliced loaf, cut it horizontally (parallel to the cutting board) rather than in vertical slices. This creates maximum surface area for your garlic butter and ensures every bite has that perfect balance of crust and soft interior.
The Perfect Garlic Butter Spread
The garlic butter mixture is where the magic happens. Here’s how I create a spread that delivers incredible flavor without being overpowering:
Basic Garlic Butter Ingredients
| Ingredient | Amount | Notes |
|---|---|---|
| Unsalted butter | 1/2 cup (1 stick) | Room temperature for easy spreading |
| Fresh garlic | 4-6 cloves | Adjust according to size and personal preference |
| Kosher salt | 1/4 teaspoon | Enhances all flavors |
| Fresh parsley | 2 tablespoons | Finely chopped |
| Parmesan cheese | 2 tablespoons | Freshly grated, optional but recommended |
Garlic Preparation Methods
How you prepare your garlic significantly impacts the final flavor of your garlic bread. Here are the main approaches:
- Minced fresh garlic: Delivers the most potent, sharp garlic flavor. Best when you want that pronounced garlic punch.
- Crushed garlic: Pressing garlic through a garlic press releases more oils and creates a stronger flavor that distributes evenly.
- Roasted garlic: Creates a sweet, mellow garlic flavor without the sharpness. Cut the top off a whole garlic head, drizzle with olive oil, wrap in foil, and roast at 400°F for 40 minutes until soft and caramelized.
- Garlic confit: Garlic cloves slowly cooked in oil or butter until soft and golden, resulting in a buttery, nutty garlic flavor.
For my perfect garlic bread, I actually use a combination of methods. I use some fresh minced garlic for bright flavor and some roasted garlic for depth. This creates a complex garlic profile that hits all the right notes.
Elevating Your Garlic Butter
While the basic garlic butter recipe above makes fantastic garlic bread, you can take things to the next level with these enhancements:
Herbs and Seasonings
Fresh herbs make a world of difference in garlic bread. Here are my favorite additions:
- Fresh parsley: The classic choice that adds bright, clean flavor
- Fresh basil: Adds a sweet, aromatic quality
- Fresh thyme: Provides earthy, slightly floral notes
- Red pepper flakes: Adds gentle heat that balances the richness
- Black pepper: Freshly cracked adds subtle spice
- Lemon zest: Just a touch brightens all the flavors
Creating Compound Butter
For the absolute best results, I recommend making your garlic butter mixture in advance:
- Mix softened butter with all herbs, seasonings, and garlic
- Form into a log using plastic wrap
- Refrigerate for at least 2 hours (or up to 3 days)
- Bring back to spreading consistency before using
This allows the flavors to meld together beautifully, creating a more cohesive flavor profile in your finished garlic bread.
My Ultimate Garlic Bread Recipe
Now that we’ve covered the components, let’s put it all together with my ultimate garlic bread recipe:
Ingredients
| Ingredient | Amount | Notes |
|---|---|---|
| French or Italian loaf | 1 (16-20 inch) | Fresh from bakery if possible |
| Unsalted butter | 1/2 cup (1 stick) | Room temperature |
| Fresh garlic | 4 cloves | Minced |
| Roasted garlic | 4-6 cloves | Mashed into paste |
| Fresh parsley | 3 tablespoons | Finely chopped |
| Fresh thyme | 1 teaspoon | Leaves only |
| Parmesan cheese | 1/4 cup | Freshly grated |
| Kosher salt | 1/4 teaspoon | |
| Black pepper | 1/8 teaspoon | Freshly ground |
| Lemon zest | 1/2 teaspoon | Optional but recommended |
| Extra virgin olive oil | 1 tablespoon | For added richness |
Instructions
- Prepare the garlic butter: In a medium bowl, combine softened butter, both types of garlic, herbs, cheese, salt, pepper, lemon zest, and olive oil. Mix thoroughly until well combined. (This can be made up to 3 days ahead and refrigerated.)
- Prepare the bread: Preheat your oven to 375°F (190°C). Slice your bread loaf horizontally to create two equal halves.
- Apply the butter mixture: Generously spread the garlic butter mixture onto the cut sides of both bread halves. Be sure to distribute it evenly, getting right to the edges.
- Reassemble and wrap: Put the bread halves back together to reform the loaf. Wrap the entire loaf tightly in aluminum foil.
- Initial bake: Place the wrapped loaf on a baking sheet and bake for 10-15 minutes, until the butter has melted and the bread has warmed through.
- Crisp the bread: Open the foil and separate the halves again, laying them butter-side up. Return to the oven, uncovered, for an additional 5 minutes to crisp up the surface.
- Optional broil: For extra color and crispness, broil for 1-2 minutes, watching carefully to prevent burning.
- Rest and slice: Let the bread rest for 2-3 minutes before slicing into portions. Serve immediately.
Variations to Try
Once you’ve mastered the basic recipe, try these delicious variations:
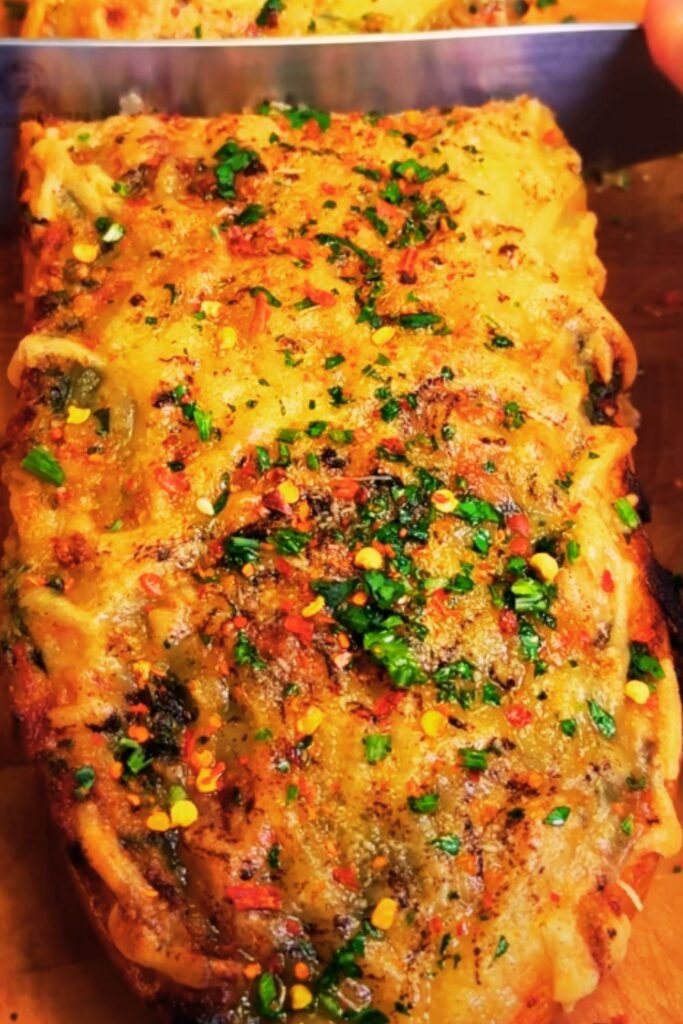
Cheesy Garlic Bread
Add a generous layer of cheese on top during the final baking stage:
| Cheese Option | Flavor Profile | Best Combinations |
|---|---|---|
| Mozzarella | Mild, stretchy | Good with stronger herbs like rosemary |
| Provolone | Slightly sharp | Pairs well with dried oregano |
| Gruyère | Nutty, complex | Perfect with thyme and black pepper |
| Fontina | Buttery, melty | Excellent with roasted garlic |
| Blend of cheeses | Balanced flavor and texture | Classic Italian blend of mozzarella, provolone, and parmesan |
Herb-Focused Variations
- Mediterranean: Focus on oregano, thyme, and lemon zest
- Provençal: Heavy on herbs de Provence with lavender notes
- Italian: Basil, oregano, and marjoram
- Garden fresh: Heavy on fresh herbs like parsley, chives, and dill
Spicy Garlic Bread
Add one of these elements to give your garlic bread some heat:
- Calabrian chili paste (1-2 teaspoons)
- Minced jalapeño (1 tablespoon)
- Cayenne pepper (1/4 teaspoon)
- Hot honey drizzle after baking
Common Garlic Bread Mistakes
Even simple garlic bread can go wrong. Here are the most common mistakes I’ve made (so you don’t have to):
- Not using enough butter: This leads to dry bread that doesn’t have enough flavor. Be generous!
- Using cold butter: Hard butter doesn’t spread evenly and creates an inconsistent experience.
- Burning the garlic: Raw garlic can easily burn in the oven, creating bitter flavors. Using partially roasted garlic or keeping the bread wrapped longer helps prevent this.
- Overbaking: This dries out the interior of the bread too much. Remember, you want contrast between the crisp exterior and soft interior.
- Underbaking: Results in soggy bread that doesn’t have that crucial textural contrast.
- Not letting the bread rest: Slicing immediately releases all the aromatic butter, leaving you with less flavorful bread.
Make-Ahead and Storage Tips
Garlic bread is best fresh, but you can still work ahead:
Make-Ahead Options
- Pre-bake preparation: Prepare the entire loaf up to the baking stage, wrap tightly in foil, and refrigerate for up to 24 hours. Allow to come to room temperature for 30 minutes before baking.
- Freeze for later: Prepare the garlic butter spread on the bread, but don’t bake. Wrap tightly in plastic wrap, then foil, and freeze for up to 1 month. Thaw in refrigerator overnight before baking.
- Compound butter: Make the garlic butter mixture up to 1 week ahead and refrigerate, or freeze for up to 3 months.
Storage and Reheating
| Storage Method | Maximum Time | Reheating Method |
|---|---|---|
| Room temperature | 2 hours | Not recommended |
| Refrigerator | 3 days | Wrap in foil and heat at 350°F for 5-10 minutes |
| Freezer (baked) | 1 month | Thaw in refrigerator, then warm at 350°F for 8-12 minutes |
| Freezer (unbaked) | 3 months | Thaw in refrigerator overnight, then bake as directed |
For the best reheating results, sprinkle a little water on the bread before wrapping in foil. This creates steam that helps revive the interior texture.
Serving Suggestions
Great garlic bread deserves to be paired with the right dishes. Here are some perfect companions:
Classic Pairings
- Pasta dishes: Especially those with red sauce like spaghetti and meatballs or lasagna
- Soups: Perfect for dipping into minestrone, tomato, or Italian wedding soup
- Salads: Adds substance to a Caesar or Italian chopped salad
- Grilled meats: Complements the smoky flavors beautifully
- Roasted vegetables: The garlic flavors enhance roasted vegetables like eggplant, zucchini, and peppers
Creative Serving Ideas
- Garlic bread pizza: Use leftover garlic bread as the base for quick pizzas
- Garlic bread croutons: Cube leftover bread and rebake for the best croutons ever
- Garlic bread sandwich: Split and use as the bread for an Italian sandwich
- Garlic bread breakfast: Top with a fried egg for an indulgent breakfast
Nutritional Considerations
I’m all about enjoying garlic bread in its full glory, but if you have dietary considerations, here are some adaptations:
Dietary Adaptations
| Dietary Need | Adaptation |
|---|---|
| Gluten-free | Use gluten-free baguette or ciabatta (results vary significantly by brand) |
| Dairy-free | Use high-quality plant-based butter and nutritional yeast instead of cheese |
| Lower calorie | Use half the butter and add roasted garlic puree to maintain flavor |
| Heart-healthy | Use olive oil instead of butter, focus on herbs for flavor |
| Vegan | Combine olive oil, plant-based butter, and nutritional yeast |
Remember that these adaptations will change the final result, but they can still produce delicious garlic bread that meets your dietary needs.
Frequently Asked Questions
Q: Can I use garlic powder instead of fresh garlic? A: You can, but the flavor won’t be the same. If you must use garlic powder, use 1 teaspoon as a substitute for 2-3 cloves of fresh garlic, and consider adding a touch of olive oil to replace the moisture.
Q: Why is my garlic bread soggy in the middle? A: This usually happens when the bread is wrapped too tightly during baking or not baked uncovered long enough. Make sure to unwrap and bake uncovered for those final few minutes.
Q: Is there a way to reduce the garlic flavor but keep it tasty? A: Absolutely! Use roasted garlic instead of raw, which has a much mellower, sweeter flavor profile. You can also reduce the quantity and increase herbs for balance.
Q: Can I use pre-made garlic bread from the store and enhance it? A: Yes! Unwrap it, add extra butter, fresh herbs, and a sprinkle of good cheese, then bake according to package directions.
Q: How do I know when my garlic bread is perfectly done? A: Perfect garlic bread has a golden-brown top, crispy edges, and when you press the center gently, it should feel soft but not doughy.
Q: What’s the best way to slice garlic bread? A: Let it rest 2-3 minutes after baking, then use a serrated knife with a gentle sawing motion to get clean slices without crushing the bread.
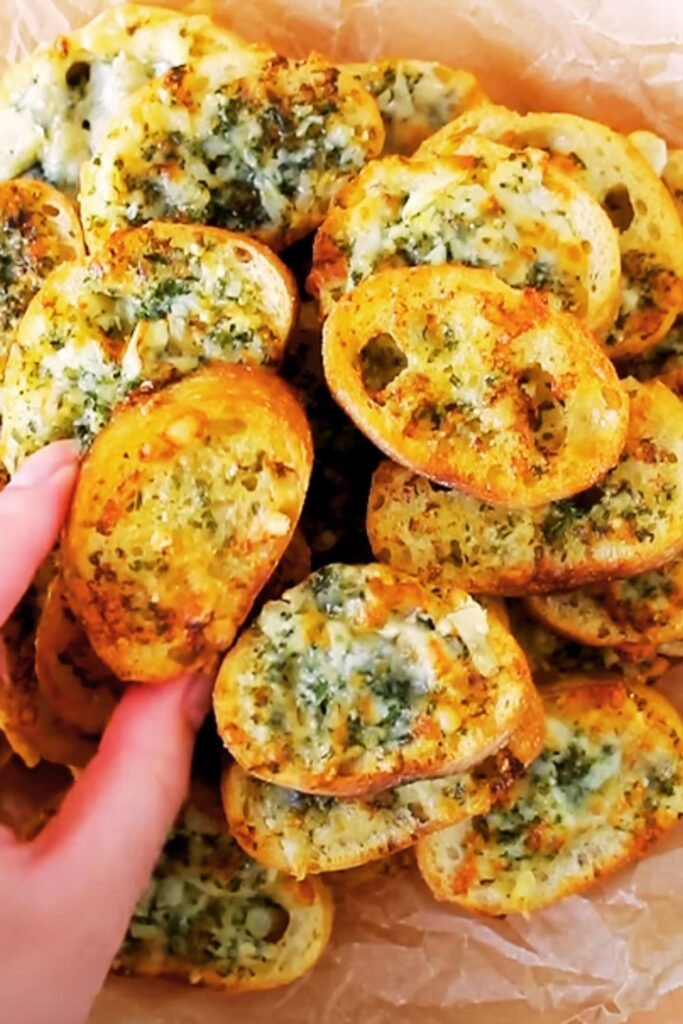
Q: Can I make individual garlic bread slices instead of a whole loaf? A: Absolutely! Cut the bread into slices first, arrange on a baking sheet, spread with garlic butter, and bake at 375°F for 7-10 minutes.
Final Thoughts
Garlic bread may seem simple, but the difference between mediocre and magnificent comes down to attention to detail. Using high-quality ingredients, preparing your garlic properly, finding the right balance of herbs and seasonings, and mastering the baking technique will elevate this humble side dish to star status on your table.
I hope this guide helps you create the most delicious garlic bread you’ve ever tasted. The beauty of this recipe is that once you understand the principles, you can adapt it to your preferences, creating your own signature version that friends and family will request time and again.
Remember, great garlic bread isn’t just a side dish—it’s an experience. So take your time, enjoy the process, and prepare to create something truly special. Your taste buds (and anyone lucky enough to share your table) will thank you!