There’s something magical about the aroma of curry spices filling my kitchen on a weeknight. It transforms an ordinary evening into something special, promising comfort in a bowl. My easy chickpea curry has become my go-to recipe when I crave something hearty, flavorful, and satisfying without spending hours in the kitchen.
This isn’t just another curry recipe – it’s my answer to those hectic days when I need something that feels like a warm hug but doesn’t require extensive prep work or hard-to-find ingredients. I’ve perfected this recipe through countless iterations, tweaking the spice levels and adjusting the cooking method until I achieved that perfect balance of rich flavors and foolproof execution.
What makes this chickpea curry special is its versatility. I can prepare it on a Sunday and enjoy it throughout the week, watching as the flavors deepen and meld together. It’s equally at home as a quick lunch or an impressive dinner when friends drop by unexpectedly. The beauty lies in its simplicity – using pantry staples and basic spices to create something that tastes like it’s been simmering all day.
Understanding Chickpea Curry Fundamentals
Before diving into the recipe, let me share some essential knowledge that will elevate your curry game.
Chickpeas (Garbanzo Beans) : The protein-rich legumes that form the foundation of this dish, providing both substance and nutritional value
Garam Masala : A warming spice blend typically containing cardamom, cinnamon, cloves, and other aromatic spices that adds depth and complexity
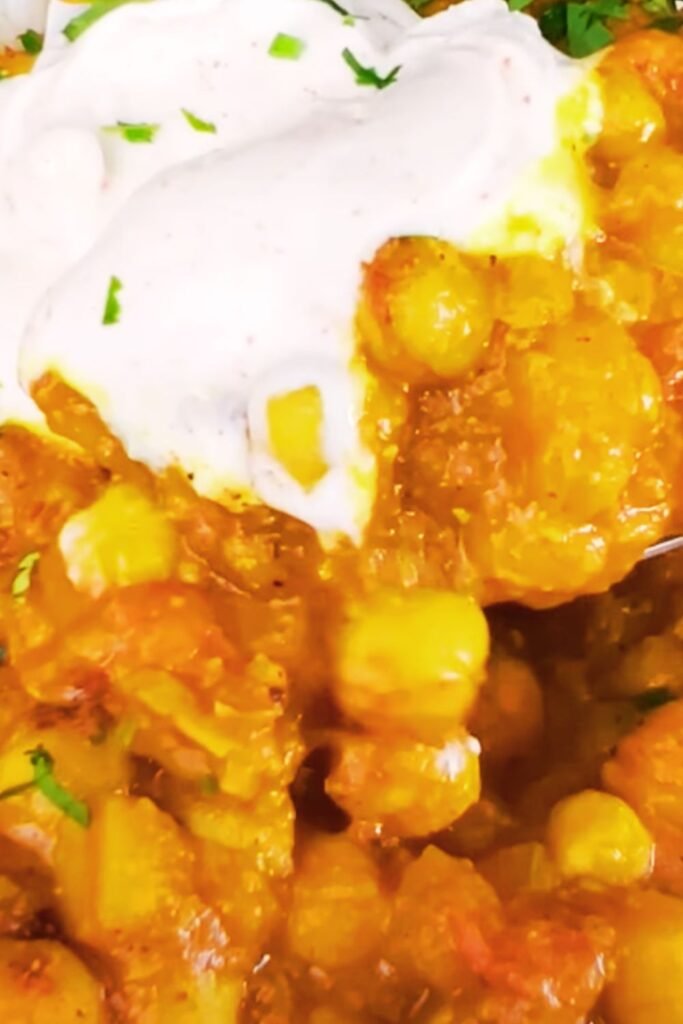
Coconut Milk : The creamy base that balances the spices and creates a rich, velvety texture
Turmeric : The golden spice that provides color, anti-inflammatory properties, and earthy flavor
Cumin Seeds : Whole seeds that release intense flavor when heated in oil, forming the aromatic foundation
The key to exceptional chickpea curry lies in understanding how these ingredients work together. I’ve learned that the order of operations matters tremendously. Starting with whole spices in hot oil creates what we call a “tadka” or tempering, which forms the flavor base. This technique infuses the oil with aromatic compounds that permeate the entire dish.
Essential Ingredients Breakdown
Let me walk you through each component and why I choose specific ingredients for optimal results.
| Ingredient | Quantity | Purpose | Substitution Options |
|---|---|---|---|
| Chickpeas (canned) | 2 cans (15 oz each) | Primary protein source | Dried chickpeas (soaked overnight) |
| Coconut Milk | 1 can (14 oz) | Creamy base | Heavy cream, cashew cream |
| Yellow Onion | 1 large | Aromatic foundation | White onion, shallots |
| Garlic | 4 cloves | Flavor enhancer | Garlic powder (1 tsp) |
| Fresh Ginger | 1-inch piece | Warming spice | Ground ginger (1/2 tsp) |
| Diced Tomatoes | 1 can (14 oz) | Acidity and body | Fresh tomatoes (2 large) |
| Cumin Seeds | 1 teaspoon | Aromatic base | Ground cumin (1/2 tsp) |
| Turmeric | 1 teaspoon | Color and earthiness | None recommended |
| Garam Masala | 1 tablespoon | Complex spice blend | Curry powder |
| Cayenne Pepper | 1/4 teaspoon | Heat level | Red pepper flakes |
| Coconut Oil | 2 tablespoons | Cooking medium | Vegetable oil, ghee |
| Salt | To taste | Flavor enhancement | Sea salt, kosher salt |
| Fresh Cilantro | 1/4 cup | Fresh finish | Parsley, green onions |
I prefer using canned chickpeas for convenience, but if you have time, dried chickpeas create a superior texture. The key is ensuring they’re properly cooked – tender but not mushy.
Step-by-Step Cooking Process
Here’s my foolproof method for creating perfect chickpea curry every time:
Preparation Phase
- Drain and rinse chickpeas thoroughly
- Dice onion into uniform pieces
- Mince garlic and ginger finely
- Measure all spices into a small bowl
- Open coconut milk and stir to combine
Cooking Sequence
Building the Base
- Heat coconut oil in a large, heavy-bottomed pot over medium heat
- Add cumin seeds and let them sizzle for 30 seconds until fragrant
- Add diced onion and cook for 5-7 minutes until softened and lightly golden
- Incorporate minced garlic and ginger, cooking for another minute until aromatic
Spice Integration
- Add turmeric, garam masala, and cayenne pepper to the onion mixture
- Stir constantly for 30 seconds to bloom the spices and prevent burning
- Pour in diced tomatoes with their juice, scraping up any browned bits
- Simmer for 8-10 minutes until tomatoes break down and mixture thickens
Final Assembly
- Add drained chickpeas and stir to coat with the spice mixture
- Pour in coconut milk, stirring to create a smooth consistency
- Season with salt and bring to a gentle simmer
- Reduce heat to low and cook covered for 15-20 minutes
- Stir occasionally to prevent sticking and allow flavors to meld
The magic happens during that final simmering phase. I resist the urge to rush this step because it’s when the chickpeas absorb the flavors and the sauce reaches its ideal consistency.
Nutritional Profile and Health Benefits
This chickpea curry isn’t just delicious – it’s incredibly nutritious. Let me break down the health benefits that make this dish a smart choice for your regular meal rotation.
| Nutrient Category | Benefits | Key Sources in Recipe |
|---|---|---|
| Protein | 15g per serving | Chickpeas |
| Fiber | 12g per serving | Chickpeas, vegetables |
| Iron | 20% daily value | Chickpeas, turmeric |
| Folate | 25% daily value | Chickpeas |
| Potassium | 600mg | Chickpeas, tomatoes |
| Healthy Fats | Medium-chain fatty acids | Coconut milk, coconut oil |
| Antioxidants | Anti-inflammatory compounds | Turmeric, garlic, ginger |
The protein content makes this curry particularly satisfying. I find that a serving keeps me full for hours, unlike some vegetarian dishes that leave me searching for snacks an hour later. The combination of plant protein and fiber creates lasting satiety.
Turmeric deserves special mention for its curcumin content, which has powerful anti-inflammatory properties. I always add a pinch of black pepper to enhance curcumin absorption, though it’s not strictly necessary for flavor.
Flavor Variations and Customizations
One reason I love this recipe is its adaptability. Here are my favorite variations that transform the basic recipe into something entirely different:
Spice Level Adjustments
- Mild Version: Omit cayenne pepper, use sweet paprika instead
- Medium Heat: Standard recipe as written
- Spicy Version: Double the cayenne, add fresh jalapeños
- Extra Hot: Include dried chilies or hot curry powder
Protein Additions
- Chicken Chickpea Curry: Add 1 pound diced chicken thighs
- Lamb Version: Include 12 ounces ground lamb
- Extra Legumes: Mix in kidney beans or lentils
- Egg Curry: Add hard-boiled eggs in the final 5 minutes
Vegetable Enhancements
- Root Vegetable Version: Include diced potatoes and carrots
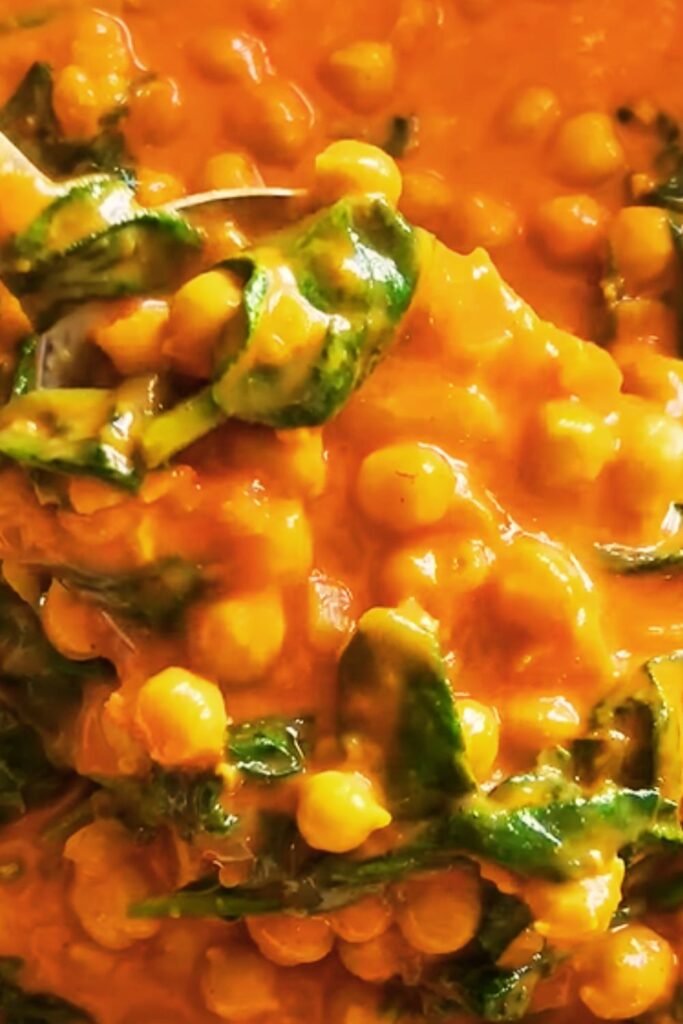
- Green Curry Style: Add spinach, peas, and green beans
- Cauliflower Addition: Roasted cauliflower florets
- Sweet Potato Twist: Cubed sweet potatoes for natural sweetness
I encourage experimentation with vegetables based on seasonal availability. Fall root vegetables work beautifully, while summer additions like zucchini and bell peppers create lighter versions.
Perfect Serving Suggestions
The beauty of chickpea curry lies in its versatility as a complete meal or component of a larger feast. Here are my preferred serving methods:
Grain Pairings
- Basmati Rice: The classic choice that absorbs the sauce beautifully
- Brown Rice: Nuttier flavor and additional fiber
- Quinoa: Higher protein content and fluffy texture
- Cauliflower Rice: Low-carb alternative that works surprisingly well
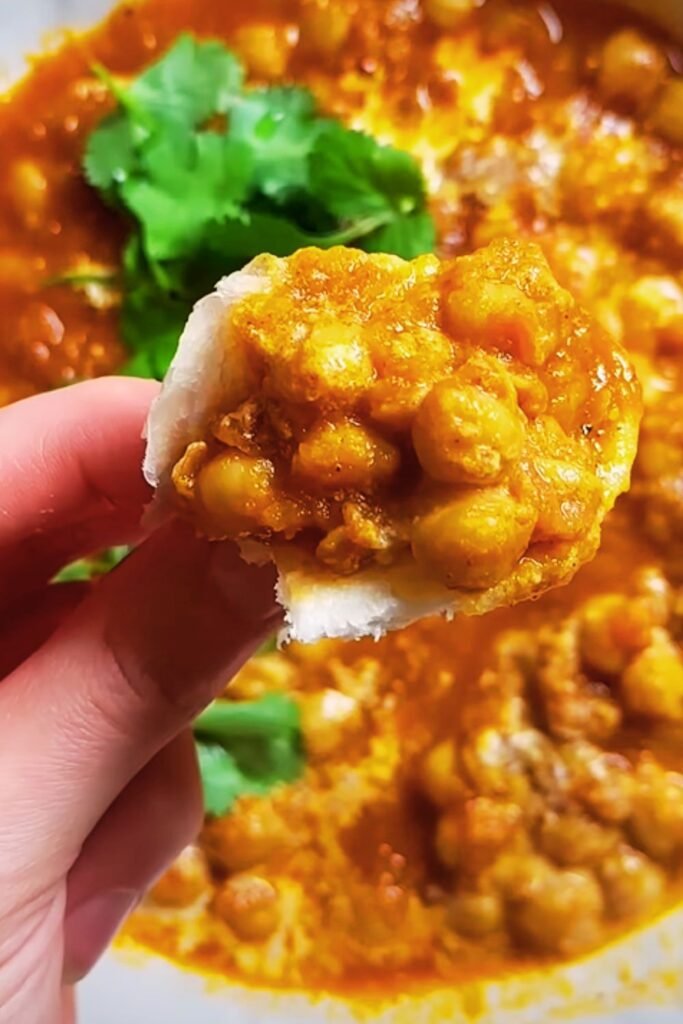
- Naan Bread: For scooping and soaking up every drop
Fresh Accompaniments
- Cooling Yogurt: Plain Greek yogurt with cucumber and mint
- Pickled Vegetables: Quick-pickled red onions or carrots
- Fresh Herbs: Additional cilantro, mint, or green onions
- Lime Wedges: For brightness and acidity
- Roasted Nuts: Cashews or almonds for crunch
Complete Meal Ideas
- Curry Bowl: Serve over rice with yogurt and pickled vegetables
- Flatbread Feast: With homemade or store-bought naan
- Meal Prep Container: Portioned with grain and vegetables
- Soup Style: Thin with extra broth and serve with crusty bread
Storage and Meal Prep Tips
This curry improves with time, making it perfect for meal preparation. Here’s how I maximize its potential:
Refrigerator Storage
- Store in airtight containers for up to 5 days
- Flavors continue developing during storage
- Reheat gently to prevent coconut milk separation
- Add fresh herbs just before serving
Freezer Guidelines
- Freezes beautifully for up to 3 months
- Portion into individual containers for easy thawing
- Leave space for expansion when freezing
- Thaw overnight in refrigerator before reheating
Reheating Methods
- Stovetop: Gentle heat with occasional stirring
- Microwave: Short intervals, stirring between
- Slow Cooker: Low setting for warming large batches
- Oven: Covered at 300°F until heated through
I often double the recipe and freeze half for future busy weeks. It’s incredibly convenient to have homemade curry ready when takeout feels tempting but expensive.
Troubleshooting Common Issues
Through years of making this recipe, I’ve encountered and solved various challenges. Here are the most common issues and my solutions:
Texture Problems
- Too Thin: Simmer uncovered to reduce liquid, or add tomato paste
- Too Thick: Add warm water or broth gradually
- Grainy Coconut Milk: Stir thoroughly before adding, avoid high heat
- Mushy Chickpeas: Reduce cooking time, use firmer beans
Flavor Corrections
- Too Bland: Increase salt, add acid (lemon juice), boost spices
- Too Spicy: Add more coconut milk, sugar, or dairy
- Too Sweet: Balance with lemon juice or vinegar
- Missing Depth: Add more garam masala or a splash of soy sauce
Technical Difficulties
- Spices Burning: Lower heat, add liquid sooner
- Oil Separating: Emulsify by stirring vigorously
- Sticking to Pan: Use heavy-bottomed pot, stir regularly
- Uneven Heating: Maintain consistent low heat after simmering
Cultural Context and History
Chickpea curry represents centuries of culinary evolution across South Asian cuisines. While my version simplifies traditional techniques for modern kitchens, it honors the fundamental principles that make these dishes so satisfying.
The use of whole spices tempered in oil, the layering of aromatics, and the slow development of flavors all reflect time-tested methods. I’ve adapted these techniques to work with commonly available ingredients and contemporary cooking equipment while maintaining authentic flavor profiles.
Different regions have their own chickpea curry traditions – from Bengali chole to Punjabi chana masala. My recipe draws inspiration from various sources while remaining accessible to home cooks regardless of their cultural background or spice tolerance.
Questions and Answers
Q: Can I make this curry without coconut milk? I understand that not everyone has coconut milk on hand or enjoys its flavor. You can substitute heavy cream, cashew cream, or even whole milk, though the flavor profile will change. For a lighter version, use vegetable broth and finish with a splash of cream.
Q: How do I prevent the spices from burning? Burning spices create bitter flavors that can ruin the entire dish. I keep the heat at medium and stir constantly when adding ground spices. If they start to smell acrid rather than fragrant, remove the pan from heat immediately and add a splash of liquid.
Q: Can I use dried chickpeas instead of canned? Absolutely! Dried chickpeas create superior texture and flavor. Soak them overnight, then cook until tender before proceeding with the recipe. This adds about 2 hours to the total time but creates restaurant-quality results.
Q: Why does my curry lack depth of flavor? Flavor development requires patience and proper technique. Ensure you’re cooking the onions until truly softened, blooming the spices adequately, and allowing sufficient simmering time. Salt also plays a crucial role – add it gradually and taste frequently.
Q: How can I make this recipe oil-free? For oil-free cooking, sauté the onions in a splash of water or vegetable broth. The tempering step becomes more challenging without oil, so you might need to toast the spices separately in a dry pan before adding them to the curry.
Q: What’s the best way to reheat leftover curry? I prefer gentle reheating on the stovetop over medium-low heat, stirring occasionally. If the curry seems thick after refrigeration, add a splash of water or broth. Microwave reheating works but requires frequent stirring to prevent hot spots.
Q: Can I make this curry in a slow cooker? Yes, but the process differs significantly. Sauté the aromatics and spices on the stovetop first, then transfer everything to the slow cooker. Cook on low for 4-6 hours. The texture will be softer, and you might need to thicken the sauce at the end.
Q: How do I adjust the recipe for different spice tolerances? Start with half the suggested spice amounts for mild palates, then taste and adjust. For heat-sensitive diners, omit the cayenne entirely and offer hot sauce on the side. Remember, you can always add more spice, but you can’t take it away.
Q: What wine pairs well with chickpea curry? A crisp Riesling or Gewürztraminer complements the spices beautifully, while a light Pinot Noir works well with heartier versions. For non-alcoholic options, try sparkling water with lime or a mango lassi.
Q: Can I make this curry ahead for entertaining? This curry is perfect for entertaining because it improves with time. I often make it the day before serving, which allows the flavors to meld completely. Reheat gently and garnish with fresh herbs just before serving.
This easy chickpea curry has become more than just a recipe in my kitchen – it’s a reliable friend that delivers comfort and satisfaction every single time. Whether you’re cooking for yourself on a quiet evening or preparing a feast for friends, this curry adapts to your needs while maintaining its delicious character. The combination of accessibility, nutrition, and incredible flavor makes it a recipe I return to again and again, and I’m confident it will become a favorite in your kitchen too.