“As an Amazon Associate, I earn from qualifying purchases.”
When I first started baking, I thought homemade bread required a chemistry degree and ingredients I couldn’t pronounce. Boy, was I wrong! After years of experimenting in my kitchen, I’ve discovered that the most satisfying loaves often come from the simplest recipes. Today, I’m sharing my foolproof method for creating delicious, crusty bread using just four basic ingredients you probably already have in your pantry.
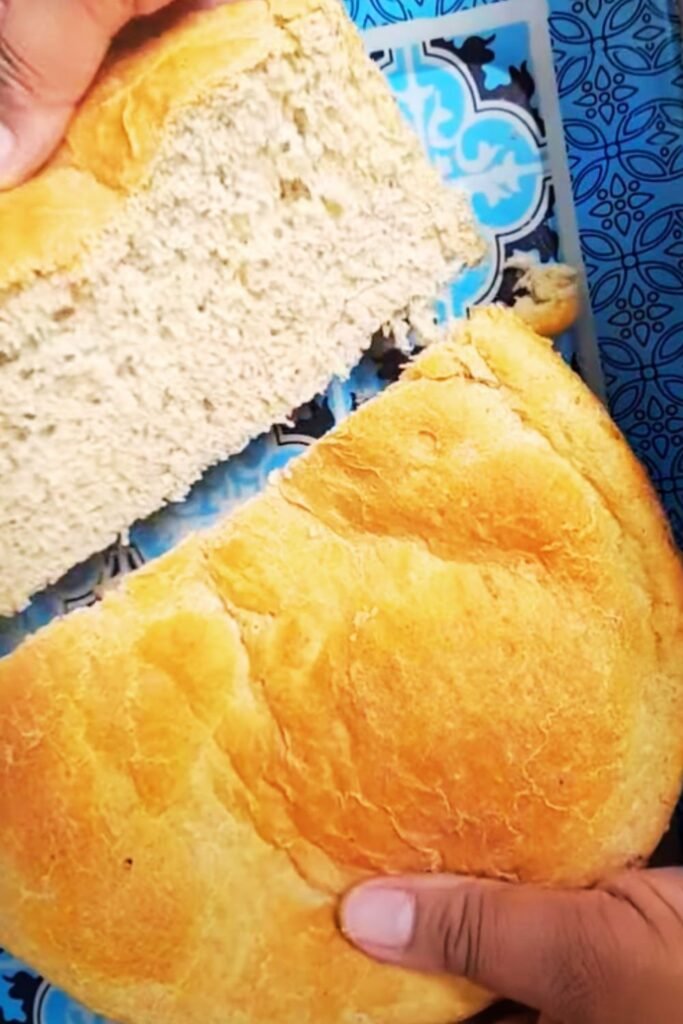
This dairy-free, egg-free bread isn’t just perfect for those with dietary restrictions – it’s actually the traditional way bread has been made for thousands of years. Before industrial food processing, our ancestors created incredible loaves with nothing more than flour, water, salt, and wild yeast. My recipe captures that timeless simplicity while delivering consistent, bakery-quality results every single time.
Why Choose Milk-Free, Egg-Free Bread?
I’ve learned that eliminating milk and eggs from bread recipes offers numerous advantages beyond dietary accommodation. When I remove these enriching ingredients, the wheat flavor becomes more pronounced, creating a cleaner, more authentic taste profile. The texture transforms too – instead of the soft, cake-like crumb that eggs and milk produce, I get a chewier, more substantial bite that pairs beautifully with both sweet and savory toppings.
From a practical standpoint, this approach makes bread-making incredibly accessible. I never have to worry about having fresh milk or eggs on hand, and my loaves stay fresh longer without the dairy components that can accelerate spoilage. The ingredient cost drops significantly too, making homemade bread an economical choice for feeding my family.
Definition List: Key Bread-Making Terms
Gluten Development : The process where wheat proteins form elastic networks that trap gas bubbles, creating bread’s characteristic texture and rise
Proofing : The final rise period where shaped dough doubles in size before baking, typically 30-90 minutes depending on temperature
Autolyse : A resting period where flour and water combine before adding other ingredients, improving dough texture and flavor
Bulk Fermentation : The initial rising phase after mixing all ingredients, where yeast activity develops flavor and structure
Oven Spring : The rapid rise that occurs in the first 10-15 minutes of baking due to expanding gases and steam
Essential Ingredients and Their Roles
My streamlined ingredient list focuses on quality over quantity. Each component serves a specific purpose in creating the perfect loaf.
Flour Selection Guide
| Flour Type | Protein Content | Best Use | Characteristics |
|---|---|---|---|
| Bread Flour | 12-14% | Artisan loaves, sandwich bread | High gluten, chewy texture, excellent rise |
| All-Purpose Flour | 10-12% | Everyday baking, beginner-friendly | Moderate gluten, balanced texture |
| Whole Wheat Flour | 13-16% | Hearty, dense breads | High protein, nutty flavor, dense crumb |
| Pastry Flour | 8-10% | Tender breads, quick breads | Low protein, soft texture |
I prefer using bread flour for its superior gluten development, but all-purpose flour works beautifully too. When I use whole wheat flour, I typically substitute only 25-30% of the total flour to maintain good rise and texture.
Water Quality Matters
Water makes up about 60-70% of bread dough, so its quality directly impacts my final results. I use filtered or bottled water when my tap water is heavily chlorinated, as chlorine can inhibit yeast activity. The temperature is crucial too – I aim for lukewarm water around 100-110°F to activate the yeast without killing it.
Salt: The Flavor Foundation
I never skimp on salt in bread recipes. Beyond enhancing flavor, salt strengthens gluten structure and controls yeast fermentation rate. I use fine sea salt or table salt, measuring carefully since too much salt can kill the yeast entirely.
Yeast Types and Selection
| Yeast Type | Characteristics | Usage | Shelf Life |
|---|---|---|---|
| Active Dry Yeast | Granulated, requires activation | Dissolve in warm water first | 2 years unopened |
| Instant Yeast | Fine powder, no activation needed | Mix directly with flour | 2 years unopened |
| Fresh Yeast | Soft, perishable cake form | Crumble into dough | 2 weeks refrigerated |
Missing a few things? You can grab them on Amazon here.
I stock instant yeast for convenience, but active dry yeast works equally well with proper activation.
My Foolproof Recipe Method
Ingredients (Makes 1 Large Loaf):
- 3 cups bread flour (or all-purpose flour)
- 1¼ cups warm water (100-110°F)
- 1 packet (2¼ tsp) active dry yeast
- 1 teaspoon salt
- 1 tablespoon olive oil (optional, for softer crust)
Missing a few things? You can grab them on Amazon here.
Step-by-Step Instructions:
Yeast Activation Phase: I start by combining warm water and yeast in my mixing bowl, whisking gently to dissolve. After 5-10 minutes, the mixture becomes foamy and fragrant – this tells me the yeast is alive and active. If nothing happens after 15 minutes, I start over with fresh yeast.
Mixing and Initial Kneading: I add flour and salt to the activated yeast mixture, stirring with a wooden spoon until a shaggy dough forms. The mixture looks rough and uneven at this stage – that’s perfectly normal. I turn the dough onto my lightly floured counter and begin kneading.
Kneading Technique: My kneading method involves pushing the dough away with the heel of my hand, folding it back over itself, rotating 90 degrees, and repeating. I maintain a steady rhythm for 8-10 minutes until the dough becomes smooth, elastic, and slightly tacky but not sticky. Proper kneading develops the gluten network that gives bread its structure.
First Rise (Bulk Fermentation): I place the kneaded dough in an oiled bowl, cover with a damp kitchen towel, and let it rise in a warm, draft-free location. My oven with just the light on provides perfect conditions. The dough should double in size within 1-2 hours, depending on room temperature.
Shaping and Final Proof: After the first rise, I gently deflate the dough and shape it into a loaf. I place it seam-side down in a greased 9×5-inch loaf pan, cover again, and let it rise until it crowns above the pan rim – typically 45-60 minutes.
Missing any kitchen essentials? You can grab them on Amazon here.
Baking Techniques for Perfect Results
Oven Preparation
I preheat my oven to 450°F with a rack positioned in the lower third. For extra-crispy crust, I place an empty metal pan on the oven floor and add hot water just before loading the bread – the steam creates a professional bakery effect.
Scoring and Loading
Just before baking, I make a shallow slash lengthwise down the center of the loaf using a sharp knife or razor blade. This controlled weak point allows the bread to expand properly during oven spring.
Baking Timeline and Temperature Control
| Time Period | Temperature | Action | Visual Cues |
|---|---|---|---|
| 0-15 minutes | 450°F | Steam phase, oven spring | Rapid rise, light browning |
| 15-30 minutes | 425°F | Crust development | Golden brown color |
| 30-40 minutes | 400°F | Final baking | Deep golden, hollow thump |
I reduce temperature gradually to ensure even cooking without over-browning the crust. The bread is done when it sounds hollow when tapped on the bottom and registers 200-210°F on an instant-read thermometer.
Cooling and Storage
Patience during cooling is crucial – I resist cutting into hot bread despite the tempting aroma. The interior continues cooking from residual heat for the first hour. I cool loaves on a wire rack to prevent soggy bottoms.
For storage, I wrap completely cooled bread in clean kitchen towels or store in paper bags to maintain crust crispness. Plastic bags soften the crust but keep the bread moist longer.
Missing any kitchen essentials? You can grab them on Amazon here.
Troubleshooting Common Problems
Dense, Heavy Bread
When my loaves turn out heavy and dense, I’ve usually encountered one of these issues:
- Dead or insufficient yeast
- Too much flour (measuring by weight prevents this)
- Inadequate kneading
- Rushing the rising process
I always proof my yeast and measure ingredients carefully to avoid these problems.
Flat, Spreading Loaves
Bread that spreads instead of rising typically suffers from:
- Weak gluten development
- Over-proofed dough
- Too much liquid
- Insufficient kneading time
I’ve learned to recognize properly developed dough – it should feel smooth and elastic, springing back when poked gently.
Uneven Texture or Large Holes
Inconsistent crumb structure usually results from:
- Uneven mixing
- Temperature fluctuations during rising
- Improper shaping technique
- Inadequate deflating between rises

Nutritional Benefits and Dietary Considerations
Nutritional Profile Comparison
| Nutrient (per slice) | Homemade Bread | Commercial White Bread | Commercial Whole Wheat |
|---|---|---|---|
| Calories | 85 | 80 | 90 |
| Protein (g) | 3.2 | 2.5 | 4.0 |
| Carbohydrates (g) | 16 | 15 | 17 |
| Fiber (g) | 0.8 | 0.5 | 2.8 |
| Sodium (mg) | 145 | 170 | 180 |
| Sugar (g) | 0.2 | 1.5 | 2.0 |
My homemade bread contains no preservatives, artificial flavors, or high-fructose corn syrup found in many commercial loaves. I control exactly what goes into each batch, making it ideal for families with food sensitivities.
Allergen-Free Benefits
This recipe naturally accommodates multiple dietary restrictions:
- Dairy-free (lactose intolerant individuals)
- Egg-free (egg allergies)
- Can be made vegan (skip optional butter)
- Lower sodium than commercial bread
- No preservatives or artificial additives
Missing a few things? You can grab them on Amazon here.
Creative Variations and Flavor Additions
Herb and Spice Combinations
I love experimenting with different flavor profiles by adding ingredients during the initial mixing phase:
Mediterranean Blend:
- 2 tablespoons dried rosemary
- 1 tablespoon dried oregano
- 1 teaspoon garlic powder
Everything Bagel Style:
- 2 tablespoons sesame seeds
- 1 tablespoon poppy seeds
- 1 tablespoon dried onion flakes
- 1 teaspoon garlic powder
Sweet Cinnamon:
- 2 teaspoons ground cinnamon
- 2 tablespoons brown sugar
- 1 teaspoon vanilla extract (add with water)
Missing a few things? You can grab them on Amazon here.
Texture Modifications
For varied textures, I incorporate these additions:
| Addition | Amount | Effect | Best Uses |
|---|---|---|---|
| Rolled Oats | ½ cup | Heartier texture, nutty flavor | Sandwich bread, toast |
| Seeds (sunflower, pumpkin) | ¼ cup | Crunchy texture, nutrition boost | Artisan loaves |
| Whole Wheat Flour | Up to 1 cup substitution | Denser crumb, nuttier taste | Rustic breads |
| Olive Oil | 2-3 tablespoons | Softer crumb, longer freshness | Dinner rolls, flatbread |
Serving Suggestions and Pairings
Fresh homemade bread transforms ordinary meals into special occasions. I serve warm slices with:
Breakfast Options:
- Honey and butter
- Homemade jam or preserves
- Avocado with sea salt and pepper
- Peanut or almond butter
Lunch and Dinner:
- Olive oil and balsamic vinegar for dipping
- Soup accompaniment (especially tomato or vegetable)
- Sandwich base for deli meats and vegetables
- Bruschetta topped with tomatoes and fresh basil
Appetizer Ideas:
- Garlic bread (brush with olive oil and garlic)
- Crostini with various toppings
- Bread bowl for spinach or artichoke dip
Missing a few things? You can grab them on Amazon here.
Advanced Tips for Bread Perfection
Temperature Control Mastery
I’ve invested in an instant-read thermometer for consistent results. Key temperatures I monitor:
- Water for yeast activation: 100-110°F
- Dough during rising: 75-80°F ideal
- Internal bread temperature when done: 200-210°F
Timing Flexibility
Life doesn’t always accommodate bread schedules, so I’ve learned timing adjustments:
- Slow rise in refrigerator (up to 24 hours) develops complex flavors
- Quick rise in warm oven with light on (doubled time in half)
- Freeze shaped loaves before final rise, thaw and proof when ready
Equipment Recommendations
While fancy equipment isn’t necessary, these tools improve my results:
- Kitchen scale for precise measurements
- Bench scraper for easy dough handling
- Instant-read thermometer for temperature accuracy
- Steam pan for professional-quality crust
Missing any kitchen essentials? You can grab them on Amazon here.
Questions and Answers
Q: Can I make this bread without a stand mixer? Absolutely! I actually prefer hand-kneading for this recipe. It takes 8-10 minutes of steady kneading, but I find the process meditative and rewarding. Hand-kneading also gives me better control over dough development.
Q: How long does homemade bread stay fresh? My loaves stay fresh for 2-3 days at room temperature when stored properly. I wrap them in clean kitchen towels or store in paper bags. For longer storage, I slice and freeze portions, toasting directly from frozen.
Q: Can I substitute whole wheat flour entirely? I recommend starting with a 50/50 blend of whole wheat and bread flour. Pure whole wheat creates dense, heavy bread that many find less appealing. Gradually increase the whole wheat percentage as your family adjusts to the heartier texture.
Q: Why didn’t my bread rise properly? Poor rise usually stems from dead yeast, too-cold environment, or rushing the process. I always proof my yeast first and create warm rising conditions. Room temperature below 70°F significantly slows fermentation.
Q: Can I add nuts or dried fruit to this recipe? Yes, but I add them during the final few minutes of kneading to prevent breaking them up. I use about ½ cup total additions and adjust flour slightly if the dough becomes too sticky.
Q: What’s the best way to store leftover bread? For day-to-day use, I keep bread in a paper bag or wrapped in kitchen towels to maintain crust crispness. For longer storage, I slice and freeze individual portions in freezer bags, removing air to prevent freezer burn.
Q: Can I double this recipe? Certainly! I often make double batches, but I mix each loaf separately rather than doubling the entire recipe at once. This ensures even ingredient distribution and proper kneading.
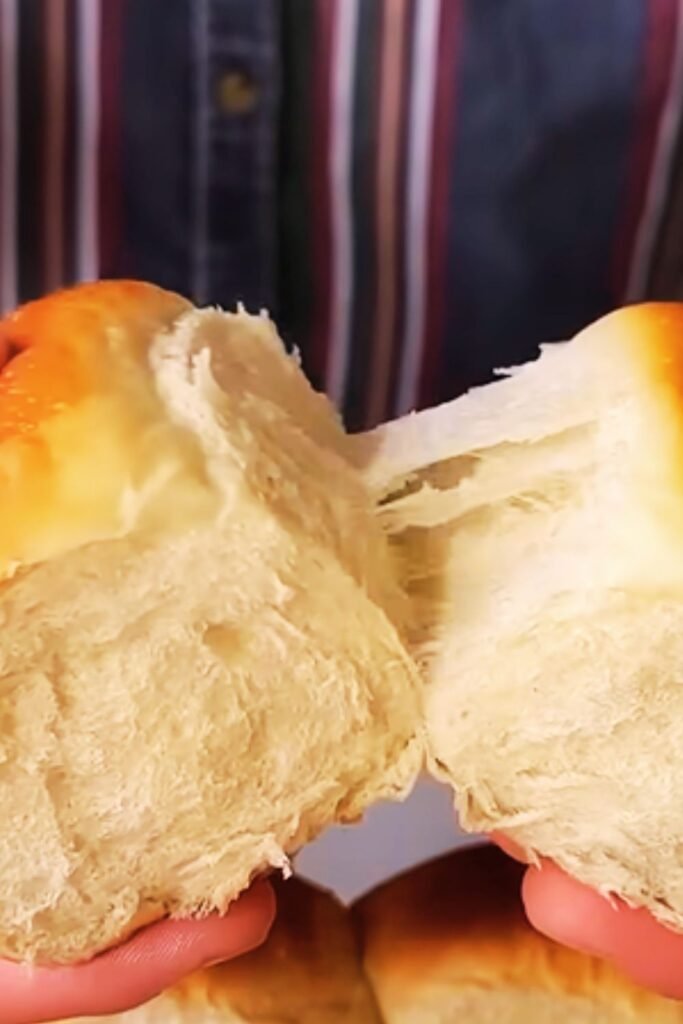
Q: How do I know if I’ve kneaded enough? Properly kneaded dough feels smooth, elastic, and slightly tacky but not sticky. I use the “windowpane test” – stretching a small piece of dough thin enough to see light through without tearing.
Q: Can I make this recipe gluten-free? This particular recipe relies on gluten development for structure, so direct substitution won’t work. Gluten-free bread requires different techniques and binding agents like xanthan gum.
Q: What causes bread to have a gummy texture? Gummy bread usually results from cutting too soon after baking or underbaking. I always let my loaves cool completely and check the internal temperature reaches 200-210°F before removing from the oven.
Creating perfect homemade bread becomes second nature with practice. This simple, milk-free, egg-free recipe has served my family well for years, providing fresh, wholesome bread that brings warmth and satisfaction to our table. Start with this basic version, then explore variations as your confidence grows. The aroma of fresh bread baking will fill your home with comfort, and the taste will remind you why homemade always beats store-bought.
Missing a few things? You can grab them on Amazon here.
Missing any kitchen essentials? You can grab them on Amazon here.