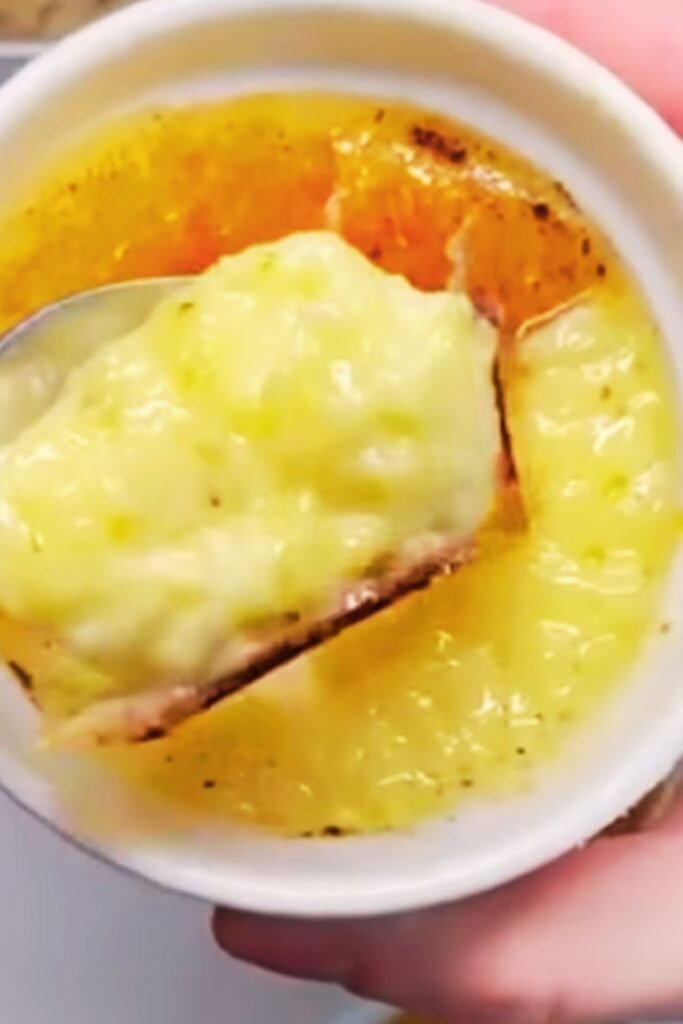
I’ve been making crème brûlée for over fifteen years, and I can confidently say that this dessert never fails to impress. There’s something magical about the contrast between the crispy, caramelized sugar top and the silky smooth custard beneath. My “Dreams Crème Brûlée” recipe has become legendary among my friends and family – it’s earned this name because it literally tastes like a dream come true.
When I first attempted crème brûlée years ago, I was intimidated by its reputation as a sophisticated French dessert. However, I quickly discovered that with the right technique and attention to detail, creating restaurant-quality crème brûlée at home is entirely achievable. This recipe has been perfected through countless iterations, incorporating traditional French techniques with modern precision.
The beauty of crème brûlée lies in its simplicity – just five basic ingredients transformed into something extraordinary. What makes my Dreams version special is the careful balance of vanilla, the perfect custard texture, and most importantly, the technique that ensures consistent results every time.
Understanding Crème Brûlée: Essential Definitions
Crème Brûlée : A rich custard dessert topped with a layer of hardened caramelized sugar, traditionally served in shallow ramekins
Custard Base : The smooth, creamy foundation made from egg yolks, cream, sugar, and vanilla that sets during baking
Bain-Marie (Water Bath) : A gentle cooking method where ramekins sit in a pan of hot water during baking, ensuring even, gentle heat distribution
Caramelization : The process of heating sugar until it melts and transforms into a golden, crispy layer on top of the custard
Tempering : The technique of gradually warming egg yolks with hot cream to prevent curdling
The Perfect Dreams Crème Brûlée Recipe
Ingredients for Dreams Crème Brûlée
| Ingredient | Amount | Purpose | Quality Notes |
|---|---|---|---|
| Heavy Cream (35% fat) | 2 cups (480ml) | Creates rich, silky texture | Must be fresh, avoid ultra-pasteurized |
| Large Egg Yolks | 6 pieces | Provides structure and richness | Room temperature works best |
| Granulated Sugar | 1/3 cup (65g) | Sweetens custard base | Fine granulation dissolves easier |
| Pure Vanilla Extract | 2 teaspoons | Primary flavoring | Real vanilla, not imitation |
| Extra Sugar for Topping | 6 tablespoons | Creates caramelized crust | Superfine sugar works best |
Essential Equipment
| Equipment | Purpose | Alternative Options |
|---|---|---|
| 6 Shallow Ramekins (4-5 oz) | Individual serving vessels | Ceramic or glass, avoid metal |
| Kitchen Torch | Caramelizes sugar topping | Broiler setting (less control) |
| Fine-Mesh Strainer | Removes lumps from custard | Cheesecloth works in emergency |
| Large Roasting Pan | Holds water bath | Any deep baking dish |
| Whisk | Mixing ingredients | Fork works but whisk is better |
Step-by-Step Preparation Method
Preparing the Custard Base
I always start by preheating my oven to 325°F (163°C). This moderate temperature is crucial for achieving the perfect texture without overcooking the delicate custard.
First, I pour the heavy cream into a medium saucepan and place it over medium heat. I’m looking for the cream to just begin steaming – small bubbles will form around the edges, but I never let it reach a full boil. This usually takes about 5-7 minutes depending on my stove.
While the cream heats, I separate my egg yolks into a medium mixing bowl. Room temperature eggs work much better than cold ones straight from the refrigerator. I add the 1/3 cup of granulated sugar to the yolks and whisk vigorously for about 2 minutes until the mixture becomes pale yellow and slightly thickened. This process, called ribboning, is essential for creating the proper custard texture.
The Critical Tempering Process
Here’s where many home cooks make their biggest mistake. When the cream is properly heated, I remove it from the heat and add the vanilla extract, stirring to combine. Now comes the tempering – the most crucial step in the entire process.
I pour about 1/4 cup of the hot cream mixture into the egg yolk mixture while whisking constantly. This gradual introduction of heat prevents the eggs from scrambling. I continue adding the cream in small increments, whisking continuously, until about half the cream is incorporated. Then I can add the remaining cream more quickly while still whisking.
The mixture should be smooth and pale yellow. I always strain it through a fine-mesh strainer to remove any potential lumps or bits of cooked egg. This extra step ensures my Dreams Crème Brûlée has that signature silky texture.
Baking in the Water Bath
I arrange my six ramekins in a large roasting pan and divide the custard mixture evenly among them, filling each about 3/4 full. The water bath technique is non-negotiable for perfect results. I place the pan in the oven first, then carefully pour hot water into the pan until it reaches halfway up the sides of the ramekins.
The baking time is typically 35-40 minutes, but I always test for doneness rather than relying solely on time. The custards are ready when the centers are just barely set – they should jiggle slightly when gently shaken but not be liquid. Overbaking results in a grainy texture that ruins the entire dessert.
Cooling and Chilling
After removing the ramekins from the water bath, I let them cool to room temperature for about 30 minutes. Then I cover each with plastic wrap and refrigerate for at least 4 hours, though overnight is preferable. This chilling time allows the custard to fully set and develop its characteristic creamy texture.
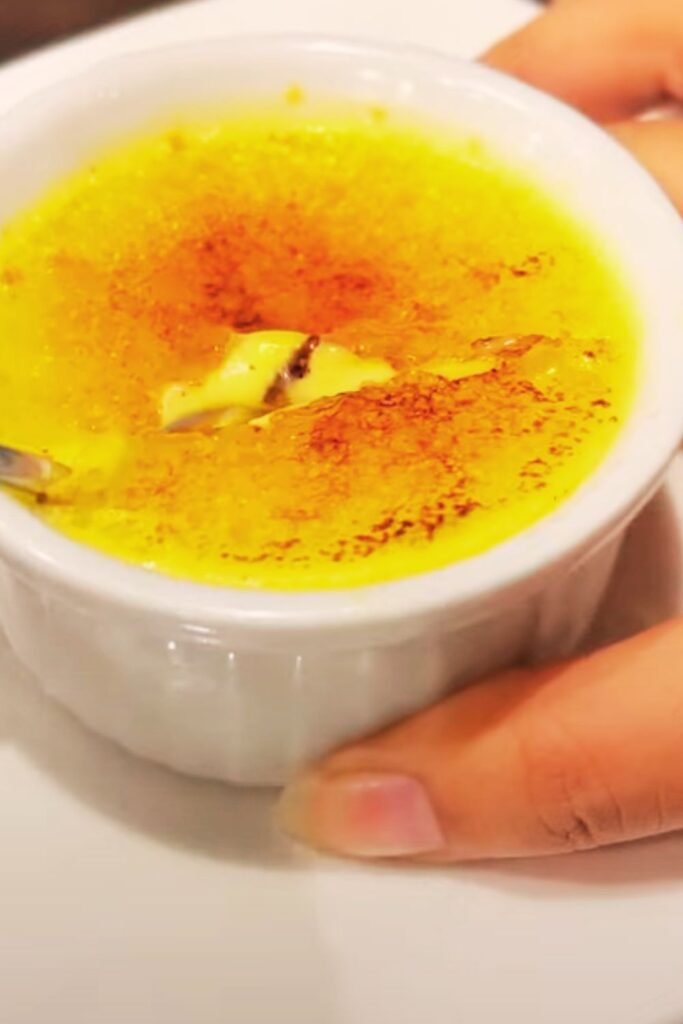
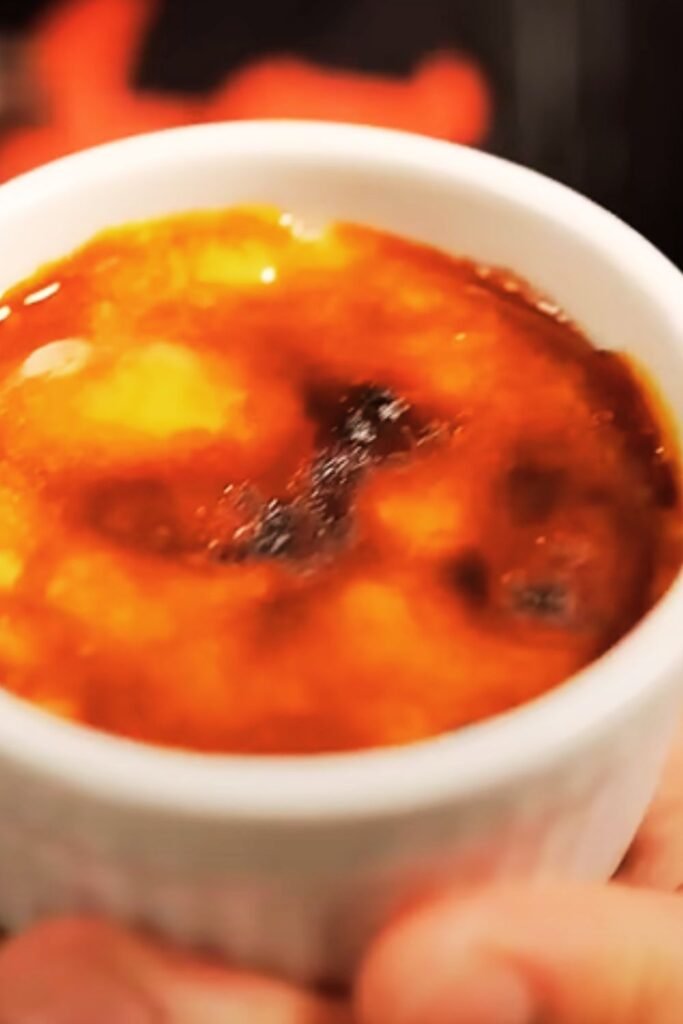
Creating the Signature Caramelized Top
The caramelized sugar top is what transforms good custard into extraordinary crème brûlée. I remove the chilled custards from the refrigerator about 10 minutes before serving – they should still be cold but not ice-cold when I add the sugar topping.
I sprinkle about 1 tablespoon of superfine sugar evenly over each custard surface. Using my kitchen torch, I move in small circles about 2 inches from the surface, caramelizing the sugar until it forms a golden-brown, glass-like crust. The key is patience – rushing this step often results in burnt spots or uneven caramelization.
Nutritional Information and Serving Details
Nutritional Breakdown Per Serving
| Nutrient | Amount | % Daily Value |
|---|---|---|
| Calories | 285 | 14% |
| Total Fat | 24g | 31% |
| Saturated Fat | 14g | 70% |
| Cholesterol | 195mg | 65% |
| Sodium | 35mg | 2% |
| Total Carbohydrates | 15g | 5% |
| Sugars | 15g | – |
| Protein | 4g | 8% |
Serving Suggestions and Pairings
My Dreams Crème Brûlée pairs beautifully with fresh berries – strawberries, raspberries, or blackberries add a lovely tartness that balances the rich sweetness. I often serve it alongside delicate butter cookies or thin wafer biscuits for textural contrast.
For special occasions, I’ll garnish with a sprig of fresh mint or a light dusting of powdered sugar around the plate’s rim. The dessert also pairs wonderfully with a strong espresso or a cup of Earl Grey tea.
During summer months, I love serving it with a small scoop of vanilla bean ice cream or a dollop of lightly sweetened whipped cream infused with a touch of Grand Marnier.
Troubleshooting Common Issues
Texture Problems and Solutions
| Problem | Cause | Solution |
|---|---|---|
| Grainy Texture | Overcooked or eggs too hot | Lower oven temperature, better tempering |
| Runny Center | Undercooked | Extend baking time by 5-10 minutes |
| Curdled Mixture | Poor tempering technique | Strain mixture, start tempering process over |
| Cracked Surface | Oven too hot or overbaked | Reduce temperature to 300°F, check earlier |
| Burnt Sugar Top | Torch too close or too long | Keep torch 2-3 inches away, constant motion |
Storage and Make-Ahead Tips
I frequently make my Dreams Crème Brûlée up to three days in advance, storing the custards covered in the refrigerator without the sugar topping. The caramelized sugar should always be added just before serving to maintain its crispy texture.
If I need to transport them, I wait to add the sugar topping until I arrive at my destination. The custards travel well when properly covered and kept chilled.
Flavor Variations and Creative Adaptations
Classic Flavor Modifications
Over the years, I’ve developed several variations of my Dreams recipe that have become equally popular:
Lavender Dreams Crème Brûlée: I steep 1 tablespoon of dried culinary lavender in the warm cream for 20 minutes before straining it out. This creates a subtle floral note that’s absolutely divine.
Chocolate Dreams: I add 2 ounces of finely chopped dark chocolate to the warm cream, whisking until completely melted. The result is rich and indulgent without being overpowering.
Coffee Dreams: I dissolve 2 tablespoons of instant espresso powder in the warm cream for a sophisticated coffee flavor that pairs beautifully with the caramelized sugar.
Citrus Dreams: I add the zest of one lemon or orange to the cream while heating, then strain before tempering. The bright citrus notes create a refreshing contrast to the rich custard.
Seasonal Adaptations
During autumn, I love creating a Spiced Dreams version by adding 1/2 teaspoon of cinnamon, 1/4 teaspoon of nutmeg, and a pinch of cardamom to the cream. For winter holidays, I’ll incorporate a tablespoon of brandy or rum for extra warmth and complexity.
Spring calls for lighter variations – I might infuse the cream with fresh herb combinations like vanilla and thyme, or create a rose water version using just 1/2 teaspoon of high-quality rose water.
Professional Tips for Consistent Results
After years of perfecting this recipe, I’ve learned several professional techniques that make the difference between good and exceptional crème brûlée:
Temperature Control: I always use an instant-read thermometer to ensure my cream reaches exactly 170°F (77°C) – hot enough to properly temper the eggs but not so hot that it cooks them instantly.
Egg Selection: I prefer eggs from pasture-raised hens as they tend to have richer, more orange yolks that create a more luxurious color and flavor in the final custard.
Cream Quality: The quality of cream makes an enormous difference. I always choose organic heavy cream with a 35% fat content, avoiding ultra-pasteurized varieties when possible.
Ramekin Preparation: I lightly butter my ramekins before adding the custard mixture. This makes unmolding easier if I ever want to serve them inverted, though traditional presentation keeps them in the ramekins.
Water Bath Precision: The water temperature in my bain-marie should match the oven temperature when I first put the pan in. I accomplish this by using hot tap water and letting it come to temperature as the oven preheats.
The Science Behind Perfect Crème Brûlée
Understanding the science helps me achieve consistent results every time. The proteins in egg yolks coagulate between 160-180°F (71-82°C), which is why gentle, even heating is so important. The fat in the cream provides richness and helps create the smooth mouthfeel, while the sugar not only sweetens but also affects the setting temperature of the custard.
The caramelization process on top occurs when sugar reaches approximately 340°F (171°C), transforming from crystalline sugar into the complex flavors and crispy texture we associate with great crème brûlée.
Questions and Answers
Q: Can I make Dreams Crème Brûlée without a kitchen torch?
I can achieve similar results using my oven’s broiler setting, though it requires more attention. I place the sugar-topped custards on the top oven rack and broil for 1-2 minutes, rotating the ramekins frequently to ensure even caramelization. However, a kitchen torch provides much better control and more consistent results.
Q: Why does my custard sometimes curdle during the tempering process?
Curdling typically occurs when the cream is too hot or when it’s added too quickly to the egg yolks. I always let the cream cool for a minute or two after removing it from heat, and I add it very gradually while whisking constantly. If curdling does occur, I can sometimes save the mixture by straining it through a fine-mesh sieve and whisking vigorously.
Q: How far in advance can I prepare Dreams Crème Brûlée?
I can prepare the custard base up to three days in advance, storing covered ramekins in the refrigerator. However, I never add the sugar topping until just before serving, as it will dissolve and lose its crispy texture if applied too early.
Q: What’s the best way to achieve an even caramelized top?
The key is using superfine sugar and keeping the torch moving in small circles about 2 inches from the surface. I start from the outside edge and work toward the center, ensuring complete coverage. If I notice any spots that aren’t caramelizing evenly, I can go back over them with the torch.
Q: Can I substitute different types of cream in this recipe?
Heavy cream with 35% fat content is essential for proper texture and richness. Half-and-half or light cream won’t provide the same luxurious mouthfeel, and the custard may not set properly. I’ve experimented with alternatives, but nothing matches the results of high-quality heavy cream.
Q: Why do some of my custards cook faster than others in the same batch?
Uneven cooking usually results from inconsistent oven hot spots or variations in ramekin size and material. I always rotate my pan halfway through baking and ensure all ramekins are identical. Using ceramic or glass ramekins provides the most even heat distribution.
Q: What should I do if my caramelized sugar top becomes too thick or burnt?
If the sugar becomes too thick, I can gently scrape it off and reapply a thinner layer. For burnt spots, I remove the burnt sugar and start over. The key is patience – it’s better to build up the caramelization gradually than to rush and risk burning.
Q: Can I make a larger batch of Dreams Crème Brûlée for parties?
I can easily double or triple this recipe for larger gatherings. The technique remains exactly the same, though I may need to use multiple roasting pans for the water bath. I always prepare extra custards when entertaining, as they’re consistently the first dessert to disappear from my table.
This Dreams Crème Brûlée recipe has become my signature dessert, and I’m confident it will become yours too. The combination of classic French technique with careful attention to detail creates a dessert that’s both impressive and achievable for home cooks of any skill level.