There’s something magical about the aroma of freshly baked English muffins wafting through my kitchen on a lazy weekend morning. After years of buying store-bought versions that often disappointed with their dense texture and artificial preservatives, I discovered that making homemade English muffins isn’t just possible—it’s surprisingly simple and incredibly rewarding.
My journey with homemade English muffins began during a particularly dreary winter when I craved comfort food that reminded me of cozy breakfast spots. What I found was a recipe that delivers pillowy-soft muffins with those coveted nooks and crannies, perfect for catching every drop of butter and jam. These aren’t just any English muffins—they’re quick to make, requiring no overnight rising, and result in the softest texture I’ve ever achieved.
The beauty of this recipe lies in its simplicity and the fact that you can have fresh, warm English muffins on your table in under two hours. Unlike traditional methods that require extensive kneading and long fermentation periods, my approach uses a combination of techniques that accelerate the process without compromising on flavor or texture.
Understanding English Muffins: More Than Just Bread
English Muffin: A small, round, flat yeast-leavened bread that’s cooked on a griddle rather than baked in an oven, characterized by its distinctive nooks and crannies interior.
Griddle Cooking: The traditional method of cooking English muffins on a flat cooking surface, which creates the characteristic flat top and bottom while maintaining a soft, airy interior.
Nooks and Crannies: The irregular air pockets and texture inside an English muffin that make it perfect for holding toppings and spreading condiments.
Crumpet Rings: Metal rings used to contain the muffin batter while cooking, ensuring uniform shape and proper rising.
The key difference between English muffins and regular bread lies in their cooking method and batter consistency. While bread dough is typically firm enough to shape by hand, English muffin batter has a higher hydration level, making it more like a thick, sticky dough that needs to be contained in rings while cooking.
Essential Ingredients for Perfect English Muffins
Creating the perfect English muffin requires understanding how each ingredient contributes to the final product. I’ve experimented with various combinations over the years, and this ingredient list represents the perfect balance of flavor, texture, and ease of preparation.
| Ingredient | Amount | Purpose | Substitution Options |
|---|---|---|---|
| All-purpose flour | 3 cups | Provides structure and gluten development | Bread flour (use 2¾ cups) |
| Warm milk | 1 cup | Creates tenderness and richness | Buttermilk, plant-based milk |
| Active dry yeast | 1 packet (2¼ tsp) | Leavening agent for rise and texture | Instant yeast (same amount) |
| Sugar | 1 tablespoon | Feeds yeast and adds subtle sweetness | Honey, maple syrup |
| Salt | 1 teaspoon | Enhances flavor and controls yeast | Sea salt, kosher salt |
| Butter | 2 tablespoons | Adds richness and tender crumb | Vegetable oil, coconut oil |
| Cornmeal | ¼ cup | Prevents sticking and adds texture | Semolina flour, fine polenta |
The quality of your ingredients directly impacts the final result. I always use unbleached all-purpose flour for better flavor, and I’ve found that using milk instead of water creates significantly softer muffins. The small amount of sugar isn’t just for taste—it helps the yeast work more efficiently, contributing to better rise and texture.

Step-by-Step Method for Quick English Muffins
My streamlined method eliminates the guesswork and lengthy waiting periods typically associated with English muffin making. This process focuses on creating the ideal environment for yeast activity while maintaining the proper dough consistency.
Preparing the Yeast Mixture
I start by warming the milk to exactly 110°F—this temperature is crucial because it’s warm enough to activate the yeast without killing it. In a large mixing bowl, I combine the warm milk with sugar, stirring until completely dissolved. The sugar provides immediate food for the yeast, jumpstarting the fermentation process.
Next, I sprinkle the yeast over the milk mixture and let it sit for 5-8 minutes until it becomes foamy and fragrant. This step, called proofing, ensures that my yeast is alive and active. If the mixture doesn’t foam, the yeast is likely dead, and I need to start over with fresh yeast.
Creating the Dough
Once my yeast mixture is properly activated, I add the melted butter and salt, whisking everything together until well combined. The key to my quick method is adding the flour gradually while mixing with a wooden spoon. I incorporate about half the flour first, mixing until a shaggy dough forms, then gradually add the remaining flour until the dough is sticky but manageable.
The consistency should be wetter than typical bread dough but not so wet that it can’t hold its shape. This higher hydration level is what creates those perfect nooks and crannies. I’ve learned that it’s better to err on the side of slightly too wet rather than too dry, as dry dough results in dense, tough muffins.
The Quick Rise Method
Instead of a long, slow rise, I place the dough in a lightly oiled bowl and cover it with a damp kitchen towel. I then set it in a warm place—I often use my oven with just the light on, which creates the perfect temperature of around 80°F. This controlled environment allows the dough to double in size in just 45-60 minutes rather than the typical 2-3 hours.
Cooking Technique: Mastering the Griddle
The cooking process is where many home bakers struggle, but I’ve developed a foolproof method that ensures even cooking and perfect texture every time.
Preparing Your Cooking Surface
I use a large, heavy-bottomed skillet or griddle set over medium-low heat. The key is maintaining a consistent temperature of around 300°F. If you don’t have a thermometer, you can test the heat by sprinkling a few drops of water on the surface—they should sizzle gently and evaporate within a few seconds.
I generously dust the cooking surface with cornmeal, which serves two purposes: it prevents sticking and adds that traditional English muffin texture to the bottom and top. The cornmeal also helps regulate the heat transfer, preventing the bottoms from burning before the centers cook through.
Shaping and Cooking Process
| Cooking Stage | Time | Temperature | Visual Cues |
|---|---|---|---|
| Initial Setup | – | Medium-low | Water droplets sizzle gently |
| First Side | 7-8 minutes | 300°F | Golden brown bottom, set edges |
| Flip | – | – | Muffin releases easily |
| Second Side | 6-7 minutes | 300°F | Golden brown, springs back when pressed |
| Internal Check | – | – | Internal temperature 190°F |
Using crumpet rings or clean tuna cans with both ends removed, I place them on the griddle and fill each about halfway with dough. This contains the batter and ensures uniform shape. I cook the first side for 7-8 minutes, watching for the edges to set and the bottom to develop a golden-brown color.
The flip is crucial—I remove the rings and carefully turn each muffin using a thin spatula. The second side typically cooks faster, requiring only 6-7 minutes. I know they’re done when they spring back lightly when pressed and have reached an internal temperature of 190°F.
Troubleshooting Common Issues
Through my years of making English muffins, I’ve encountered and solved virtually every problem that can arise. Here are the most common issues and my proven solutions:
Dense, Heavy Muffins: Usually caused by too much flour or inactive yeast. I always measure flour by spooning it into the cup and leveling off, never scooping directly from the bag. For yeast issues, I check the expiration date and proof it properly.
Uneven Cooking: This typically results from inconsistent heat. I’ve learned to use medium-low heat and be patient. Rushing the process with higher heat leads to burnt outsides and raw centers.
Lack of Nooks and Crannies: The hallmark texture comes from proper hydration and gentle handling. Overmixing or adding too much flour creates dense muffins without the characteristic holes.
Sticking to the Pan: Insufficient cornmeal or too high heat causes sticking. I always use plenty of cornmeal and maintain consistent, moderate temperature.
Flavor Variations and Creative Twists
Once you master the basic technique, the possibilities for customization are endless. I’ve experimented with numerous variations that maintain the soft texture while adding exciting flavors.
Sweet Variations
For cinnamon-raisin English muffins, I add 1 teaspoon of ground cinnamon to the flour and fold in ½ cup of plump raisins after the initial mixing. The key is soaking the raisins in warm water for 10 minutes before adding them to prevent them from absorbing moisture from the dough.
My honey wheat version substitutes ½ cup of the all-purpose flour with whole wheat flour and replaces the sugar with 2 tablespoons of honey. This creates a slightly denser but incredibly flavorful muffin with a beautiful golden color.
Savory Options
Everything bagel English muffins have become my weekend favorite. I mix 2 tablespoons of everything bagel seasoning into the flour before adding it to the wet ingredients. The result is a savory muffin perfect for breakfast sandwiches.
For herb lovers, I create garden herb muffins by adding 2 tablespoons of fresh chopped herbs—typically a combination of rosemary, thyme, and chives. These pair beautifully with cream cheese and tomatoes.

Storage and Freezing Guidelines
Proper storage ensures that your homemade English muffins maintain their soft texture and fresh flavor for days or even months.
| Storage Method | Duration | Temperature | Best Practices |
|---|---|---|---|
| Room Temperature | 2-3 days | 68-72°F | Airtight container, cool dry place |
| Refrigerator | 1 week | 35-40°F | Plastic bag, remove excess air |
| Freezer | 3 months | 0°F | Individual wrapping, freezer bags |
| Thawed Muffins | 2 days | Room temp | Use within 48 hours of thawing |
For room temperature storage, I place completely cooled muffins in an airtight container lined with paper towels to absorb any excess moisture. They stay fresh for 2-3 days this way.
Freezing is where homemade English muffins really shine. I slice them in half before freezing, then wrap each muffin individually in plastic wrap before placing them in freezer bags. This allows me to toast them directly from frozen, and they taste just as good as fresh.
Serving Suggestions and Pairings
The versatility of English muffins makes them suitable for any meal, and I’ve discovered some outstanding combinations over the years.
Classic Breakfast Pairings
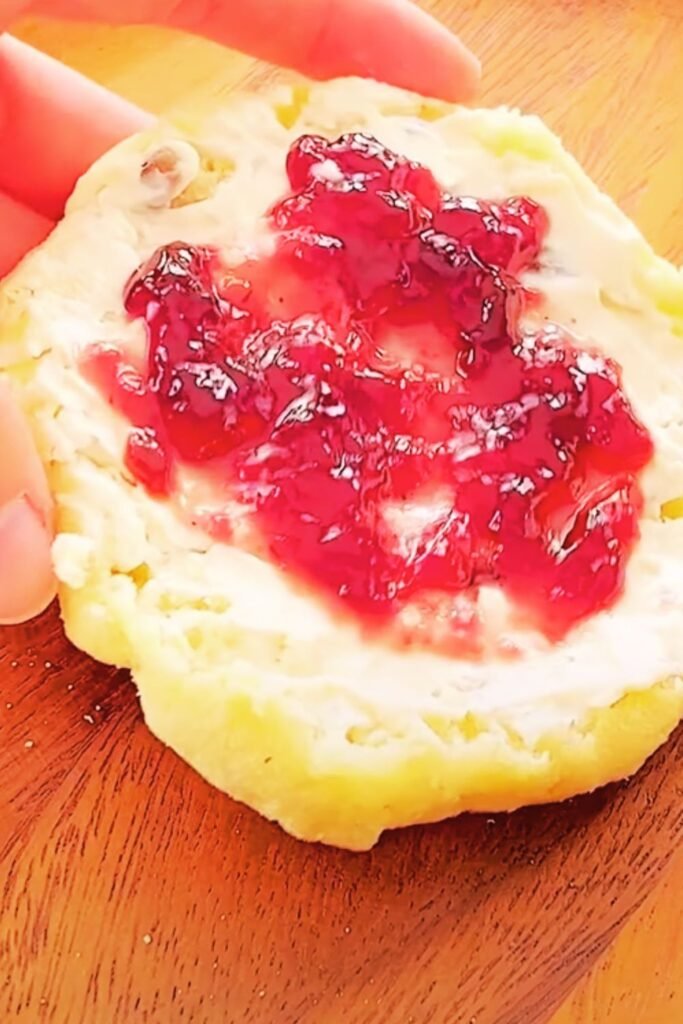
The traditional butter and jam combination remains my go-to comfort choice. I prefer European-style butter for its higher fat content and richer flavor. For jams, I gravitate toward small-batch preserves with visible fruit pieces that nestle perfectly in the muffin’s nooks and crannies.
Eggs Benedict represents the pinnacle of English muffin sophistication. My soft muffins provide the perfect base for poached eggs and hollandaise sauce, absorbing the rich yolk without becoming soggy.
Creative Sandwich Ideas
For lunch, I create gourmet sandwiches using these muffins as the base. My favorite combination includes cream cheese, smoked salmon, capers, and fresh dill. The muffin’s texture complements the smooth cream cheese while providing enough structure to hold all the toppings.
Breakfast sandwiches become restaurant-quality when made with homemade muffins. I layer scrambled eggs, cheese, and Canadian bacon between the toasted halves for a satisfying morning meal.
International Inspirations
Mediterranean-style toppings work beautifully with these muffins. I spread ricotta cheese mixed with honey, then top with fresh berries and a drizzle of balsamic reduction for an elegant brunch option.
For a British-inspired treat, I toast the muffins and top them with thick-cut marmalade and a dollop of clotted cream, creating an indulgent afternoon snack.
Nutritional Information and Dietary Considerations
Understanding the nutritional profile of homemade English muffins helps in making informed dietary choices and accommodating various dietary needs.
| Nutrient | Per Muffin | Daily Value % | Notes |
|---|---|---|---|
| Calories | 165 | 8% | Based on 2000 calorie diet |
| Carbohydrates | 32g | 11% | Primary energy source |
| Protein | 5g | 10% | From flour and milk |
| Fat | 2g | 3% | Minimal fat content |
| Fiber | 1g | 4% | Can increase with whole grain flour |
| Sodium | 195mg | 8% | Controlled through salt measurement |
| Sugar | 2g | – | Natural and added sugars |
The beauty of homemade English muffins lies in controlling exactly what goes into them. Unlike store-bought versions that often contain preservatives, high fructose corn syrup, and artificial flavors, my recipe uses simple, wholesome ingredients.
For those with dietary restrictions, modifications are straightforward. Gluten-free versions work well using a 1:1 gluten-free flour blend, though the texture will be slightly different. Dairy-free options substitute plant-based milk and vegan butter without significantly affecting the final result.
Equipment Recommendations
Having the right tools makes the English muffin-making process smoother and more enjoyable. Through trial and error, I’ve identified the essential equipment that makes the biggest difference.
Heavy-bottomed Skillet or Griddle: This is crucial for even heat distribution. I prefer cast iron for its heat retention properties, but a good quality stainless steel pan works well too.
Crumpet Rings: While you can use clean tuna cans, proper crumpet rings make the process much easier. I recommend 3-inch diameter rings with about 1-inch height.
Kitchen Thermometer: For checking both milk temperature and internal muffin temperature. This eliminates guesswork and ensures consistent results.
Bench Scraper: Essential for handling the sticky dough without adding excess flour. It helps maintain proper hydration levels.
The Science Behind Perfect English Muffins
Understanding the science behind English muffin making has dramatically improved my success rate and helped me troubleshoot issues more effectively.
The unique texture comes from the interaction between yeast fermentation and steam cooking. When the muffin cooks on the griddle, the moisture in the dough creates steam, which gets trapped and forms the characteristic holes. The lower cooking temperature compared to oven baking allows this process to happen gradually, creating the perfect texture.
Gluten development is crucial but must be balanced. Too little mixing results in muffins that fall apart, while overmixing creates tough, chewy results. The sticky dough consistency indicates proper hydration levels that contribute to the final texture.
The milk proteins contribute to browning through the Maillard reaction, while the fats from butter and milk create tenderness and flavor. This is why my milk-based recipe produces superior results compared to water-based versions.
Q&A Section
Q: Why are my English muffins dense instead of light and airy? Dense muffins usually result from too much flour or inactive yeast. Make sure to measure flour properly by spooning it into the measuring cup and leveling off. Always proof your yeast to ensure it’s active before proceeding with the recipe.
Q: Can I make the dough ahead of time? Yes, you can prepare the dough and let it rise slowly in the refrigerator overnight. This actually develops more complex flavors. Just bring it to room temperature before shaping and cooking.
Q: What’s the best way to reheat leftover English muffins? Toasting is always best, even for fresh muffins. If they’re frozen, you can toast them directly from the freezer. For room temperature muffins, a light toast brings back their texture perfectly.
Q: Why do my muffins stick to the pan even with oil? Sticking usually occurs when the heat is too high or there’s insufficient cornmeal. Use medium-low heat and be generous with the cornmeal dusting. Also, make sure your muffins are properly set before attempting to flip them.
Q: Can I use instant yeast instead of active dry yeast? Absolutely! Use the same amount of instant yeast, but you can mix it directly with the flour instead of proofing it first. The rise time might be slightly faster.
Q: How do I know when my muffins are fully cooked? The best indicator is internal temperature—they should reach 190°F. Visually, they should be golden brown on both sides and spring back when gently pressed. If you don’t have a thermometer, they should sound hollow when tapped.
Q: What causes the characteristic nooks and crannies? The nooks and crannies form from steam created during the cooking process. The higher moisture content in the dough and the griddle cooking method create these air pockets. Proper hydration and gentle handling are key.
Q: Can I make smaller or larger muffins? Yes, but adjust cooking times accordingly. Smaller muffins will cook faster, while larger ones need more time. The key is maintaining the same cooking temperature and watching for the visual cues of doneness.
The satisfaction of creating perfect English muffins from scratch never gets old. Each batch reminds me why homemade versions surpass anything available in stores. The control over ingredients, the ability to customize flavors, and the pure joy of creating something delicious with my own hands makes this recipe one of my most treasured. Whether you’re a seasoned baker or just starting your culinary journey, these quick and soft English muffins will become a staple in your kitchen, bringing warmth and comfort to countless meals ahead.