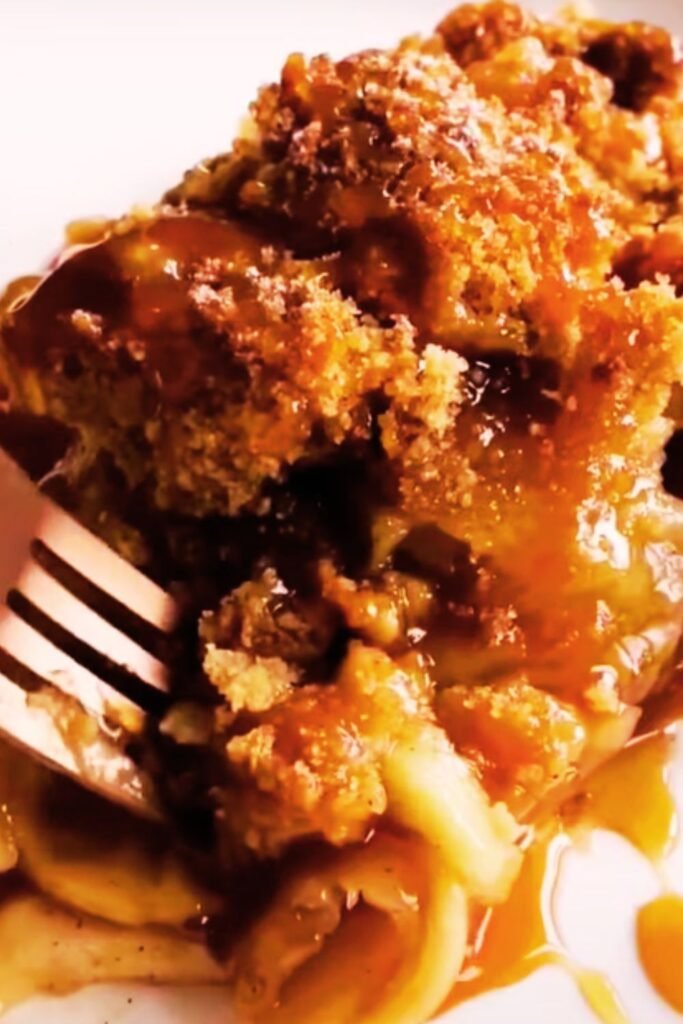
Nothing says autumn quite like the aroma of cinnamon-spiced apples bubbling away in a buttery crust, topped with a golden crumb topping and drizzled with rich caramel sauce. I’ve been perfecting my caramel apple crumb pie recipe for over a decade, and I can confidently say this version will become your new favorite fall dessert.
This isn’t just any ordinary apple pie. The combination of tender, perfectly spiced apples, a luscious homemade caramel sauce, and a crispy crumb topping creates layers of flavor and texture that will have your family and guests asking for seconds. What makes this recipe special is the careful balance of sweet and tart apples, the foolproof caramel that won’t crystallize, and the secret ingredient in my crumb topping that keeps it perfectly crispy.
I remember the first time I attempted this pie – it was a disaster. The caramel seized, the apples turned mushy, and the crumb topping fell flat. But through years of experimentation and countless pies later, I’ve developed techniques that guarantee success every single time. Today, I’m sharing all my hard-earned secrets with you.
Understanding the Perfect Apple Selection
Tart Apples: These varieties hold their shape during baking and provide the necessary acidity to balance the sweet caramel. Examples include Granny Smith, Braeburn, and Northern Spy.
Sweet Apples: These add natural sweetness and create a more complex flavor profile. Consider Honeycrisp, Gala, or Fuji varieties.
All-Purpose Apples: Some apples work well on their own, offering both tartness and sweetness. Jonathan and Rome apples fall into this category.
The key to an exceptional caramel apple crumb pie lies in using a combination of apple varieties. I always use a 2:1 ratio of tart to sweet apples, which creates the perfect balance of flavors while ensuring the apples maintain their structure during the long baking process.
Essential Equipment and Ingredients
Equipment Needed
- 9-inch deep-dish pie pan
- Large mixing bowls
- Medium saucepan for caramel
- Pastry cutter or food processor
- Sharp knife and cutting board
- Measuring cups and spoons
- Candy thermometer (optional but helpful)
Complete Ingredient Breakdown
| Component | Ingredient | Quantity | Purpose | Substitution Notes |
|---|---|---|---|---|
| Pie Crust | All-purpose flour | 1¼ cups | Structure | Can use whole wheat for nuttier flavor |
| Cold unsalted butter | ½ cup | Flakiness | Vegetable shortening works but less flavor | |
| Ice water | 3-4 tbsp | Binding | Add gradually to avoid tough crust | |
| Salt | ½ tsp | Flavor enhancement | Essential, don’t skip | |
| Sugar | 1 tbsp | Browning aid | Helps with golden color | |
| Apple Filling | Mixed apples | 8 cups sliced | Main filling | See apple selection guide above |
| Granulated sugar | ½ cup | Sweetness balance | Adjust based on apple sweetness | |
| Brown sugar | ¼ cup | Deep molasses notes | Light or dark both work | |
| All-purpose flour | 3 tbsp | Thickening agent | Cornstarch works but use 2 tbsp | |
| Ground cinnamon | 2 tsp | Warm spice | Fresh ground preferred | |
| Ground nutmeg | ¼ tsp | Aromatic depth | Freshly grated is best | |
| Vanilla extract | 1 tsp | Flavor enhancement | Pure extract only | |
| Lemon juice | 2 tbsp | Prevents browning | Also brightens flavors | |
| Caramel Sauce | Granulated sugar | 1 cup | Caramel base | Don’t substitute |
| Heavy cream | ½ cup | Richness | Room temperature works best | |
| Unsalted butter | 4 tbsp | Smooth texture | Salted butter needs adjustment | |
| Vanilla extract | 1 tsp | Flavor depth | Add after cooking | |
| Sea salt | ½ tsp | Balances sweetness | Flaky salt preferred | |
| Crumb Topping | All-purpose flour | 1 cup | Structure | Oat flour adds texture |
| Brown sugar | ¾ cup | Sweetness | Packed measurement | |
| Cold butter | 6 tbsp | Texture | Must be cold for proper crumbs | |
| Rolled oats | ½ cup | Texture variety | Old-fashioned oats only | |
| Ground cinnamon | 1 tsp | Spice harmony | Matches filling spices | |
| Salt | ¼ tsp | Flavor balance | Enhances other flavors |
Mastering the Perfect Pie Crust
Creating a flaky, tender pie crust is fundamental to this recipe’s success. I’ve found that the temperature of your ingredients makes all the difference. Your butter should be cold enough that you can grate it, and your water should have actual ice cubes floating in it.
Start by combining the flour, salt, and sugar in a large bowl. Cut the cold butter into small cubes and work it into the flour mixture using a pastry cutter or your fingertips. You want to create a mixture that resembles coarse breadcrumbs with some larger butter pieces still visible – these larger pieces create the flaky layers we love.
Add the ice water one tablespoon at a time, tossing the mixture gently with a fork after each addition. Stop adding water as soon as the dough begins to come together. You should be able to squeeze a handful and have it hold together, but it shouldn’t be wet or sticky.
Form the dough into a disk, wrap it in plastic wrap, and refrigerate for at least one hour. This resting period allows the gluten to relax and the butter to firm up, making the dough easier to roll and preventing shrinkage during baking.
Creating the Perfect Apple Filling
The secret to perfectly textured apples in your pie lies in the preparation and the specific combination of sugars and spices I use. Start by peeling and coring your apples, then slice them into uniform ¼-inch thick pieces. Consistent sizing ensures even cooking.
In a large bowl, combine the sliced apples with both granulated and brown sugar. The granulated sugar helps draw out the natural juices, while the brown sugar adds depth and molasses notes that complement the caramel beautifully. Add the flour, cinnamon, nutmeg, vanilla, and lemon juice, tossing everything together until the apples are evenly coated.
Let this mixture sit for about 15 minutes. During this time, the apples will begin to release their juices, which will combine with the flour to create a natural thickening agent. This step is crucial for preventing a soggy bottom crust.
The Art of Homemade Caramel Sauce
Making caramel from scratch intimidates many home bakers, but I promise you that with the right technique, it’s completely foolproof. The key is patience and constant attention – never leave caramel unattended.
Place the granulated sugar in a heavy-bottomed saucepan over medium heat. Don’t stir initially; instead, swirl the pan occasionally as the sugar begins to melt around the edges. The sugar will clump and look messy at first, but keep swirling and it will eventually smooth out into a beautiful amber liquid.
Continue cooking until the caramel reaches a deep amber color – this usually takes 8-10 minutes total. The color should be similar to an old penny. Remove the pan from heat and immediately whisk in the heavy cream. The mixture will bubble vigorously, so be careful. Add the butter, vanilla, and salt, whisking until smooth.
If your caramel seems too thick, you can thin it with a tablespoon of heavy cream. If it’s too thin, return it to low heat for a minute or two. The consistency should coat the back of a spoon but still be pourable.
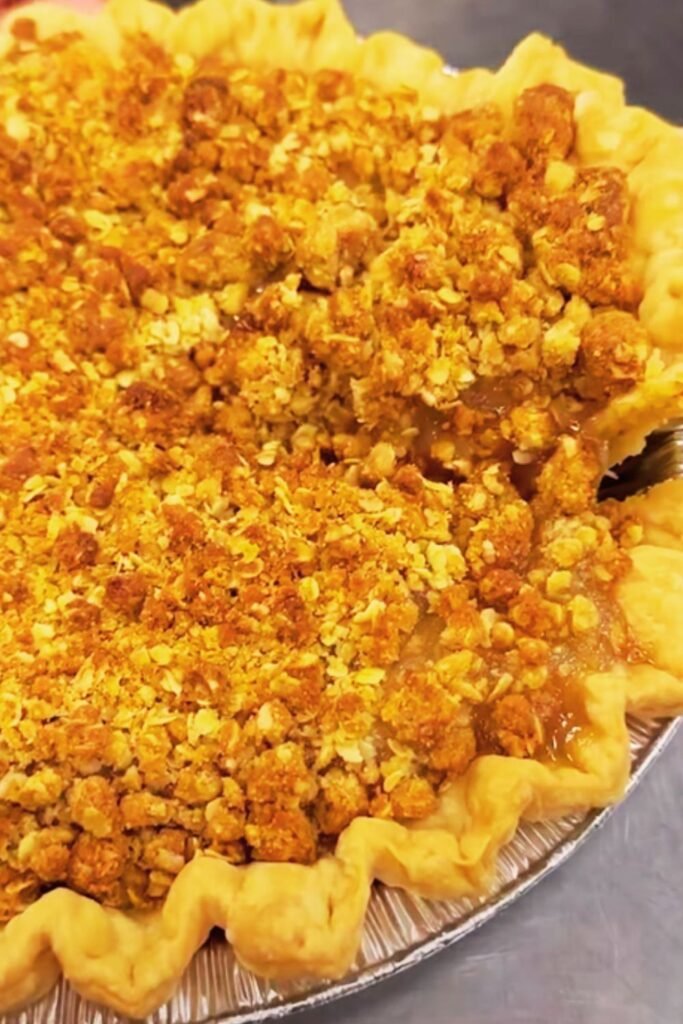
Crafting the Perfect Crumb Topping
The crumb topping is what sets this pie apart from a traditional apple pie. I’ve experimented with countless variations, and this combination of flour, brown sugar, oats, and spices creates the perfect balance of sweetness and texture.
In a medium bowl, combine the flour, brown sugar, cinnamon, and salt. Cut the cold butter into small pieces and work it into the dry ingredients using your fingertips or a pastry cutter. You want to create a mixture that resembles coarse crumbs with some larger pieces. The key is keeping the butter cold – if it starts to melt from the heat of your hands, pop the bowl in the refrigerator for 10 minutes.
Add the rolled oats and toss everything together. The oats add a wonderful texture contrast and help the topping stay crispy during baking. Store the crumb topping in the refrigerator until you’re ready to assemble the pie.
Assembly and Baking Techniques
Now comes the exciting part – bringing all the components together. Roll out your chilled pie dough on a lightly floured surface to about 12 inches in diameter. Transfer it to your 9-inch pie pan, allowing the excess to hang over the edges. Trim the overhang to about 1 inch, then fold it under and crimp the edges decoratively.
Pour the apple mixture into the prepared crust, making sure to distribute the apples evenly. Drizzle about half of the caramel sauce over the apples, reserving the rest for serving. The caramel will sink down between the apple slices, creating pockets of sweetness throughout the pie.
Sprinkle the crumb topping evenly over the surface, making sure to cover all the apples. Some of the crumb mixture will fall between the apple slices, which is perfectly fine – it adds extra texture and flavor.

Baking for Perfect Results
Preheat your oven to 425°F (220°C). Place the assembled pie on the middle rack and bake for 15 minutes at this high temperature. This initial blast of heat helps set the bottom crust and prevents sogginess.
Reduce the temperature to 375°F (190°C) and continue baking for 35-45 minutes, until the crumb topping is golden brown and the filling is bubbling around the edges. If the topping browns too quickly, tent the pie with aluminum foil.
The pie is done when you can insert a knife into the center and the apples feel tender. The juices should be bubbling and slightly thickened. Let the pie cool on a wire rack for at least 2 hours before serving – this cooling time allows the filling to set properly.
Detailed Nutritional Information
| Nutrient | Per Slice (1/8 of pie) | % Daily Value | Notes |
|---|---|---|---|
| Calories | 485 | 24% | Based on 2000 calorie diet |
| Total Fat | 18g | 28% | Primarily from butter in crust and topping |
| Saturated Fat | 11g | 55% | Can be reduced with butter substitutes |
| Cholesterol | 45mg | 15% | From butter and cream |
| Sodium | 285mg | 12% | Mostly from added salt |
| Total Carbohydrates | 82g | 27% | Natural sugars from apples plus added sugars |
| Dietary Fiber | 4g | 16% | From apples and oats |
| Total Sugars | 58g | – | Combination of natural and added sugars |
| Protein | 4g | 8% | From flour and oats |
| Vitamin C | 8mg | 9% | From apples and lemon juice |
| Calcium | 65mg | 6% | From dairy ingredients |
| Iron | 2mg | 11% | From fortified flour |
Storage and Serving Recommendations
This caramel apple crumb pie is best served slightly warm, about 2-3 hours after baking. The filling will have set but will still be pleasantly warm. I like to serve each slice with a dollop of vanilla ice cream or a drizzle of the reserved caramel sauce.
For storage, cover the cooled pie with plastic wrap or aluminum foil and keep it at room temperature for up to 2 days. For longer storage, refrigerate for up to 5 days. The pie can be frozen for up to 3 months – wrap it tightly in plastic wrap and aluminum foil before freezing.
To reheat, place individual slices in a 350°F oven for 10-15 minutes, or microwave for 30-45 seconds. Avoid reheating the entire pie unless you plan to serve it all, as repeated heating and cooling can make the crust soggy.
Troubleshooting Common Issues
Soggy Bottom Crust: This usually happens when the filling is too wet or the oven temperature is too low. Make sure to let your apple mixture sit and drain excess juices, and always start baking at a high temperature.
Seized Caramel: If your caramel becomes grainy or seizes up, it’s usually because the temperature was too high or water got into the mixture. Start over with fresh ingredients and keep the heat at medium.
Crumb Topping Too Hard: This happens when there’s not enough butter in the mixture or the butter got too warm during mixing. Make sure your butter is cold and work quickly.
Apples Too Mushy: Choose firmer apple varieties and don’t overbake. The apples should be tender but still hold their shape.
Seasonal Variations and Adaptations
While this recipe is perfect as written, I love experimenting with seasonal variations. In early fall, I sometimes add fresh cranberries for tartness and beautiful color. During winter months, I might include a handful of chopped pecans in the crumb topping for extra richness.
For a more intense caramel flavor, you can reduce some apple cider down to a syrup and add it to the filling. This creates an even more complex flavor profile that really highlights the autumn theme.
If you’re serving this for a special occasion, consider making individual tartlets using the same filling and topping. They’re elegant and allow for better portion control.
Advanced Tips for Professional Results
After years of making this pie, I’ve discovered several professional techniques that elevate the final result. First, I always brush the bottom crust with a beaten egg white before adding the filling. This creates a barrier that helps prevent sogginess.
Second, I like to partially cook my apple filling on the stovetop for about 5 minutes before adding it to the pie shell. This removes excess moisture and ensures the apples are perfectly tender without overbaking the crust.
Finally, I always use a combination of sugars in my caramel – about 80% granulated sugar and 20% light corn syrup. The corn syrup helps prevent crystallization and creates a smoother final texture.
Questions and Answers
Q: Can I make this pie ahead of time for a holiday dinner? Yes, absolutely! You can assemble the entire pie up to 24 hours in advance and keep it covered in the refrigerator. Add about 10-15 minutes to the baking time if you’re starting with a cold pie. You can also bake it completely up to 2 days ahead and reheat individual slices as needed.
Q: What’s the best way to prevent my caramel from crystallizing? The key is to avoid stirring the sugar while it’s melting. Instead, swirl the pan gently. Make sure your saucepan is completely clean before starting, as any residue can cause crystallization. Adding a tablespoon of corn syrup to the sugar also helps prevent this issue.
Q: Can I use a store-bought pie crust to save time? While homemade crust definitely tastes better, a high-quality store-bought crust will work in a pinch. Look for one made with butter rather than vegetable shortening for the best flavor. Make sure to thaw it completely and let it come to room temperature before rolling if needed.
Q: My crumb topping always seems to get soggy. How can I keep it crispy? The secret is to keep your butter cold during mixing and to add the oats, which help absorb moisture. Also, make sure your oven temperature is accurate – a too-low temperature won’t crisp the topping properly. If you’re still having issues, try baking the crumb topping separately for the first 10 minutes, then adding it to the pie.
Q: Can I make this pie dairy-free? Yes, with some modifications. Use a dairy-free butter substitute for the crust and crumb topping. For the caramel, substitute the heavy cream with full-fat coconut milk and use dairy-free butter. The flavor will be slightly different but still delicious.
Q: How do I know when my caramel has reached the right color? The caramel should be a deep amber color, similar to an old penny or dark honey. It usually takes 8-10 minutes of cooking. If you have a candy thermometer, you’re looking for about 340°F (170°C). The caramel will continue to darken slightly after you remove it from heat.
Q: Can I freeze the unbaked pie? Yes, you can freeze the assembled unbaked pie for up to 3 months. Wrap it tightly in plastic wrap and aluminum foil. Bake directly from frozen, adding about 20-30 minutes to the total baking time. Cover with foil if the top browns too quickly.
Q: What apple varieties work best for this recipe? I recommend using a combination of tart and sweet apples. My favorite mix is Granny Smith and Honeycrisp in a 2:1 ratio. Other great options include Braeburn, Jonathan, Northern Spy, and Gala. Avoid Red Delicious or McIntosh as they become too mushy when baked.
Q: The filling seems too sweet. How can I balance it? If your apples are particularly sweet, reduce the granulated sugar in the filling by 2-3 tablespoons. You can also add an extra tablespoon of lemon juice to brighten the flavors and cut through the sweetness. The tartness of your apple variety will also affect the overall sweetness level.
Q: Can I make mini versions of this pie? Absolutely! Use a muffin tin or individual tart pans. Reduce the baking time to about 25-30 minutes total, checking for doneness by looking for bubbling filling and golden crumb topping. These individual pies are perfect for portion control and entertaining.
This caramel apple crumb pie represents everything I love about fall baking – the warm spices, the perfect balance of textures, and the way it brings people together around the table. Every time I make it, I’m reminded of why I fell in love with baking in the first place. The combination of techniques I’ve shared here will help you create a pie that’s not just delicious, but truly memorable. Take your time with each step, trust the process, and most importantly, enjoy the wonderful aromas that will fill your kitchen. Happy baking!