“As an Amazon Associate, I earn from qualifying purchases.”
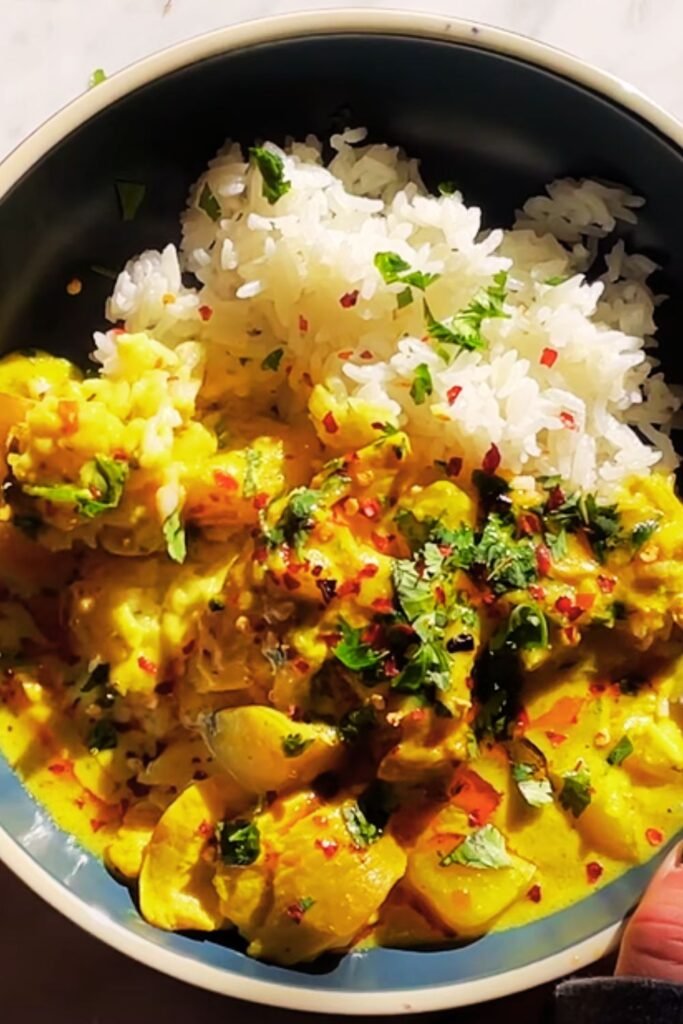
When I first traveled to Thailand, I discovered that authentic yellow curry is nothing like the watered-down versions I’d tasted back home. The real deal bursts with complex flavors – creamy coconut milk, aromatic spices, and tender chunks of chicken swimming alongside perfectly cooked potatoes and carrots. After years of perfecting this recipe in my own kitchen, I’m excited to share the secrets I’ve learned for creating restaurant-quality Thai yellow curry at home.
Yellow curry, known as gaeng karee in Thai, holds a special place in Thai cuisine as one of the milder curry varieties, making it perfect for those who want authentic flavors without overwhelming heat. Unlike its fiery red and green cousins, yellow curry gets its distinctive color and gentle warmth from turmeric and dried yellow chilies, creating a dish that’s both approachable and deeply satisfying.
Understanding Thai Yellow Curry
Gaeng Karee (Yellow Curry) : A mild Thai curry characterized by its golden color from turmeric, coconut milk base, and balanced blend of aromatic spices including coriander, cumin, and lemongrass.
Curry Paste : The heart of any Thai curry, made from fresh and dried ingredients ground together to create a concentrated flavor base that forms the foundation of the dish.
Coconut Milk : Essential for authentic Thai curry, providing richness and helping to balance the spices while creating the signature creamy texture.
The beauty of yellow curry lies in its versatility and forgiving nature. I’ve found that it welcomes vegetables beautifully, and the combination of chicken, potatoes, and carrots creates a hearty, comforting meal that satisfies both traditionalists and those seeking something familiar yet exotic.
Essential Ingredients for Authentic Flavor
Creating authentic Thai yellow curry starts with understanding the core ingredients that make this dish special. I’ve learned through trial and error that substitutions rarely yield the same depth of flavor, so I always recommend seeking out authentic ingredients when possible.
Yellow Curry Paste Components
The foundation of exceptional yellow curry begins with the paste. While store-bought paste works in a pinch, nothing compares to the vibrant flavors of homemade paste. My preferred blend includes:
- Dried yellow chilies – These provide the signature color and mild heat
- Fresh galangal – Offers a sharp, citrusy bite that ginger cannot replicate
- Lemongrass stalks – Contributes essential aromatic oils
- Kaffir lime zest – Adds bright, floral notes
- Thai shallots – Smaller and more intense than regular shallots
- Garlic cloves – Fresh and pungent
- Coriander seeds – Toasted for maximum flavor
- Cumin seeds – Ground fresh for optimal potency
- Turmeric root – Fresh preferred over powder for vibrant color
- White peppercorns – Provides heat without overwhelming the palate
- Shrimp paste – Essential for authentic umami depth
Missing a few things? You can grab them on Amazon here.
Main Dish Components
For the curry itself, I select ingredients that complement each other while maintaining authentic Thai flavors:
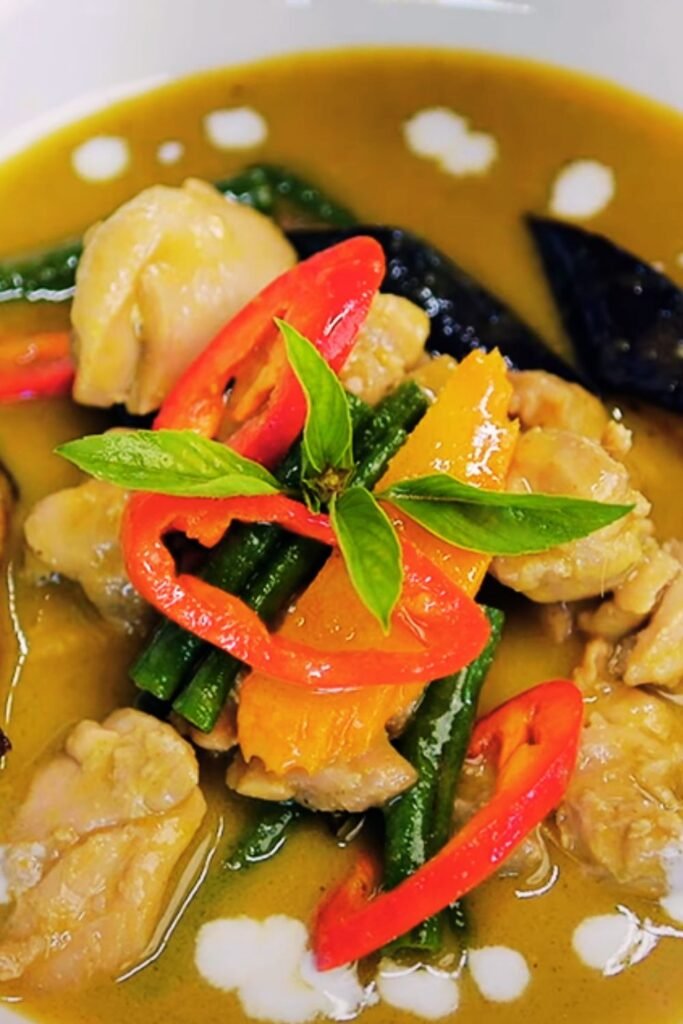
- Chicken thighs – More flavorful and tender than breast meat
- Coconut milk – Full-fat for richness, divided for proper technique
- Potatoes – Waxy varieties hold their shape better
- Carrots – Cut large enough to maintain texture
- Fish sauce – The cornerstone of Thai seasoning
- Palm sugar – Traditional sweetener that balances the salt
- Thai basil – Distinctive anise-like flavor
- Kaffir lime leaves – Fresh whenever possible
Missing a few things? You can grab them on Amazon here.
Detailed Cooking Instructions
Preparing the Yellow Curry Paste
Making curry paste from scratch might seem daunting, but I promise the results justify the effort. Start by soaking dried yellow chilies in warm water for 30 minutes until they soften completely. Meanwhile, toast coriander and cumin seeds in a dry pan until fragrant, then grind them to a fine powder.
Using a large mortar and pestle (the traditional method), begin with the hardest ingredients. Pound the toasted spice powder first, then add garlic and work it into a paste. Follow with shallots, then lemongrass (tough outer layers removed and finely sliced), galangal, and finally the soaked chilies.
The key to excellent paste lies in patience. I spend at least 20 minutes pounding, gradually building layers of flavor. Add small amounts of water only if necessary to help the grinding process. The finished paste should be smooth and aromatic, with no visible chunks of ingredients.
Building the Curry Base
The technique for building authentic Thai curry follows a specific sequence that I’ve refined over countless attempts. Start by separating your coconut milk – the thick cream naturally rises to the top, and this separation is crucial for proper flavor development.
Heat a heavy-bottomed pot or wok over medium heat. Add the thick coconut cream (about 1/2 cup from the top of your can) and let it simmer until the oils begin to separate. This process, called “cracking the coconut milk,” usually takes 3-5 minutes and creates the foundation for deep flavor penetration.
Once the coconut cream separates, add 3-4 tablespoons of your yellow curry paste. Fry the paste in the coconut oil for 2-3 minutes, stirring constantly to prevent burning. The paste should become very fragrant and slightly darker in color.
Cooking the Chicken
Add chicken pieces to the fragrant paste, stirring to coat each piece thoroughly. Cook for 5-7 minutes until the chicken is mostly cooked through and has absorbed the curry flavors. The chicken will finish cooking as the curry simmers, so don’t worry about complete doneness at this stage.
Gradually add the remaining coconut milk, stirring constantly to prevent curdling. Bring the mixture to a gentle simmer, then reduce heat to maintain a very low bubble. This gentle cooking ensures the coconut milk doesn’t split and maintains its creamy texture.
Adding Vegetables and Final Seasoning
After the curry has simmered for 10 minutes, add potato chunks first since they take longest to cook. I prefer to cut potatoes into 1-inch pieces – large enough to maintain their shape but small enough to cook evenly. Simmer for another 10 minutes before adding carrots.
Carrots should be cut into diagonal pieces about 3/4 inch thick. They’ll need only 8-10 minutes to reach perfect tenderness while retaining a slight bite. During this final cooking phase, I add torn kaffir lime leaves for their incredible aroma.
Season the curry with fish sauce and palm sugar, tasting as you go. The flavor should balance salty, sweet, and slightly spicy notes. I typically use about 2 tablespoons of fish sauce and 1 tablespoon of palm sugar, but taste preferences vary.
Missing any kitchen essentials? You can grab them on Amazon here.
Ingredient Quantities and Measurements
| Ingredient | Amount | Preparation | Notes |
|---|---|---|---|
| Chicken thighs, boneless | 2 lbs | Cut into 2-inch pieces | Skin-on optional for extra flavor |
| Coconut milk, full-fat | 2 cans (800ml) | Separate thick cream | Don’t shake cans before opening |
| Yellow curry paste | 4-6 tbsp | Homemade or store-bought | Adjust quantity for heat preference |
| Potatoes, waxy variety | 1 lb | Peeled, 1-inch cubes | Yukon Gold works excellently |
| Carrots, large | 3 medium | Diagonal cuts, 3/4-inch | Choose firm, fresh carrots |
| Fish sauce | 2-3 tbsp | Premium quality preferred | Start with less, adjust to taste |
| Palm sugar | 1-2 tbsp | Grated or chopped | Brown sugar substitutes adequately |
| Kaffir lime leaves | 6-8 leaves | Fresh, torn | Remove tough center vein |
| Thai basil | 1/2 cup | Fresh leaves only | Holy basil preferred if available |
| Vegetable oil | 2 tbsp | Neutral flavor | For initial cooking if needed |
Missing a few things? You can grab them on Amazon here.
Nutritional Information and Health Benefits
Thai yellow curry offers surprising nutritional benefits when prepared with quality ingredients. The turmeric provides powerful anti-inflammatory compounds, while coconut milk supplies healthy medium-chain fatty acids that support metabolism.
| Nutritional Component | Per Serving (1 cup) | Health Benefits |
|---|---|---|
| Calories | 380-420 | Moderate calorie density |
| Protein | 28-32g | Complete amino acid profile |
| Carbohydrates | 18-22g | Complex carbs from vegetables |
| Fat | 24-28g | Healthy saturated fats from coconut |
| Fiber | 3-4g | Digestive health support |
| Iron | 15% DV | Enhanced by turmeric absorption |
| Vitamin A | 120% DV | High content from carrots |
| Vitamin C | 25% DV | Immune system support |
The combination of ingredients creates a nutritionally balanced meal that provides sustained energy without the heavy feeling often associated with cream-based dishes. I find this curry particularly satisfying as a complete meal, especially when served over jasmine rice.
Serving Suggestions and Accompaniments
Traditional Thai yellow curry service involves several complementary elements that enhance the overall dining experience. I always serve curry family-style, allowing everyone to customize their portions and accompaniments.
Rice Varieties:
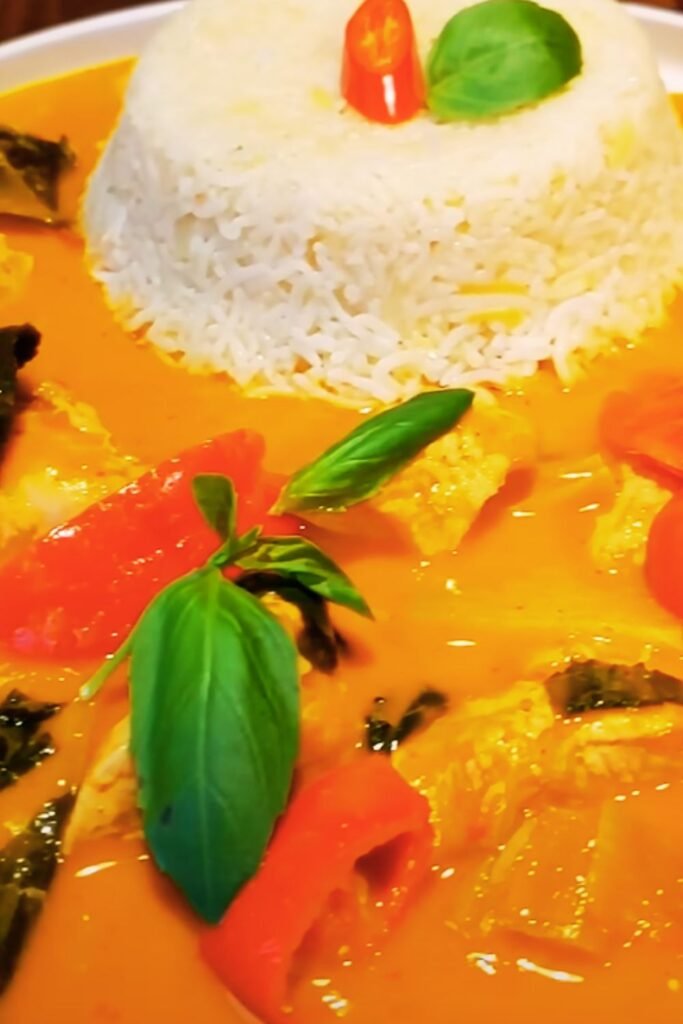
- Jasmine rice remains the classic choice, its subtle floral aroma complementing the curry’s complex flavors
- Brown jasmine rice offers more fiber and nutty flavor
- Coconut rice creates an indulgent variation that pairs beautifully with the curry’s richness
Fresh Accompaniments:
- Cucumber slices provide cool, crisp contrast
- Fresh Thai basil leaves for aromatic garnish
- Lime wedges for brightness and acidity
- Sliced red chilies for heat lovers
- Bean sprouts add textural interest
Traditional Side Dishes:
- Som tam (green papaya salad) cuts through richness
- Thai-style pickled vegetables offer tangy contrast
- Fresh spring rolls provide light, fresh balance
- Grilled vegetables complement the curry’s flavors
I’ve discovered that serving temperature matters significantly. Yellow curry tastes best when served hot but not scalding, allowing the complex flavors to shine without overwhelming the palate with heat.
Missing a few things? You can grab them on Amazon here.
Storage and Reheating Guidelines
One of yellow curry’s greatest advantages is how beautifully it keeps and reheats. In fact, I often think it tastes even better the next day as the flavors continue to meld and deepen.
Refrigeration Storage: Store cooled curry in airtight containers for up to 4 days. The coconut milk may separate slightly, but gentle stirring during reheating resolves this issue completely.
Freezing Instructions: Yellow curry freezes exceptionally well for up to 3 months. I portion it into meal-sized containers, leaving space for expansion. Potatoes may become slightly softer after freezing, but the overall quality remains excellent.
Reheating Methods:
- Stovetop: Gentle heat with occasional stirring prevents coconut milk separation
- Microwave: Use 50% power, stirring every minute until heated through
- Slow cooker: Low setting for 1-2 hours, perfect for meal prep
Never boil curry during reheating, as this can cause the coconut milk to curdle and create an unpleasant texture.
Missing any kitchen essentials? You can grab them on Amazon here.
Common Mistakes and Troubleshooting
Through years of making yellow curry, I’ve encountered and solved numerous issues that home cooks often face. Understanding these potential pitfalls helps ensure success every time.
Coconut Milk Curdling: This happens when the temperature is too high or acid is added too quickly. Always use gentle heat and add acidic ingredients gradually while stirring constantly.
Paste Burning: Curry paste contains sugars that burn easily. Keep heat at medium-low and stir constantly when frying the paste. If it starts to stick, add a splash of coconut cream.
Vegetables Overcooking: Different vegetables require different cooking times. Add harder vegetables first, softer ones later. Carrots and potatoes should be tender but not mushy.
Balancing Flavors: Thai cuisine emphasizes balance between salty (fish sauce), sweet (palm sugar), sour (lime), and spicy (chilies). Taste frequently and adjust gradually.
Thin Consistency: If your curry seems too thin, simmer uncovered to reduce liquid, or mix a small amount of curry paste with coconut cream and stir it in.
Regional Variations and Adaptations
Yellow curry varies significantly across different regions of Thailand, and I’ve adapted my recipe to incorporate elements from various traditions while maintaining authenticity.
Southern Thai Style: Uses more turmeric and often includes pineapple for sweetness. The curry tends to be slightly thinner and more aromatic.
Central Thai Approach: Features balanced flavors with equal emphasis on all taste elements. This style most closely matches what you’ll find in Thai restaurants abroad.
Northern Influences: Sometimes incorporates additional root vegetables and uses less coconut milk, creating a more concentrated flavor profile.
Modern Adaptations: Contemporary Thai cooks sometimes add cherry tomatoes, green beans, or bell peppers, creating colorful variations while maintaining traditional flavor profiles.
I encourage experimentation while respecting the dish’s fundamental character. The key lies in understanding how new ingredients affect the overall balance.
Questions and Answers
Q: Can I make yellow curry paste ahead of time? Absolutely! Fresh curry paste actually improves with time as the flavors meld. I make large batches and freeze portions in ice cube trays, then transfer to freezer bags. Frozen paste keeps for up to 6 months and can be used directly from frozen.
Q: What’s the best substitute for galangal if I can’t find fresh? While nothing perfectly replicates galangal’s unique flavor, fresh ginger mixed with a small amount of lime zest comes closest. Use about 3/4 the amount of ginger as you would galangal, and add extra lime zest to compensate for galangal’s citrusy notes.
Q: How can I make this curry less spicy for children? Reduce the curry paste by half and add extra coconut milk to mellow the heat. You can also serve plain rice alongside to help absorb spice, and offer cooling cucumber slices. Sweet elements like extra palm sugar also help balance heat.
Q: Is it possible to make authentic yellow curry vegetarian? Yes! Replace chicken with firm tofu, extra vegetables, or meat substitutes. Use vegetarian mushroom sauce instead of fish sauce, and ensure your curry paste doesn’t contain shrimp paste. The cooking method remains exactly the same.
Q: Why does my coconut milk separate when cooking? Coconut milk separation usually occurs due to high heat or acidic ingredients. Use gentle heat throughout cooking, and if you’re adding lime juice, do so at the very end off the heat. Quality coconut milk with higher fat content is less likely to separate.
Q: Can I use curry powder instead of paste? Curry powder won’t produce authentic Thai flavors, as it lacks the fresh aromatics and proper balance of a Thai curry paste. If you must substitute, use about 2 tablespoons of good-quality curry powder mixed with minced fresh garlic, ginger, and a splash of coconut milk to form a paste-like consistency.
Q: How do I know when the curry is properly cooked? The chicken should be tender and fully cooked through, vegetables should be fork-tender but not mushy, and the flavors should be well-balanced between salty, sweet, and spicy. The coconut milk should be creamy without any oil separation, and the overall consistency should coat a spoon lightly.
Q: What’s the difference between yellow, red, and green curry? The primary difference lies in the chilies used – yellow curry uses dried yellow chilies and turmeric, red curry uses dried red chilies, and green curry uses fresh green chilies. Yellow is typically the mildest, green the spiciest, with red falling in between. Each has distinct flavor profiles beyond just heat level.
Creating authentic Thai yellow curry at home requires patience and quality ingredients, but the rewards far exceed the effort invested. This dish represents everything I love about Thai cuisine – complex flavors that achieve perfect balance, techniques that respect tradition while allowing personal expression, and results that bring people together around the table. Whether you’re cooking for family dinner or entertaining guests, this yellow curry recipe delivers restaurant-quality results that will have everyone asking for your secret. Remember that cooking is a journey of discovery, and each time you make this curry, you’ll learn something new about balancing flavors and perfecting techniques. The most important ingredient remains your enthusiasm for creating something delicious and authentic.
Missing a few things? You can grab them on Amazon here.
Missing any kitchen essentials? You can grab them on Amazon here.
heard about this on gypsy jazz radio, decided to give it a try.
I tried to pinch it but got peanut all over it.